86
Chapter 3
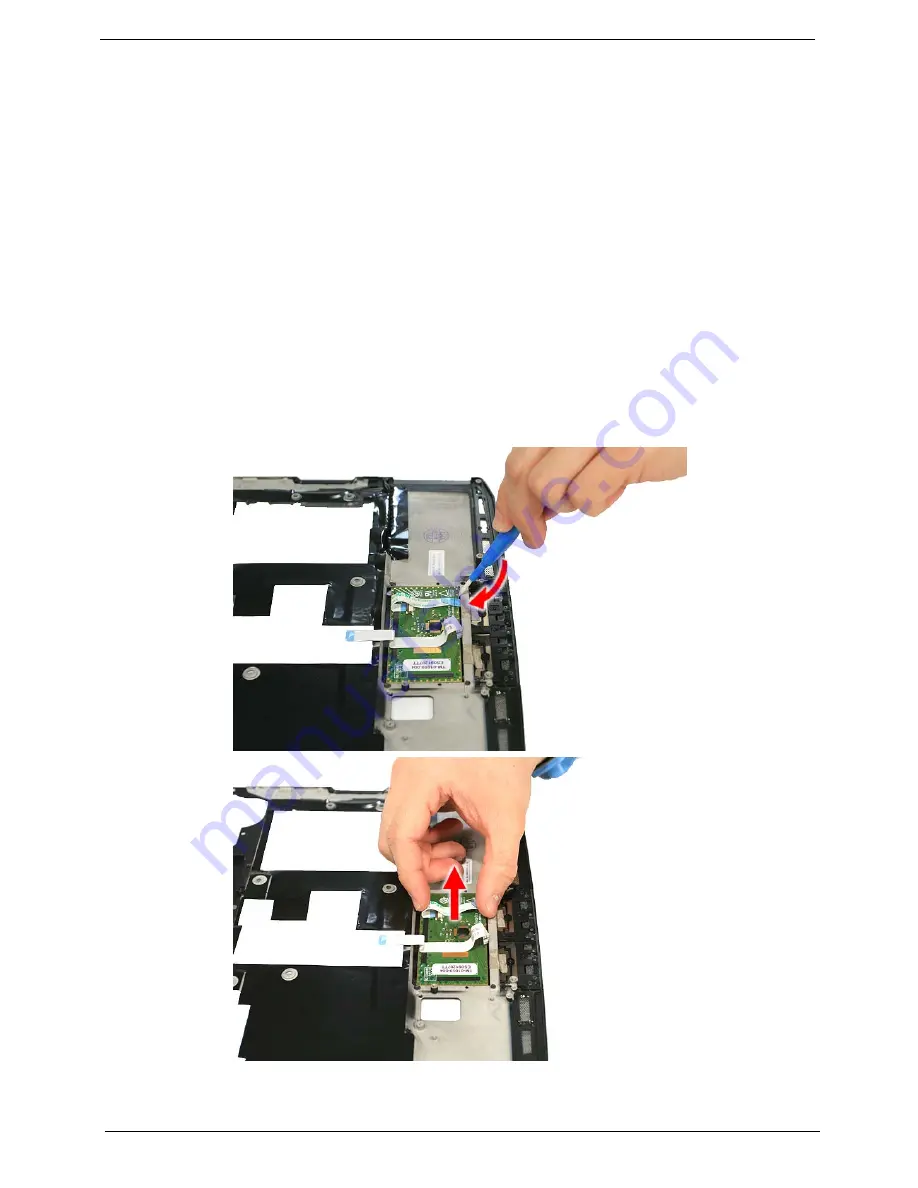
Removing theTouch Pad Board Module
1.
See “Removing the Battery Pack” on page 64.
2.
See “Removing the SD dummy card” on page 64.
3.
See “Removing the ExpressCard dummy card” on page 65.
4.
See “Removing the Lower Cover” on page 65.
5.
See “Removing the DIMM” on page 66.
6.
See “Removing the WLAN Board Modules” on page 67.
7.
See “Removing the Hard Disk Drive Module” on page 68.
8.
See “Removing the Keyboard” on page 71.
9.
See “Removing the Middle Cover” on page 72.
10.
See “Removing the LCD Module” on page 74.
11.
See “Separating the Upper Case from the Lower Case” on page 78.
12.
See “Removing the Button Board” on page 80.
13.
See “Removing the Fingerprint Board Module” on page 84.
14.
Carefully pry loose and remove the touch pad board.
WARNING:
The touchpad board is glued to the upper case, only remove the touchpad board if it is defective.
Summary of Contents for Ferrari 1200
Page 6: ...VI ...
Page 10: ...X ...
Page 18: ...8 Chapter 1 7 Modem RJ 11 port Connects to a phone line Icon Item Description ...
Page 52: ...42 Chapter 1 ...
Page 69: ...Chapter 2 59 ...
Page 70: ...60 Chapter 2 ...
Page 92: ...82 Chapter 3 13 Disconnect the fingerprint cable from the button board ...
Page 132: ...122 Chapter 4 F5h Boot to Mini DOS F6h Clear Huge Segment F7h Boot to Full DOS Code Beeps ...
Page 139: ...Chapter 4 129 ...
Page 140: ...130 Chapter 4 ...
Page 141: ...Chapter 5 131 Top and Bottom View Jumper and Connector Locations Chapter 5 ...
Page 146: ...136 Chapter 6 Ferrari 1200 Exploded Diagram ...
Page 157: ...Chapter 6 147 ...
Page 158: ...Appendix A 148 Ferrari 1200 Series Model Definition and Configuration Appendix A ...
Page 162: ...152 Appendix B ...
Page 164: ...154 Appendix C ...


