Hardware removal and installation
55
4.
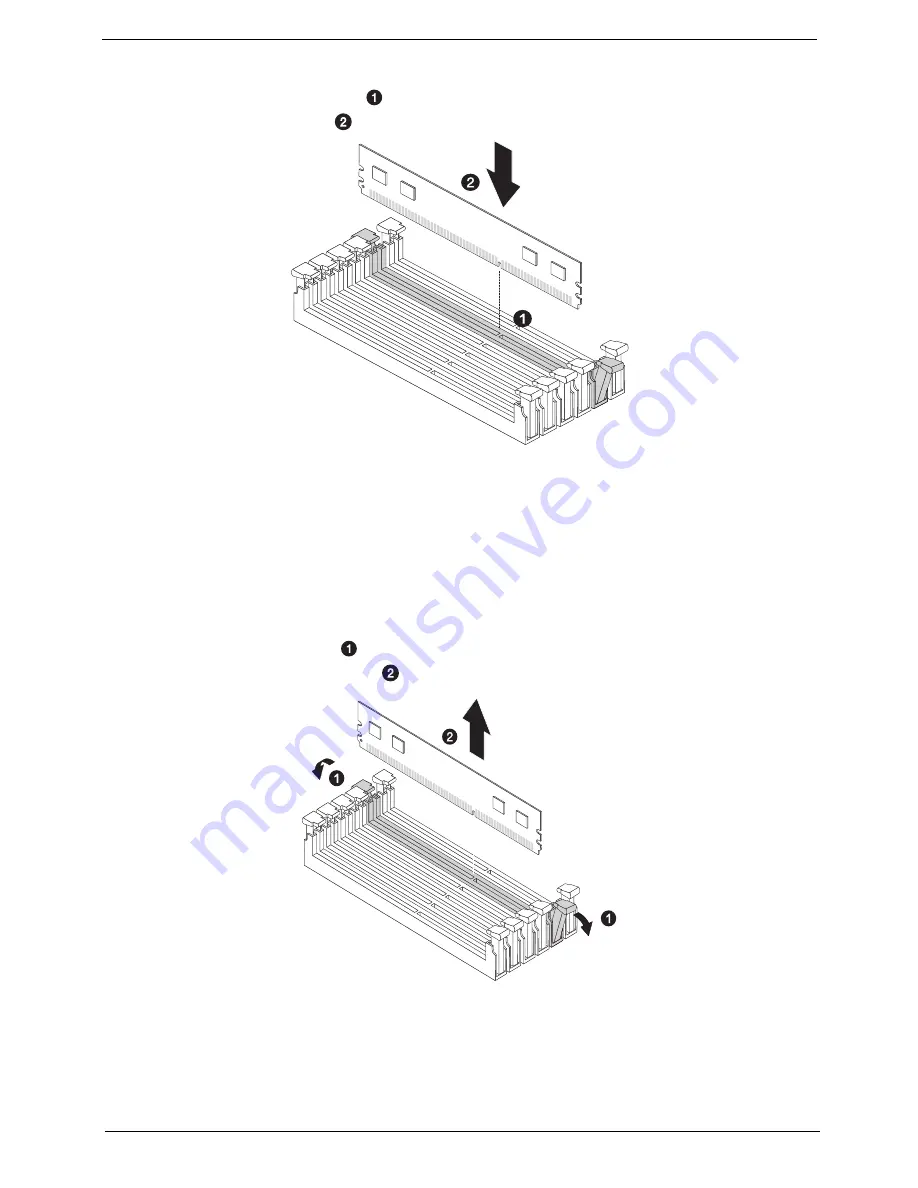
Install the memory module.
a.
Align then insert the DIMM (
) into the socket.
b.
Push down the DIMM (
)to the socket until the retaining clips snap inward.
NOTE:
The DIMM slot is slotted to ensure proper installation. If you insert a DIMM but it does not fit easily into
the socket, you may have inserted it incorrectly. Reverse the orientation of the DIMM and insert it again.
5.
Reconfigure the system memory. See below for more information.
Memory removal
IMPORTANT:
Before removing any DIMM from the mainboard, make sure to create a backup file of all
important data.
1.
Remove the memory module.
a.
Press the holding clips (
) on both sides of the DIMM slot outward to release the DIMM.
b.
Gently pull the DIMM upward (
) to remove it from the DIMM slot.
2.
If you intend to install a new memory module, refer to the previous section.
Reconfiguring the system memory:
The system automatically detects the amount of memory installed. Run the BIOS setup to view the new value
for total system memory and make a note of it.
Summary of Contents for AW2000ht
Page 1: ...Acer AW2000ht Service Guide PART NO PRINTED IN TAIWAN ...
Page 18: ...12 Chapter 2 ...
Page 28: ...22 Chapter 4 System block diagram ...
Page 30: ...24 Chapter 5 Mainboard connectors ...
Page 34: ...28 Chapter 5 ...
Page 72: ...66 Chapter 8 ...
Page 89: ...Chapter 10 83 ...
Page 90: ...84 Chapter 10 ...
Page 91: ...Chapter 11 85 Information unavailable BIOS POST Error Messages List Chapter 11 ...
Page 92: ...86 Chapter 11 ...


