25
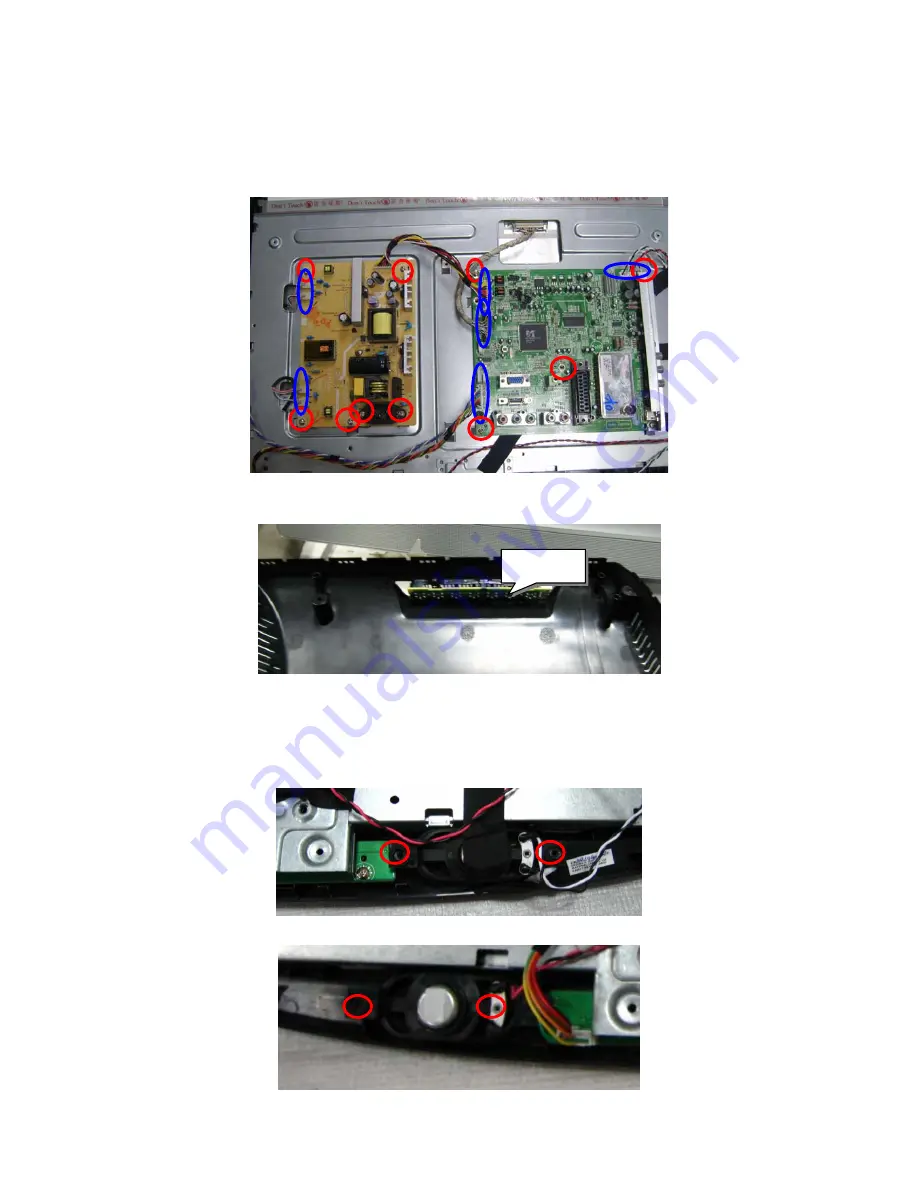
Remove the main board, power board and key board.
1. Release all the connecting wires marked in blue for these boards. (Fig 6)
2. Remove the screws marked in red to remove power board and main board. (Fig 6)
3. Remove the key board. (Fig 7)
(Fig 6)
(Fig 7)
Disassemble the speaker.
Remove the four screws marked in red to remove the speakers. (Fig 8-9)
(Fig 8)
(Fig 9)
Key board
Summary of Contents for AT2230
Page 1: ...1 Acer AT2230 AT2231 Service Guide ...
Page 7: ...7 Monitor Features General Specifications Chapter 1 ...
Page 10: ...10 Factory Preset Display Modes Analog RGB Signal Timing ...
Page 12: ...12 Optical Specifications Test Conditions Optical Specifications ...
Page 13: ...13 Connecting Peripherals Front panel controls Chapter 2 ...
Page 16: ...16 Using the OSD Menus ...
Page 17: ...17 ...
Page 18: ...18 ...
Page 19: ...19 ...
Page 20: ...20 ...
Page 21: ...21 ...
Page 35: ...35 4 Click the button Read to load the software file and then click the Auto ...
Page 36: ...36 5 When the picture showed as below we can click the run to finish to upgrading ...
Page 42: ...42 5 Main Board 6 Key Board 7 IR Board 8 Speaker ...
Page 43: ...43 EDID Data DDC DATA for D Sub Input ...
Page 44: ...44 PCB Layout Main Board Chapter 9 ...
Page 45: ...45 ...
Page 46: ...46 Power Board ...
Page 47: ...47 Key Board IR board ...


