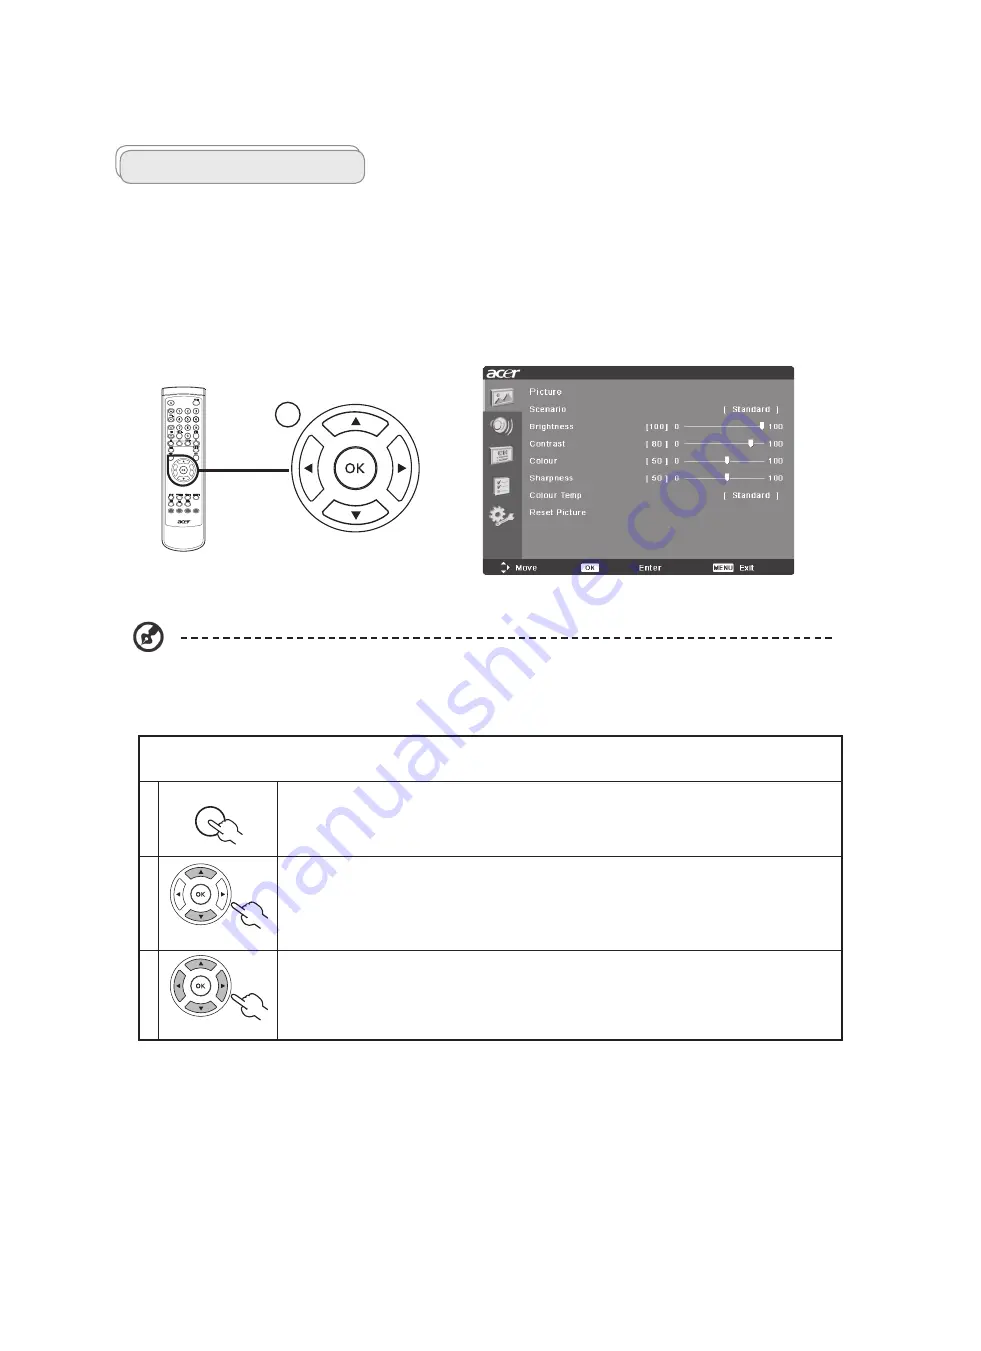
OSD navigation
Many of the advanced settings and adjustments are available through using the OSD (onscreen display) menus, as shown in the
example screenshot below.
Basic operations required to navigate these menus (Picture, Audio, Channel management, Options, Settings) are described in this
section.
There are five main OSD menus. These are: Picture, Audio, Channel management, Options and Settings.
Use the following method to navigate these menus.
1
MENU
Press the
MENU
button on the remote control or the
MENU
button on the control panel.
2
Select your desired menu by using the up and down
directional keys
to switch between the five
menus.
3
Use the
directional keys
to interact with the menu. The up / down directions will scroll through the
menu options, while left/right will adjust the different settings (for example, in the Picture menu,
settings such as brightness, contrast, etc.). Press
MENU
to exit.
You can also interact with these menus using the front panel controls. Please see "Front panel view" on page 4 for
details.
Navigating the OSD with the remote control
MENU
17
Using The OSD Menus
Summary of Contents for AT2002
Page 1: ...1 Acer AT2002 Service Guide ...
Page 25: ...13 Remove the bezel 14 Remove the bkt l r screw bkt l r ...
Page 28: ...Correct Method Incorrect method Correct Method Incorrect method ...
Page 37: ...Exploded Diagram Model AT2002 ...
Page 40: ...PCB Layout Chapter 7 40 ...
Page 41: ......
Page 42: ......
Page 43: ......
Page 44: ......
Page 45: ......
Page 46: ......
Page 47: ......
Page 48: ...CAM350 V 7 6 Fri Jun 02 14 18 32 2006 Untitled silk_top art ...
Page 49: ......
Page 50: ......
Page 51: ......
Page 52: ......
Page 53: ......
Page 54: ......
Page 55: ......
Page 56: ......
Page 57: ......
Page 58: ......
Page 59: ......
Page 60: ......
Page 61: ......
Page 62: ......
Page 63: ......
Page 64: ......
Page 65: ......
Page 66: ......
Page 67: ......
Page 68: ......
Page 69: ......


