


8
Chapter 1
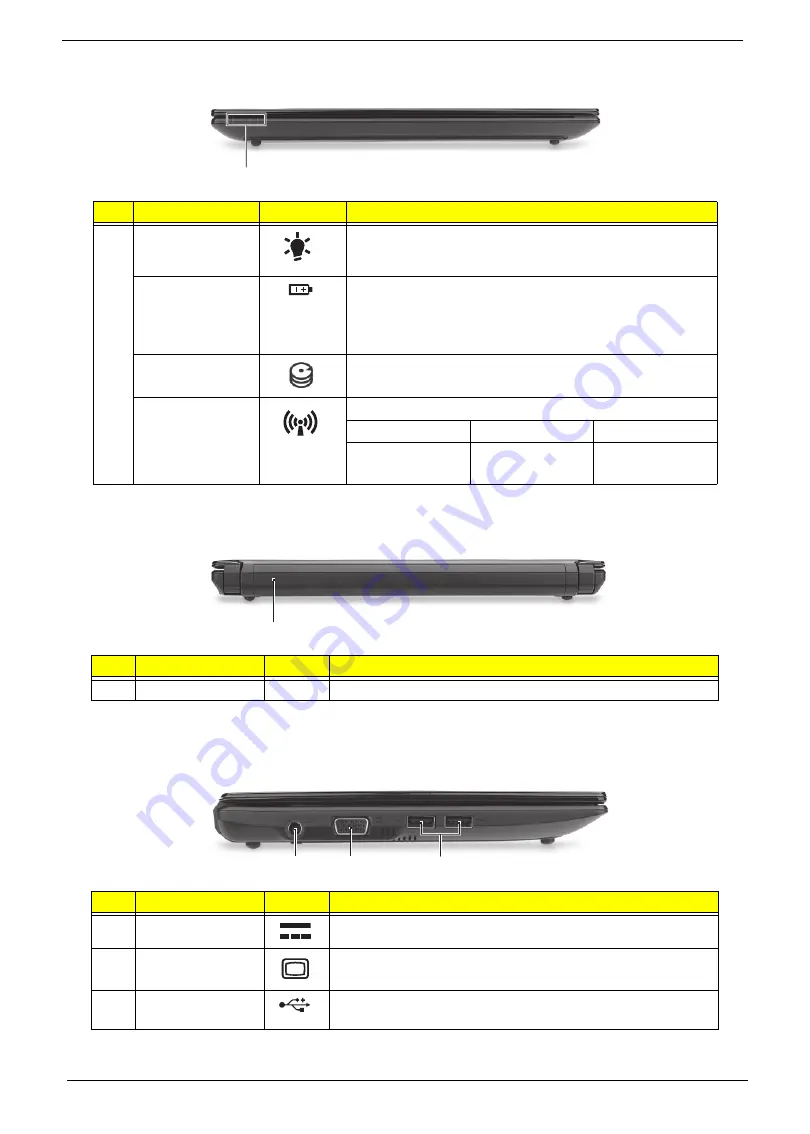
Closed Front View
Rear View
NOTE:
Your computer may be equipped with a different battery to the one in the picture.
Left View
#
Component
Icon
Description
1
Power indicator
Indicates the computer's power status.
Battery indicator
Indicates the computer's battery status.
1. Charging:
The light shows amber when the battery is
charging.
2. Fully charged:
The light shows blue when in AC mode.
HDD indicator
Indicates when the hard disk drive is active.
Communication
indicator
Indicates the status of 3G/Wireless LAN communication.
Blue light on
Orange light on
Not lit
3G on / Wi-Fi on
3G on / Wi-Fi off
3G off / Wi-Fi on
3G off / Wi-Fi off
#
Component
Icon
Description
1
Battery bay
Houses the computer’s battery pack.
#
Component
Icon
Description
1
DC-in jack
Connects to an AC adapter.
2
External display
(VGA) port
Connects to a display device (e.g., external monitor, LCD
projector).
3
USB 2.0 port
Connects to USB 2.0 devices (e.g., USB mouse, USB
camera, etc.).
1
1
2
1
3
Summary of Contents for Aspire One D255 Series
Page 6: ...VI ...
Page 10: ...X Table of Contents ...
Page 36: ...26 Chapter 1 ...
Page 53: ...Chapter 2 43 3 Execute MAC BAT to write MAC information to eeprom ...
Page 62: ...52 Chapter 3 5 Unlock the FPC 6 Remove the FPC and the keyboard ...
Page 90: ...80 Chapter 3 8 Remove the LCD module from the chassis ...
Page 133: ...Chapter 3 123 2 Push the battery lock latch in the direction shown to secure the battery ...
Page 134: ...124 Chapter 3 ...
Page 156: ...146 Chapter 4 ...
Page 264: ...254 Chapter 3 ...
Page 270: ...260 Appendix C ...