104
Chapter 3
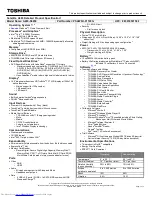
Replacing the WLAN Board
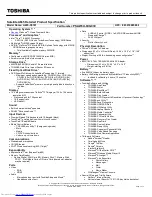
Replacing the DIMM Modules
3.
Repeat with the second DIMM module if present.
1.
Insert the WLAN board into the WLAN socket.
2.
Replace the one (1) screw to secure the module.
3.
Connect the two (2) antenna cables to the module.
NOTE:
Cable placement is
Black
to the
TR1
terminal (next to DIMM module) and
White
to the
TR2
terminal
(closest to the edge of the chassis).
1.
Insert the DIMM Module in place.
2.
Press down to lock the DIMM module in place.
Summary of Contents for ASPIRE 4625
Page 6: ...VI ...
Page 10: ...X Table of Contents ...
Page 38: ...28 Chapter 1 ...
Page 51: ...Chapter 2 41 ...
Page 65: ...Chapter 3 55 4 Detach and remove the WLAN Board from the WLAN socket ...
Page 174: ...164 Appendix B ...
Page 176: ...166 Appendix C ...