Chapter 3
74
Installing and Removing a Hard Disk Drive
Up to five hot-swaps SCSI drives can be installed into your chassis. The number of drives and the drive type
allowed depend on the Altos R710 Server system and the add-in components that you are installing.
Installing a Hot-swap Hard Disk Drive
1.
Remove the front bezel if it is installed.
2.
Press in on the green latch on the front of the hard drive carrier.
3.
Pull out on the black lever to slide the carrier from the chassis.
4.
Remove the four screws that attach the plastic retention device or the previously installed hard drive to the
drive carrier. Two screws are at each side of the retention device or the hard drive. Store the plastic
retention device for future use.
5.
Remove the hard drive from its wrapper and place it on an antistatic surface.
6.
Set any jumpers and/or switches on the drive according to the drive manufacturer's instructions.
7.
With the drive circuit-side down, position the connector end of the drive so that it is facing the rear of the
drive carrier.
Summary of Contents for Altos R710
Page 6: ...VI ...
Page 9: ...IX Table of Contents ...
Page 13: ...4 Chapter 1 System Block Diagram ...
Page 14: ...Chapter 1 5 System Board Layouts Connector and Header Locations ...
Page 23: ...14 Chapter 1 L Control Panel M Hard Drive Bays Item Description ...
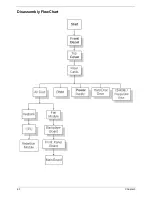
Page 72: ...63 Chapter 3 Disassembly FlowChart ...
Page 75: ...Chapter 3 66 ...
Page 130: ...121 Chapter 6 ...
Page 132: ...123 Appendix A ...
Page 146: ...137 Appendix B ...
Page 148: ...139 Appendix C ...

