65
Chapter 3
Removing and Installing the Chassis Cover
Removing the Chassis Cover
The Altos R710 Server must be operated with the top cover in place to ensure proper cooling. You will need to
remove the top cover to add or replace components inside of the platform. Before removing the top cover,
power down the server system and unplug all peripheral devices and the AC power cable. None of the
components inside of the platform is hot-swappable.
NOTE:
A nonskid surface or a stop behind the chassis amy be needed to prevent the chassis from sliding on
your work surface.
1.
Turn off all peripheral devices connected to the server. Turn off the server.
2.
Disconnect the AC pwoer cord.
3.
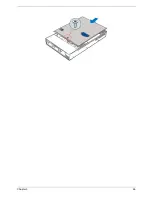
Remove the shipping screw if it is installed. (See the figure below, step 1)
4.
While holding the blue botton at the top of the chassis in, slide the top cover back until it stops. (See the
figure below, step 2)
5.
Lift the cover straight up to remove it from the platform. (See the figure below, step 3)
Installing the Chassis Cover
1.
Place the cover over the chassis so that the side edges of the cover sit just inside the chassis sidewalls.
2.
Slide the cover forward until it clicks into place.
3.
(Optional) Insert the shipping screw at the center of the top cover.
4.
Reconnect all peripheral devices and the AC power cord.
Summary of Contents for Altos R710
Page 6: ...VI ...
Page 9: ...IX Table of Contents ...
Page 13: ...4 Chapter 1 System Block Diagram ...
Page 14: ...Chapter 1 5 System Board Layouts Connector and Header Locations ...
Page 23: ...14 Chapter 1 L Control Panel M Hard Drive Bays Item Description ...
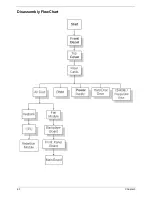
Page 72: ...63 Chapter 3 Disassembly FlowChart ...
Page 75: ...Chapter 3 66 ...
Page 130: ...121 Chapter 6 ...
Page 132: ...123 Appendix A ...
Page 146: ...137 Appendix B ...
Page 148: ...139 Appendix C ...


