Appendix B: Altos G510 Rack Installation Guide
126
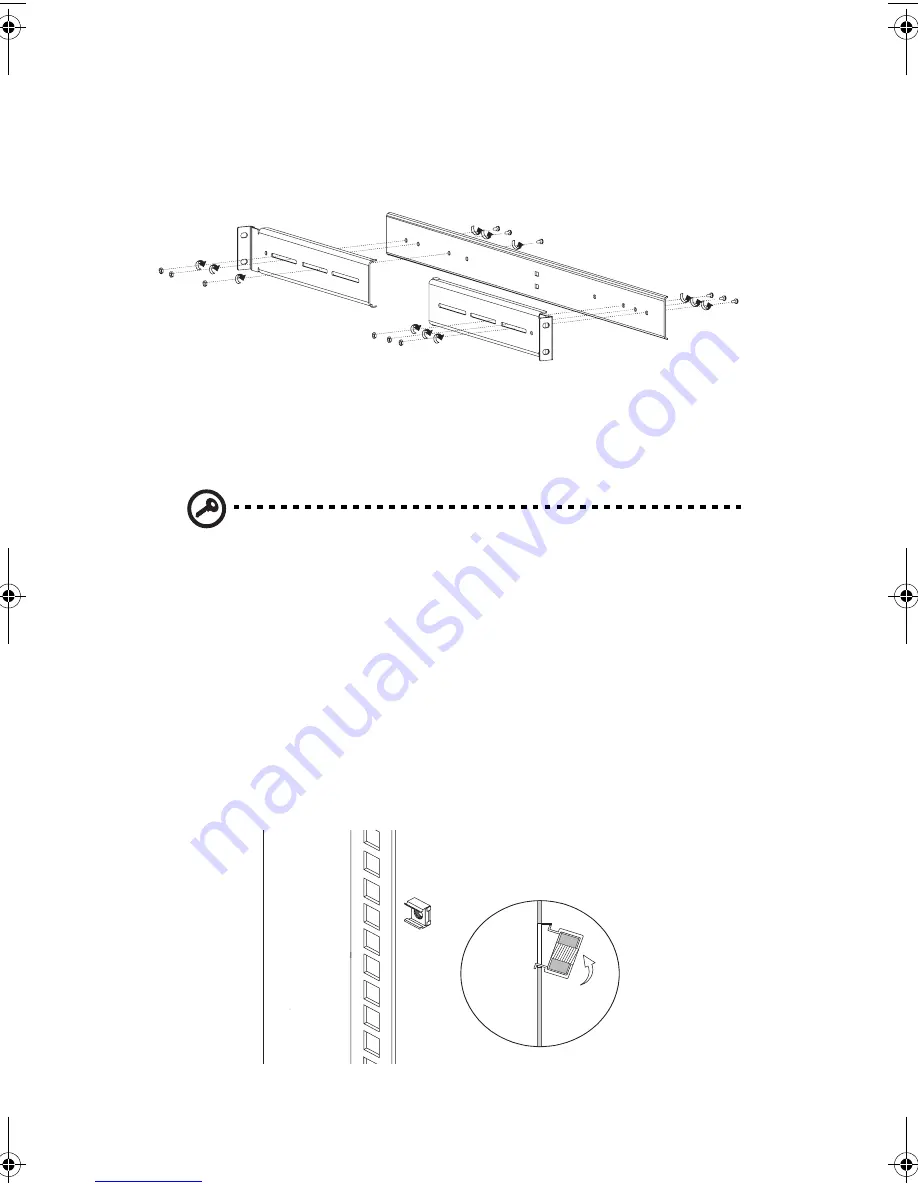
leave them loose enough to allow length adjustment when
installing the mounting rails to the rack.
Attach the other rack brackets to the remaining mounting rail.
9
Install the mounting rails to the rack using four M6 x L10 (4 on
page 113) screws and cage nuts (two at each end) for each
mounting rail.
Installing cage nuts
Cage nuts are used to secure system and other components to the
vertical rails in the rack.
To install cage nuts:
•
Insert the lower lip of the cage nut over the bottom of the
opening at the back of a rail.
•
With your fingers, pinch the cage nut rack fastener and push
in until the top lip locks into position.
•
Repeat this process to install the other cage nuts in their
appropriate locations.
BB!H621!.!FO/cppl!!Qbhf!237!!Uivstebz-!Kvof!23-!3114!!2;34!QN
Summary of Contents for Altos G510 series
Page 1: ...Acer Altos G510 series User s guide ...
Page 8: ...viii ...
Page 12: ......
Page 13: ...1 System tour ...
Page 18: ...1 System tour 6 Front panel Altos G510 Basic model Altos G510 model ...
Page 21: ...9 Rear panel Altos G510 Basic model Altos G510 model ...
Page 24: ...1 System tour 12 Internal components Altos G510 Basic model Altos G510 model ...
Page 31: ...2 System setup ...
Page 45: ...3 Upgrading the system ...
Page 91: ...4 BIOS setup ...
Page 128: ...4 BIOS setup 116 ...
Page 129: ...Appendix A ASM Quick Installation Guide ...
Page 130: ...This appendix shows you how to install the ASM software package ...
Page 133: ...Appendix B Altos G510 Rack Installation Guide ...
Page 134: ...This appendix shows you how to install the optional rack mount kit for Acer Altos G510 ...
Page 143: ...127 ...
Page 148: ...Appendix B Altos G510 Rack Installation Guide 132 ...
Page 149: ...Appendix C Onboard SCSI Integrated Mirroring ...


