background image


3078-HDR ZOOM STEREO MICROSCOPE   


ACCU-SCOPE

®     


73 Mall Drive, Commack, NY  11725  •  631-864-1000  •  www.accu-scope.com  12


Operating Instructions 

NOTE:

  When connected to a monitor, the camera is operated using the remote control.  When using the 

remote, be sure to point the remote at the microscope head where the camera is located. 


Power On/Of

The camera is powered on when you turn on the 
microscope 

– to power on, press the (I) button on the 

(I/O) toggle switch on the base of the microscope. 


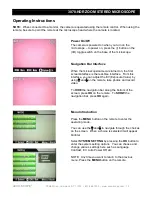
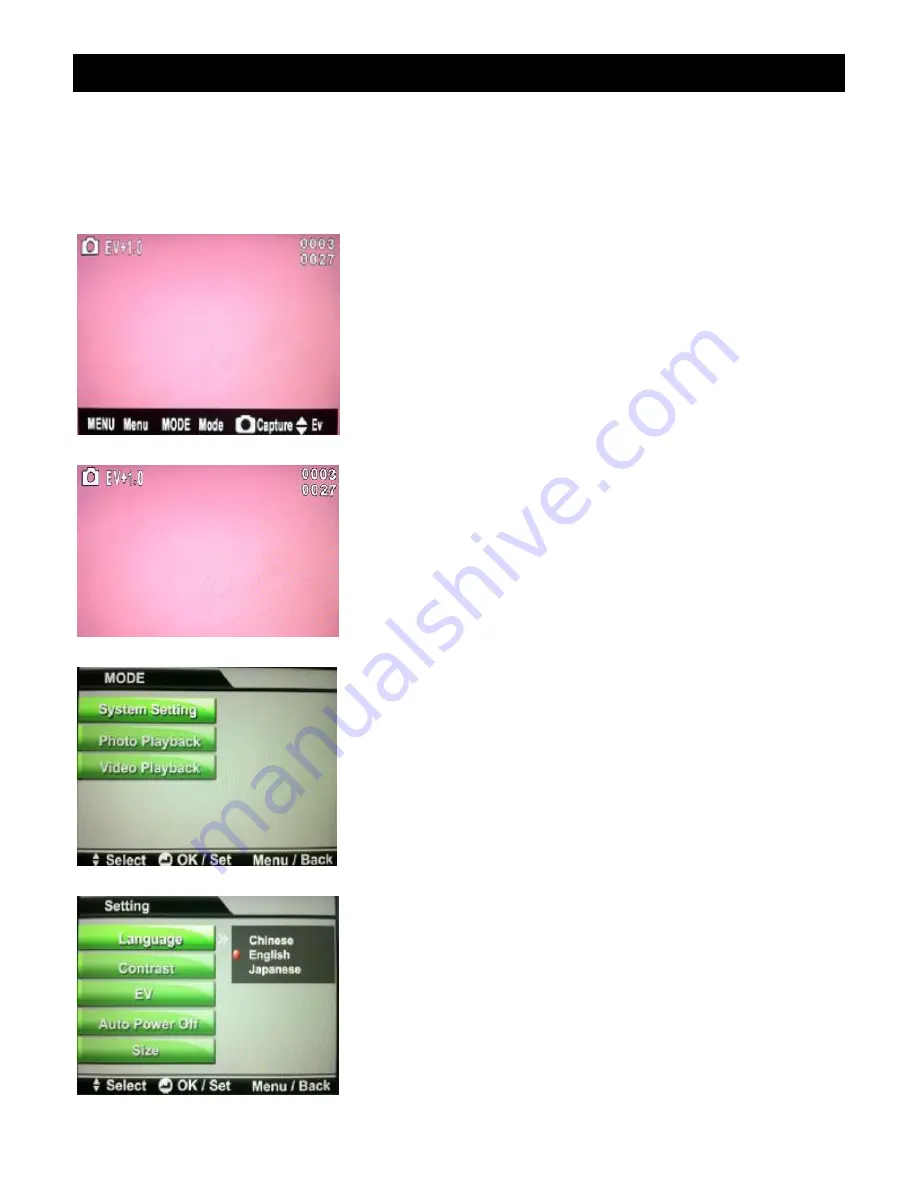
Navigation Bar Interface 


When the microscope/camera is turned on, the first 
screen/interface is the real-time interface.  From this 
interface, you can adjust the EV (Exposure Value) by 
using 

 and 

 on the remote, take photos and record 

video. 
 
To 

HIDE

 the navigation bar along the bottom of the 

screen, press 

OK

 on the remote.  To 

SHOW

 the 

navigation bar, press 

OK

 again. 


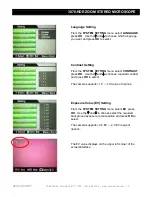
Menu Introduction 


Press the 

MENU

 button on the remote to enter the 

operating mode. 
 
You can use the 

 and 

 to navigate through the choices 

on the screen.  When a choice is selected it will appear 
brighter.   
 
Select 

SYSTEM SETTING

 by pressing the 

OK

 button to 

enter the system setting options.  You can choose and 
change various settings here such as Language, 
Contrast, EV, Auto Power Off, etc. 
 
NOTE:  Any time you want to return to the previous 
menu, Press the 

MENU

 button on the remote. 


Summary of Contents for 3078-HDR

Page 1: ...MANUAL 73 Mall Drive Commack NY 11725 631 864 1000 P 631 543 8900 F www accu scope com info accu scope com 3078 HDR 1080p ZOOM STEREO MICROSCOPE MANUAL...

Page 2: ...com 2 CONTENTS SAFETY NOTES 3 CARE AND MAINTENANCE 3 INTRODUCTION 4 UNPACKING AND COMPONENTS 4 COMPONENTS DIAGRAM 5 ASSEMBLY 6 OPERATION 7 9 SPECIFICATIONS 9 TROUBLESHOOTING 10 USING THE CAMERA WITH R...

Page 3: ...pe NOTE Always plug the microscope power cord into a suitable grounded electrical outlet A grounded 3 wire cord is provided CARE AND MAINTENANCE 1 Do not attempt to disassemble any component including...

Page 4: ...ned technicians in our New York facility Careful quality control procedures ensure each microscope is of the highest quality prior to shipment UNPACKING AND COMPONENTS Your microscope arrived packed i...

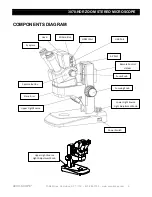
Page 5: ...000 www accu scope com 5 COMPONENTS DIAGRAM Eyepiece SD Card Slot HDMI Port Head USB Port AV Port Zoom Knob Capture Button Stand Arm Upper Light Source Focusing Knob Lower Light Source Light Adjustmen...

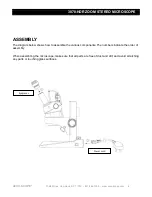
Page 6: ...ccu scope com 6 ASSEMBLY The diagram below shows how to assemble the various components The numbers indicate the order of assembly When assembling the microscope make sure that all parts are free of d...

Page 7: ...clockwise to increase tighten or counterclockwise to decrease loosen the focus knob tension After tension adjustment has been completed always rotate both adjustment knobs in the same direction Adjus...

Page 8: ...oth or cotton swab dampened with a lens cleaning solution available at camera stores see p 3 Care Maintenance Insert the clean reticle into the eyepiece then screw the reticle retaining ring back onto...

Page 9: ...et Turn the power switch to On MICROSCOPE SPECIFICATIONS Optical System Greenough Eyepieces WF10x 20mm field of view 50 75mm interpupillary distance Viewing Angle 60 Working Distance 95mm Magnificatio...

Page 10: ...Diopter adjustment is not correct Readjust diopter Focusing is not correct Readjust it The focusing knob is not smooth The focusing knob is too tight Loosen it to a suitable position The image is obsc...

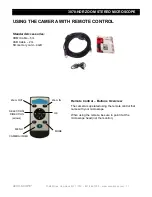
Page 11: ...CONTROL Standard Accessories HDMI Cable 5m USB Cable 2m SD memory card 4GB Remote Control Buttons Overview The camera is operated using the remote control that came with your microscope When using th...

Page 12: ...creen interface is the real time interface From this interface you can adjust the EV Exposure Value by using and on the remote take photos and record video To HIDE the navigation bar along the bottom...

Page 13: ...ting From the SYSTEM SETTING menu select CONTRAST press OK Use the and to choose required contrast and press OK to select The camera supports 1 0 1 0 range of options Exposure Value EV Setting From th...

Page 14: ...ope off O and then on I again to turn the camera back on Using the Auto Power Off feature is helpful if you wish to only use the microscope without the camera for extended periods of time Camera Size...

Page 15: ...a s field of view and click on the White Balance WB button Or by clicking the Area WB icon on a specific white area of your image The ZOOM OUT button switches the color channel You can adjust it using...

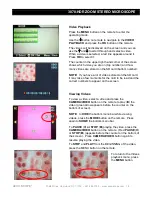
Page 16: ...and copy photos videos to a PC via USB To Capture An Image Make sure the camera is in CAMERA mode the Camera icon will be in the upper left corner If the VIDEO icon appears press the MODE button on t...

Page 17: ...n shows which photo you are on top number and how many photos are stored on the SD card bottom number NOTE If you have a lot of photos stored on the SD card it may take a few moments for the card to b...

Page 18: ...NOTE If you have a lot of videos stored on the SD card it may take a few moments for the card to be read and the correct numbers to appear on the screen Viewing Videos To view a video select a video...

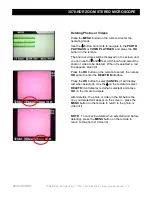
Page 19: ...be deleted When it is selected a red line appears around it Press the OK button on the remote to select then press OK again to enter the DELETION interface Press the OK button to select CANCEL it will...

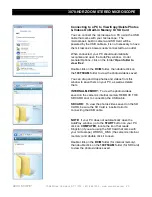
Page 20: ...click on the 100FSCAM folder to view the photos videos saved You can drag and drop photos and videos from this window to save them on your PC as well as delete them INTERNAL MEMORY To view the photos...

Page 21: ...anship for a period of five years from the date of invoice to the original end user purchaser The LED bulb and the camera are warranted for a period of one year from the date of invoice to the origina...

Reviews: