11
English
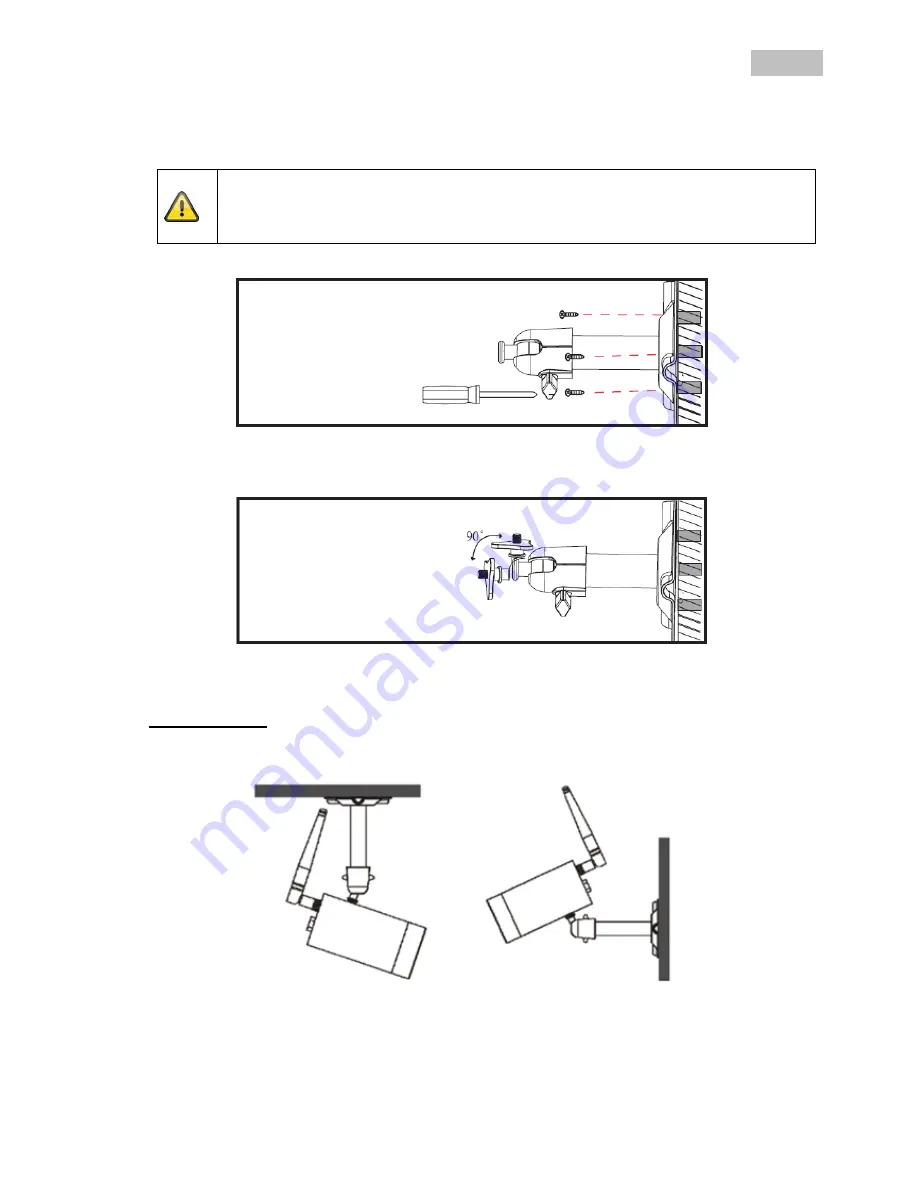
6.4 Mounting the camera
Use the camera mount to help you find a suitable place for installation. Use the drill holes to mark the
surface then drill the holes. Insert the wall plugs supplied before you attach the bracket with the screws.
Note:
Before you begin installing, make sure that the wireless transmission range is adequate at
the site of the required installation.
To do this, first screw in the antenna supplied.
You can also swivel the mount by 90° into a particular position. First loosen the screw on the side and set
the required angle. Then tighten the screw to secure the required position.
Finally, screw the camera onto the mount and connect the power supply unit with the camera.
Mounting options
Ceiling mounting
Wall mounting
Summary of Contents for TVAC18000B
Page 146: ...TVAC18000B www abus com eng Self installed security 1 1...
Page 148: ...146 1 100 240 50 60 5 12 2 3 4 5 6 20 50 C...
Page 149: ...147 7 150 1 2 3...
Page 152: ...150 3 2 IP66 640 x 480 4 4 www abus com eng Self installed security 11 5 5 1...
Page 153: ...151 5 2 Pairing Mode Standby HDMI 2 USB RJ45 LAN 12 SMA MicroSD MicroSD 32...
Page 154: ...152 6 6 1 1 USB 2 LAN 3 HDMI 4 microSD 5 12 6 7 HDMI SMA Pairing...
Page 155: ...153 6 2 1 USB 2 USB FAT32 USB USB 5 1000 6 3 LAN 7 1...
Page 156: ...154 6 4 90...
Page 158: ...156 1 2 DID Scan QR QR 20 DID 3 123456 4 5 6...
Page 159: ...157 DID 3 HDMI...
Page 160: ...158 8...
Page 161: ...159 8 8 1...
Page 162: ...160 8 2 2 2 3...
Page 163: ...161 8 3...
Page 164: ...162 8 3 1 1 1 4 60 2 60 PAIRING 3 LINK SMART QUAD...
Page 165: ...163...
Page 166: ...164 8 3 2 1 4...
Page 167: ...165 PIR PIR PIR PIR PIR 5 PIR PIR PIR 5 4 PIR PIR PIR 5 5 PIR PIR PIR 5 6 1 4 30 60 120 5 10...
Page 168: ...166 5 10 HDMI 8 3 3...
Page 169: ...167 8 3 4 10 5 5 10...
Page 170: ...168 8 3 5 SD SD IP DHCP IP DHCP DVR IP DHCP IP IP 123456 12...
Page 171: ...169 DID...
Page 172: ...170 9 9 1 9 2 10 2011 65 EU...


