


German
4.3.
Teach camera
The camera supplied in the set is already paired with the monitor at the factory.
If you want to add a second camera, proceed as follows:
1.
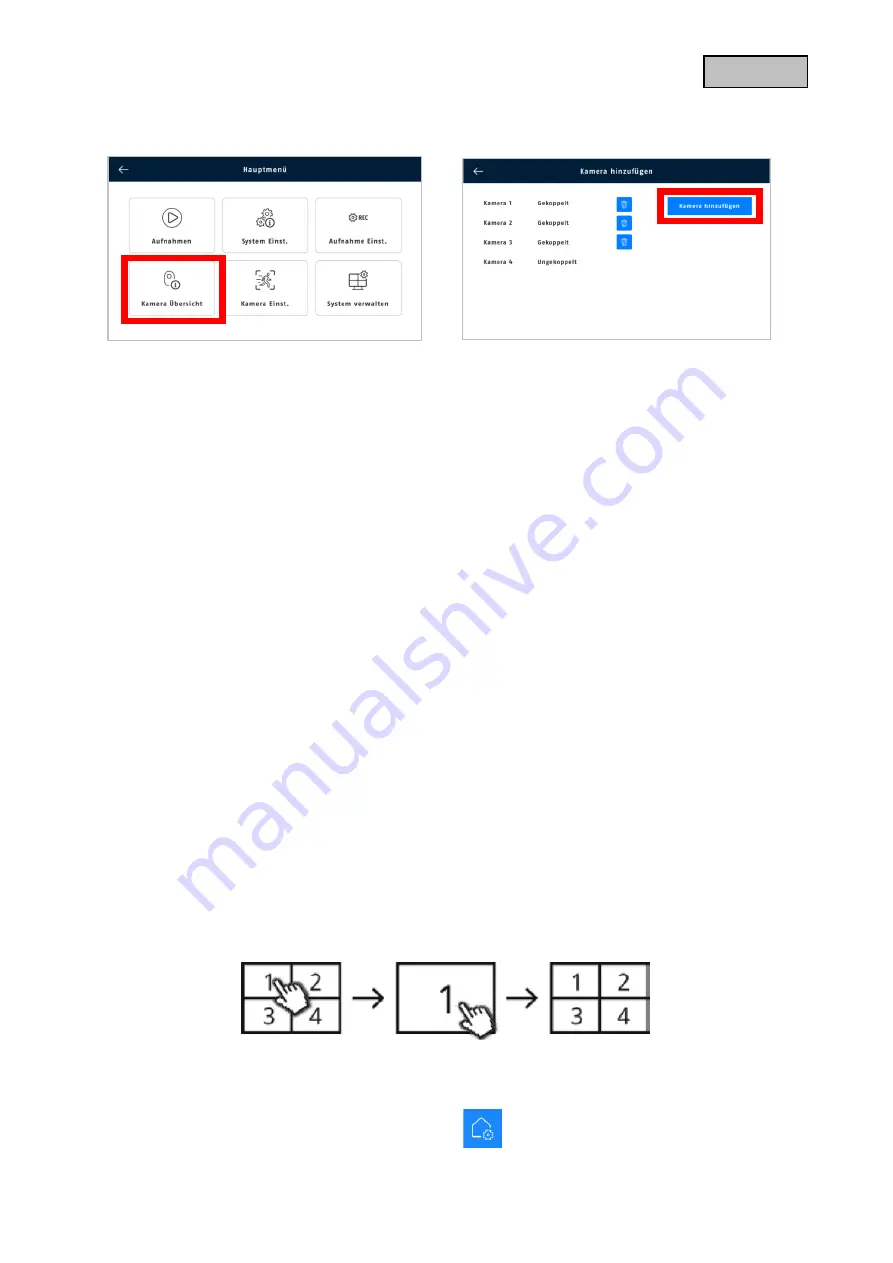
Tap the menu icon.
2.
Tap on "Camera overview".
3.
Supply the camera with power. The camera's status LED on the front panel should now light up
continuously for 10 seconds, and then flash . After another 5 seconds, the camera will emit a
pairing tone at regular intervals.
4.
Click on "Add camera".
5.
Now the LED should light up permanently for 3 seconds. After 10 sec. the camera is added to
the monitor. After successful teach-in of the camera, an ID appears in the camera overview.
6.
Then click on "Add stop ".
7.
Exit the menu to see the live image of the camera on the monitor.
5. Compatibility
The monitor can be connected with up to 4 cameras. This means that the PPDF17000 set can be
expanded with 3 cameras.
The cameras can be connected to
one
monitor and not to multiple monitors at the same time.
6. Local user interface
6.1.
Operation and live display
The monitor can be operated via touch inputs.
Quad View:
Double-click on a channel in the quad view to display it in full screen.
Double-click the full screen again to switch back to the quad view.
For further operation and setting use the menu bar.


