


Agile
Bruksanvisning / Use Instructions ver 1.0
A
Page 3 of 6
Abstracta
technical support,
tel.+46472269600.
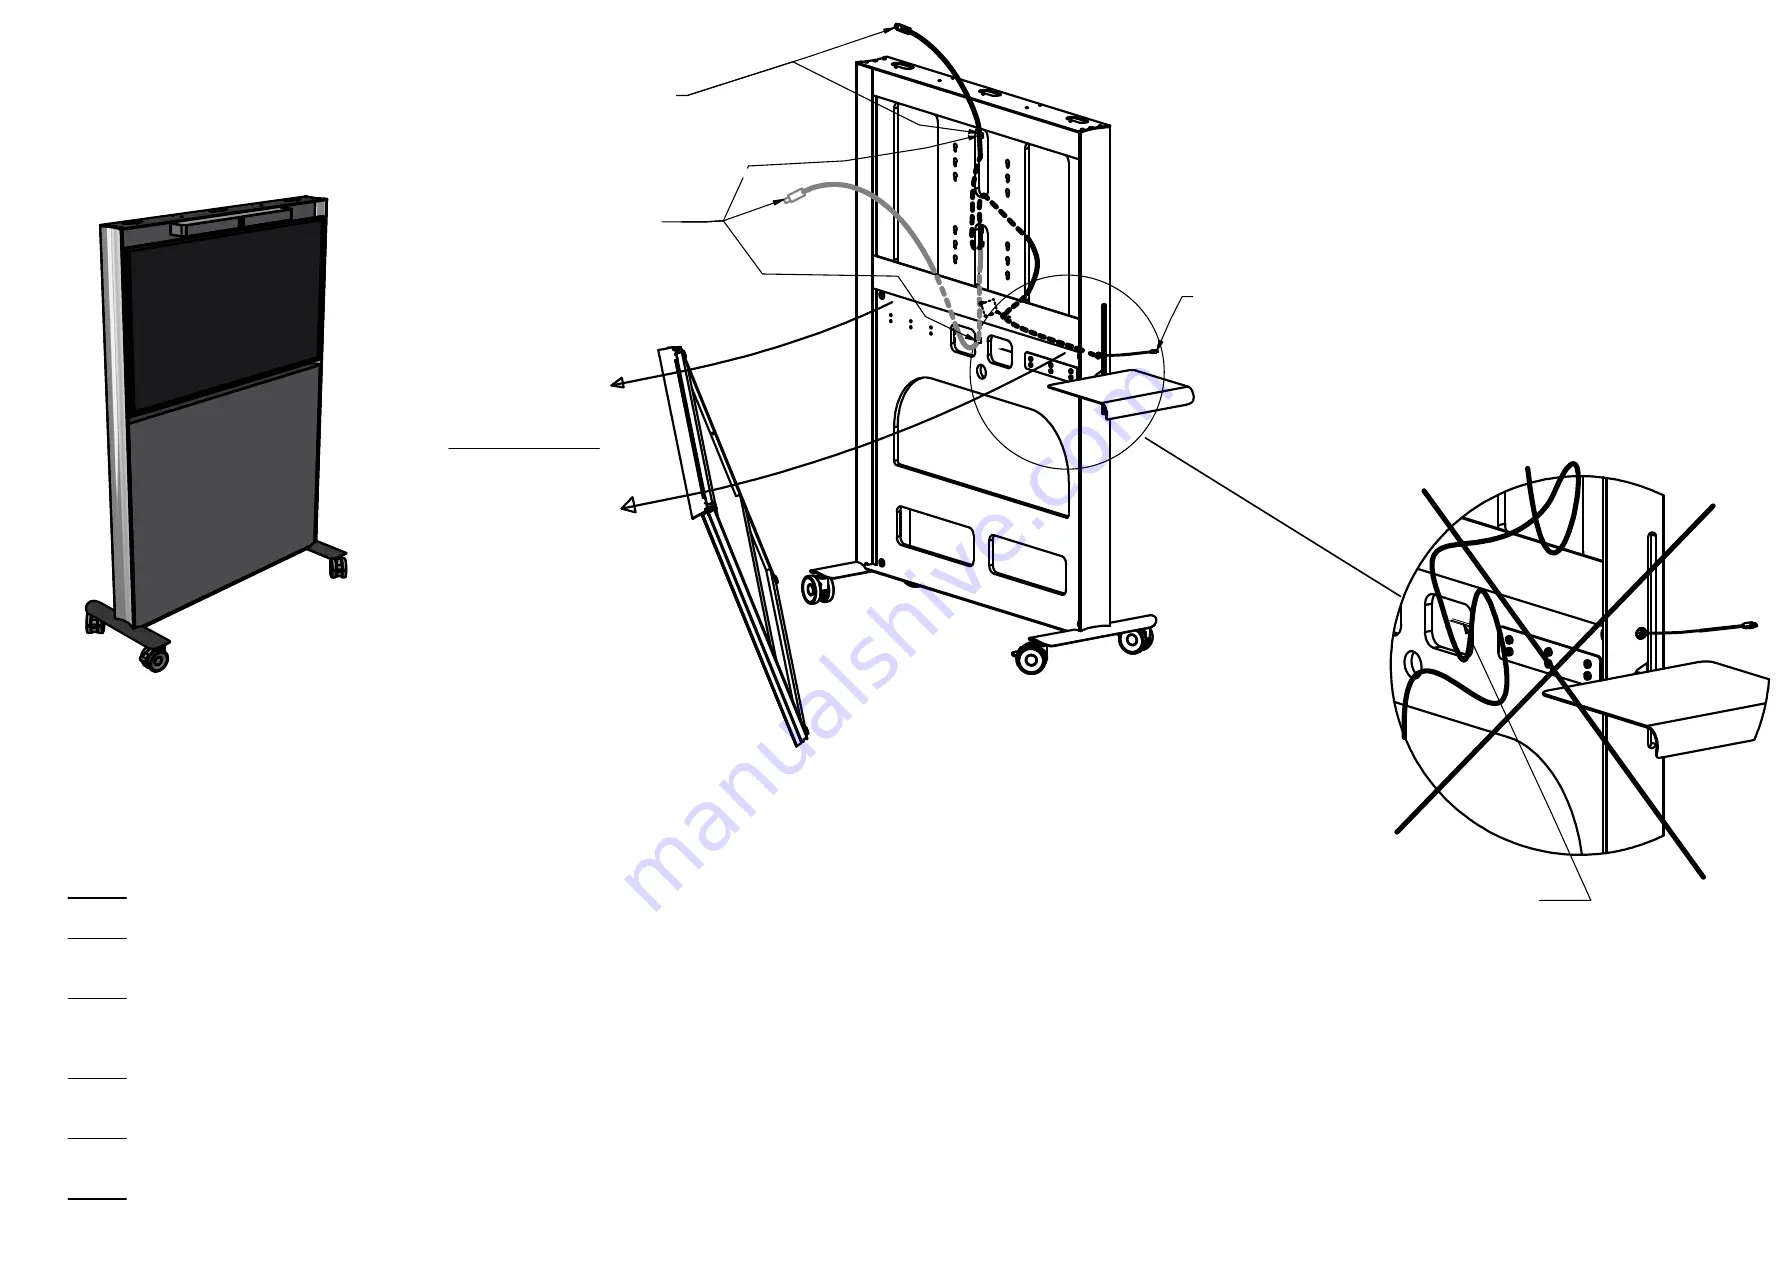
USB-C Connector to
conference equipment etc.
Alternative for high position.
Retracting USB-C
connector - To Computer
This will allow about 45 cm cable length.
All cables shall
be attached
away from the
retractable cable
and table
mechanism!
See that no
cables interfere!
Access the inside
Have clean hands!
Grab behind panel
top and front panel
with two hands, pull
hard near one upper
corner at a time, to
loosen the magnetic
connections and lift
off the panel.
Attention!
See that all cables and excess of cables are
not interfering with the cable retraction or table
mechanism. Use cable ties or similar to make sure they
don't fall into such positions in the future. You can also
squeeze in cables between the boards and the acoustic
filling to keep them into position.
USB-C Connector. Alternative
for low position of conference
equipment etc. Use the lower
extra cable clip that is unused!
Preparing retractable USB-C cable
This cable is already prepared for having a high position, but can be reorganized low, for the cable to come out underneath the display screen. Use the cable
clips on the inside of the board to rearrange the cable for your needs and make sure that it don´t interfere with the movable parts inside. Use the
USB-C-connector inside Agile to connect to your permanent installed electronic equipment. If you are installing Abstracta´s recommended conference
equipment that demands another kind of USB-C cable, please go through the chapter below.
Exchanging USB-C cable
Step 1.
First notice and note how the cable is placed before removing the old one. Make a sketch of how it is placed.
Step 2.
Remove the plastic seat were the USB-C comes out, by pulling the cable slightly harder until the seat loosen and take it of the cable. If it is hard to get
it loose, try to push it with a finger from the inside at the same time as pulling the cable.
Step 3.
Let the cable retract. From inside, take the cable off the plastic link attached to the retractor by unwinding the locking wire. Notice that the cable have a
tape at the right length (maximum 49 cm of cable, excluding connector). Notice also that the cable might have to be connected in a specific direction. Usually
the computer-side is marked with "Source".
Step 4.
Remove the cable totally from the cable clips. Mark the new cable with tape at the same length and make sure that the computer-side will be on the
outside.
Step 5.
Put the new cable in the same way with tape mark in the same position at the link and lock with the locking wire. Make sure that the cable have the
slack needed to go out all the way, but not more than needed to avoid getting stuck with other parts.
Step 6.
Run the USB-connector through the hole. From the outside, put on the plastic seat on the cable, turn the slot of the seat downwards "12 o´clock" and
pull the seat into the hole. (For Bose VB1, use the special plastic seat attached with that kit.) Try out that the retractor functions satisfying.
Remove cable!
Place here!


