AI IP Camera Quick Start Guide
2.8 Wall Mounting Installation
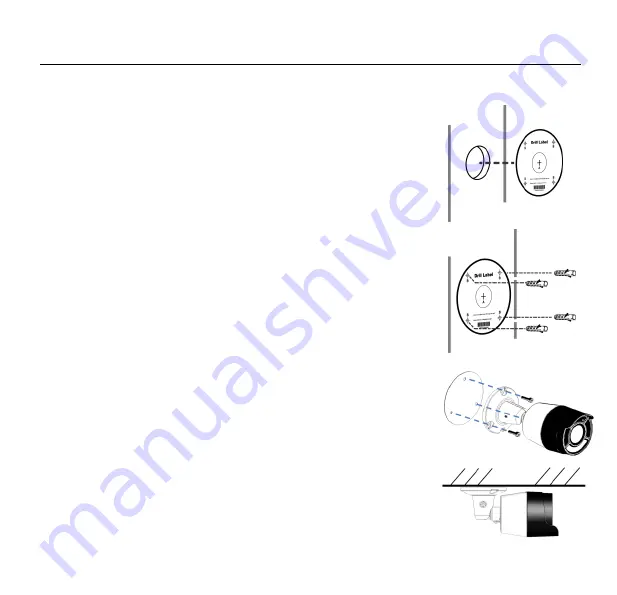
Step 1:
Confirm that the cable outlet on the wall is large enough for the
pigtails to pass through (size of hole size inserted here). Affix the
drilling sticker to the camera installation position and ensure that
the center of the sticker matches the cable outlet on the wall.
Step 2:
Use a 5mm drill bit to drill four 35mm deep holes in the
positions marked by the drilling sticker. Use a hammer to
carefully drive the white plastic expansion tubes into the holes.
Step 3:
Connect the external cabling to camera pigtails, insulate the
connections (see Cable Connections), and feed the cabling
through the cable entry on the wall. Fasten the tapping screws.
Make sure the cable outlet at the camera base is installed
facing downwards and is sealed with waterproof glue or
caulking to prevent water from getting into the camera.


