


52
| NG C820 0 AN D PGC1000 US ER MAN UA L | 2101510MNA H
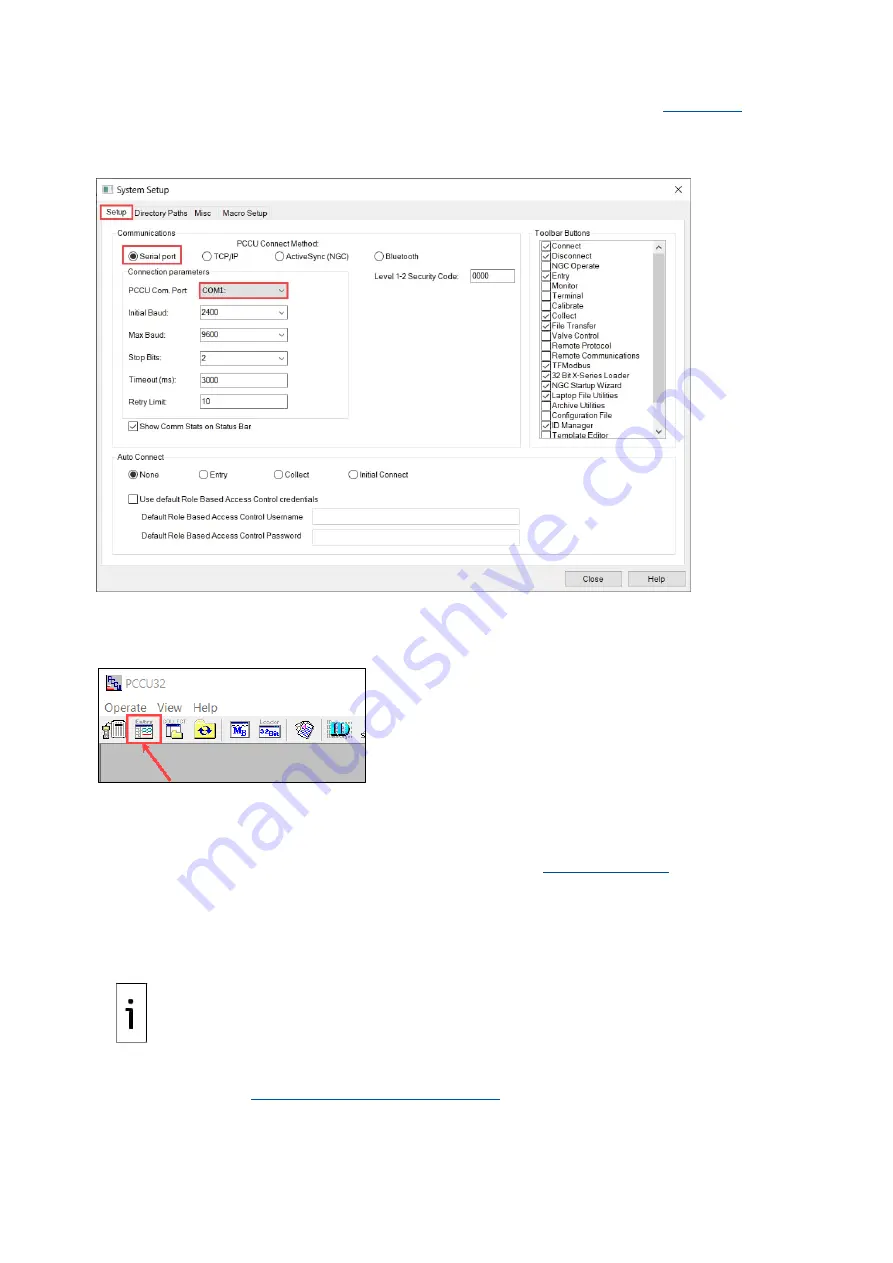
6.
On the System
Setup
tab, under PCCU Connect Method, click
Serial port
7.
Select the port from the
PCCU Com. Port
drop-down list. Legacy serial interfaces are typically
identified as COM1 or COM2. Select the port used for the connection.
Figure 6-12: PCCU system setup (MMI communication)
8.
Click
Close
to exit connection setup.
9.
Click the
Entry
icon on the PCCU32 toolbar to connect to the device.
Figure 6-13: PCCU32
10. Click
Yes
if the message to synchronize the date and time displays. This message displays if
the analyzer’s calendar clock does not match the laptop's date and time which is usually the
case with a new system.
When connection is successful, the analyzer’s startup wizard screen displays. The wizard provides the
sequence to complete basic analyzer configuration. Go to section
6.3.3
Connect using Ethernet port
If the analyzer’s Ethernet port is disabled in a new analyzer, you can connect your laptop/PC to the
port and then power on the analyzer and have the Ethernet port temporarily enabled. This happens
also if you connect to the port and the analyzer is rebooted.
IMPORTANT NOTE:
For the Ethernet port to be temporarily enabled, you must be connected to
the port prior to power being applied to the analyzer. Once you disconnect, the port will no longer
be enabled. If the Ethernet port will only be used for initial local connection and will not be
connected to a network, it is recommended that it remains disabled. After initial connection and
configuration are completed, simply disconnect the laptop from the port and the port is disabled.
If the analyzer will be connected permanently to a network, the port must be enabled and configured
as described in section


