


NETA-21 remote monitoring tool 11
First access to the user interface
This guide describes how to access the user interface by using the NETA-21 as a
DHCP server.
The NETA-21 uses dynamic IP addressing by default. After powering up, the NETA-
21 tries to get a dynamic IP address from the local network if there is a DHCP server
available. If there is no DHCP server in the local network, the NETA-21 defaults to
zero configuration networking. In the zero configuration network mode, the NETA-21
chooses an IP address in the range of 169.254.1.0…169.254.254.255.
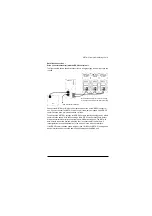
When a PC is connected locally to the PC ETH 1 port, the NETA-21 can be activated
to function as a DHCP server.
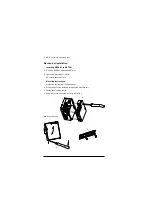
Connecting a local PC to the NETA-21 functioning as a DHCP server
Notes:
•
DHCP cannot be used in a networked environment where other DHCP
servers exists.
•
Make sure that DHCP is enabled on PC Ethernet. If the PC Ethernet is on
static mode, NETA-21 cannot provide dynamic IP to the PC.
1. Switch on the power to boot the remote monitoring tool.
2. Wait until the set-up has finished and the STAT LED is green.
3. Press the SD RJ45 button for 5 seconds or until the PC ETH1 LED starts to blink.
The NETA-21 starts functioning as a DHCP server via the PC ETH 1 port.
4. Connect the PC to the PC ETH 1 port.
The NETA-21 provides a dynamic IP to the PC.
The PC ETH 1 LED indicates a connection (green blink = waiting, green =
connected).
Notes:
If the PC is not successfully connected to the NETA-21 within 1 minute,
the DHCP server mode is switched off.
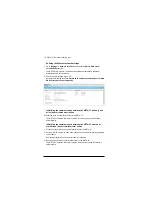
5. With the web browser of you PC, navigate to https://192.168.230.1.
Note:
If an Ethernet wire is connected to the NETA-21 before the SD RJ45 button has
been pressed, the PC does not automatically request for an IP address.
Summary of Contents for NETA-21
Page 2: ......


