OI-LLT100-EN Rev. D |
User Guide
19
6 Setting up general device parameters
You can set all device-specific parameters from the
Device
Setup
configuration menu.
6.1
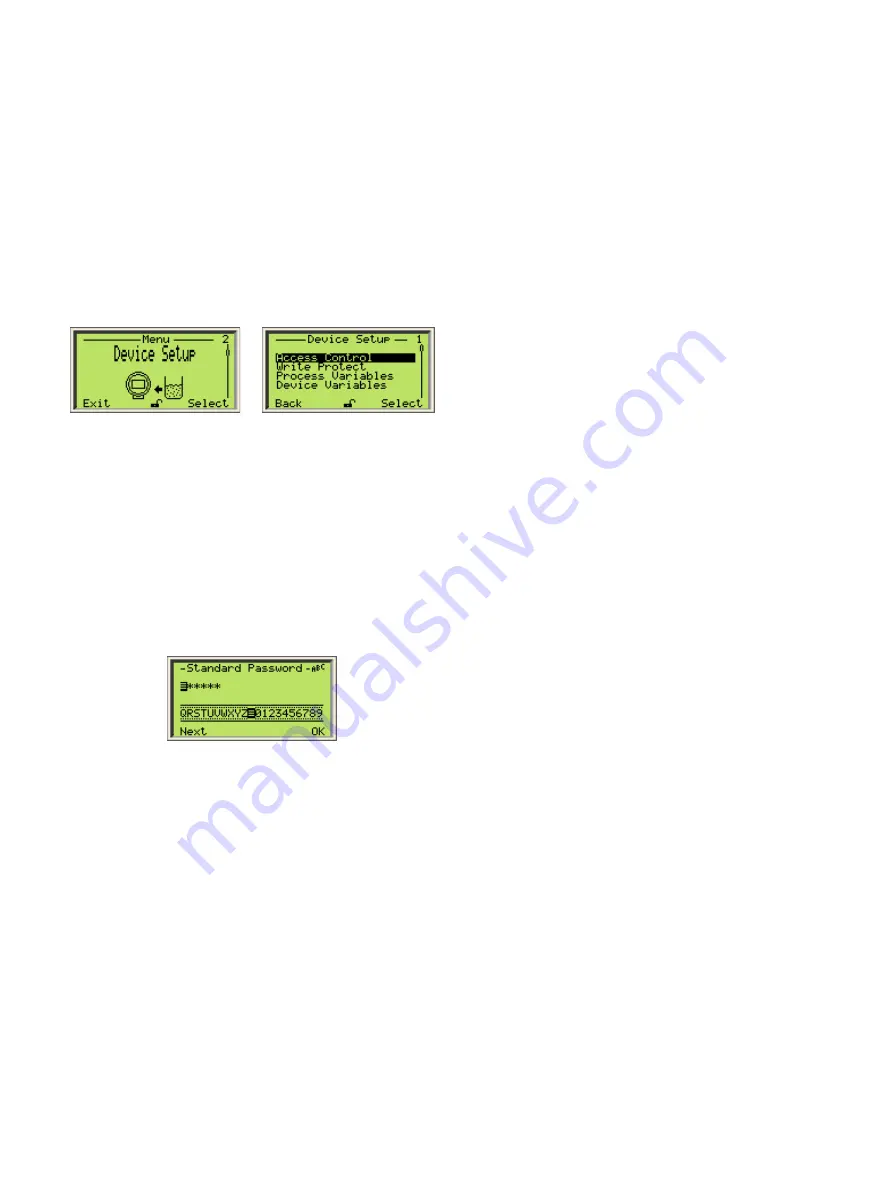
Figure 16
Accessing the
Device Setup
menu
Protecting access with passwords
To protect access to the instrument settings, you can define
passwords. These passwords, comprised of six alphanumerical
characters, give access to their respective access levels.
To define passwords:
1. From the
Device Setup
menu, select
Access Control
>
Standard Password
or
Advanced Password.
2. In the password edit window, press the Up and Down arrow
keys to move left or right and highlight the alphanumerical
characters that you need to create the password.
3. Press
Next
to select the highlighted character and move on
to the next character to highlight.
4. Repeat steps 2 and 3 until your password is complete.
5. Press
Next
one last time, then
OK
to save your password,
or
Cancel
to cancel the password that you just created.
The
Standard
password gives access to the standard access
level, and the
Advanced
password gives access to the
advanced access level (see “Accessing menus” on page 12).
6.2 Preventing settings overwrites
To prevent inadvertent or malicious overwriting of an
instrument’s settings, you can enable software write-
protection. Write protection is disabled by default.
To enable software protection:
1. From the
Device Setup
menu, select
Write Protect >
Software WP.
2. In the
Software WP
screen, press
Edit
and select
On
.
3. Press
OK
.
6.3 Setting measurement values
The LLT100 can monitor four values. These values are
identified as primary (PV), secondary (SV), tertiary (TV), and
quaternary (QV).
The primary value (PV) is the only value directly linked to
the 4 – 20 mA loop.
It impacts other parameters used by the
instrument.
To set these values:
1. From the
Device Setup
menu, select
Process Variables >
Set [chosen value]
.
2. From the
Set [chosen value]
screen, select one of four
variables (
Level, Ullage, Amplitude, Volume
).
As
Amplitude
is not directly related to level measurement, but
rather to signal strength, it is not available as a primary value.
Also, the value set as PV impacts the PV units available (see
”Setting up the PV unit” on page 19).
6.4 Setting measurement value high and low limits
To define the higher and lower measurement values for the
three LLT100 variables:
1. From the
Device Setup
menu, select
Device Variables >
Level, Volume,
or
Ullage
.
2. From there, select
Vessel Empty (LRV)
or
Vessel Full
(URV)
.
3. Edit the value for the appropriate limit, as needed, and
press
OK
.
The limit unit is the one chosen as the PV unit (see ”Setting
up the PV unit” on page 19).
6.5 Setting up the process value (PV)
Setting up the process value (PV) is a two-step procedure.
You need to select the PV unit and edit the PV range.
6.5.1 Setting up the PV unit
1. From the
Device Setup
menu, select
PV Setup > PV Unit.
2. From there, select the required unit.
Ullage
and
Level
require level units, whereas
Volume
requires volume units. Available units are:
For levels:
m
,
cm
,
mm
,
ft
,
in
For volumes:
m
3
,
in
3
,
ft
3
,
yd
3
,
l
,
hl
,
gal
,
I gal (imperial)
,
bushel
,
bbl
,
bbl liq
Summary of Contents for LLT100
Page 8: ...This page intentionally left blank ...
Page 10: ...This page intentionally left blank ...
Page 18: ...This page intentionally left blank ...
Page 22: ...This page intentionally left blank ...
Page 26: ...This page intentionally left blank ...
Page 44: ...This page intentionally left blank ...
Page 50: ...This page intentionally left blank ...
Page 66: ...This page intentionally left blank ...
Page 67: ......


