


Model 6753i RP Phone Installation Guide 7
Installation and Setup
Installation and Setup
The 6753i RP can be setup to share a network connection with another
network device. Power can be provided by the supplied power adapter or
by an 802.3af compliant network power source or with a PoE inline power
injector (optional accessory). If your System Administrator has already set
up your phone on the server, the Response Point server will automatically
provide all required configuration to your phone as soon as it is connected
to the network. Please refer to the
Getting Started Guid
e or contact your
System Administrator for further information.
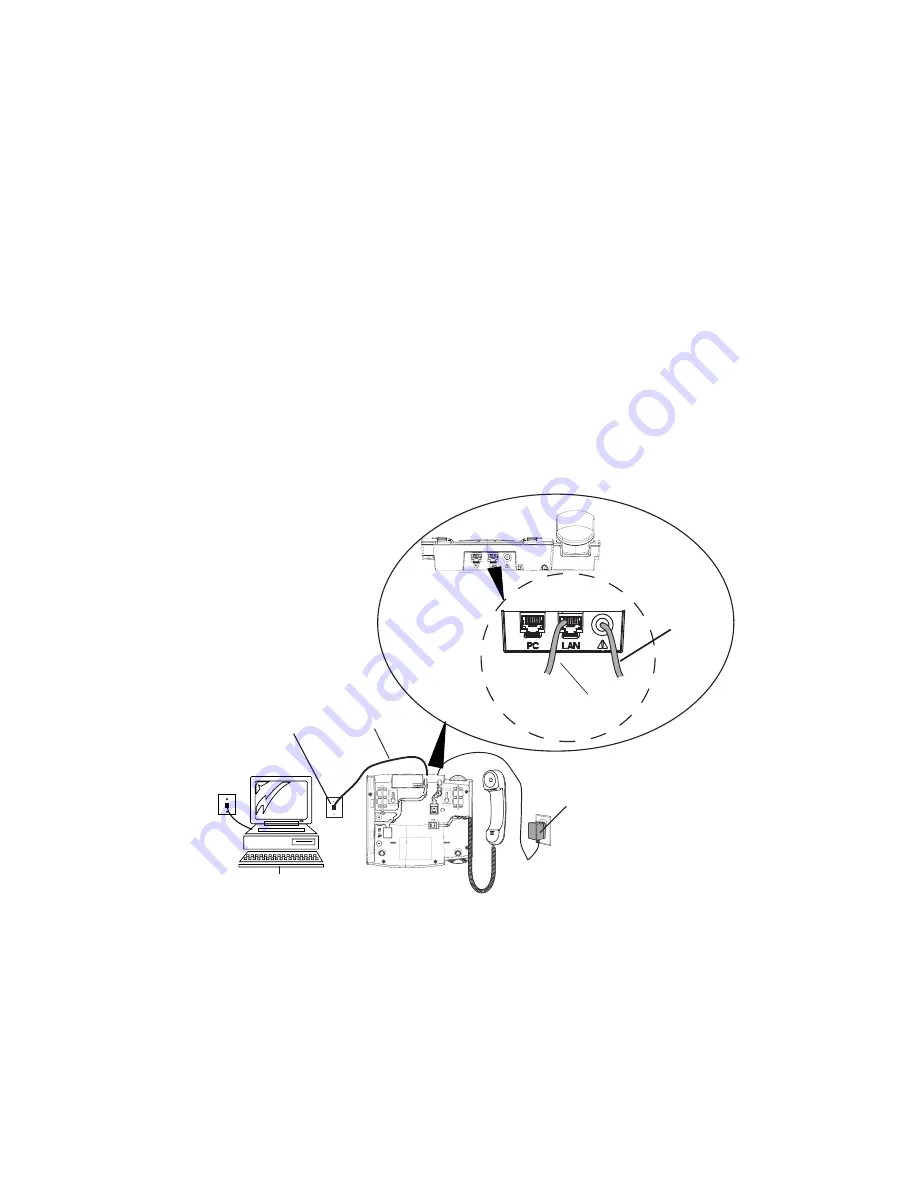
Direct or Shared Network Connection
The phone can be set up as a direct network connection to the Ethernet
wall jack or as a shared network connection as a pass-through if connecting
the phone to a computer or another network device.
Direct Network Connection
Located at the top of the phone are two fully switched 10/100 Mbps
Ethernet cable ports. The port marked with
LAN
is used to connect the
phone to the network, as well as provide power to your phone (if required).
See
"Connecting to the Network and to Power"
on
page 8
for more
information.
Ethernet
Cable
Other Network Devices
Separate
Network
Jack
Network Jack
(if Inline power provided,
do not install the power adapter)
To Network
Power
Adapter
Power Adapter
Connection
Summary of Contents for 6753I
Page 2: ......
Page 4: ......
Page 6: ...Table of Contents Table of Contents vi Limited Warranty 29 ...
Page 36: ......
Page 39: ......


