background image

M

M


33i IP Phone User Guide for SPN 

Aastra - 2741-002 


Chapter 3 
Call Handling  


Place a Call 

You can place a call using one of the following methods. 


If you are unable to make calls within certain area codes, check with your system 
administrator for any toll restrictions placed on your extension that may restrict your 
access to long distance area codes or dialing prefixes. 


Step 

Action 

1.


Dial the number. 


Live Dialpad

 is set to ON by default.  


Speaker mode is the default. The 
Speaker turns on automatically when 
you dial the number, and the call is 
placed. See 

Set Audio

Handset: 

1.


Lift the handset (the phone 
automatically selects the next available 
line/call appearance). 

The Dial screen displays. 


2.


Dial the number. 


Speaker Key: 

1.


 Press 

the 

Speaker 

key. 

The Dial screen displays 

2.


Dial the number. 


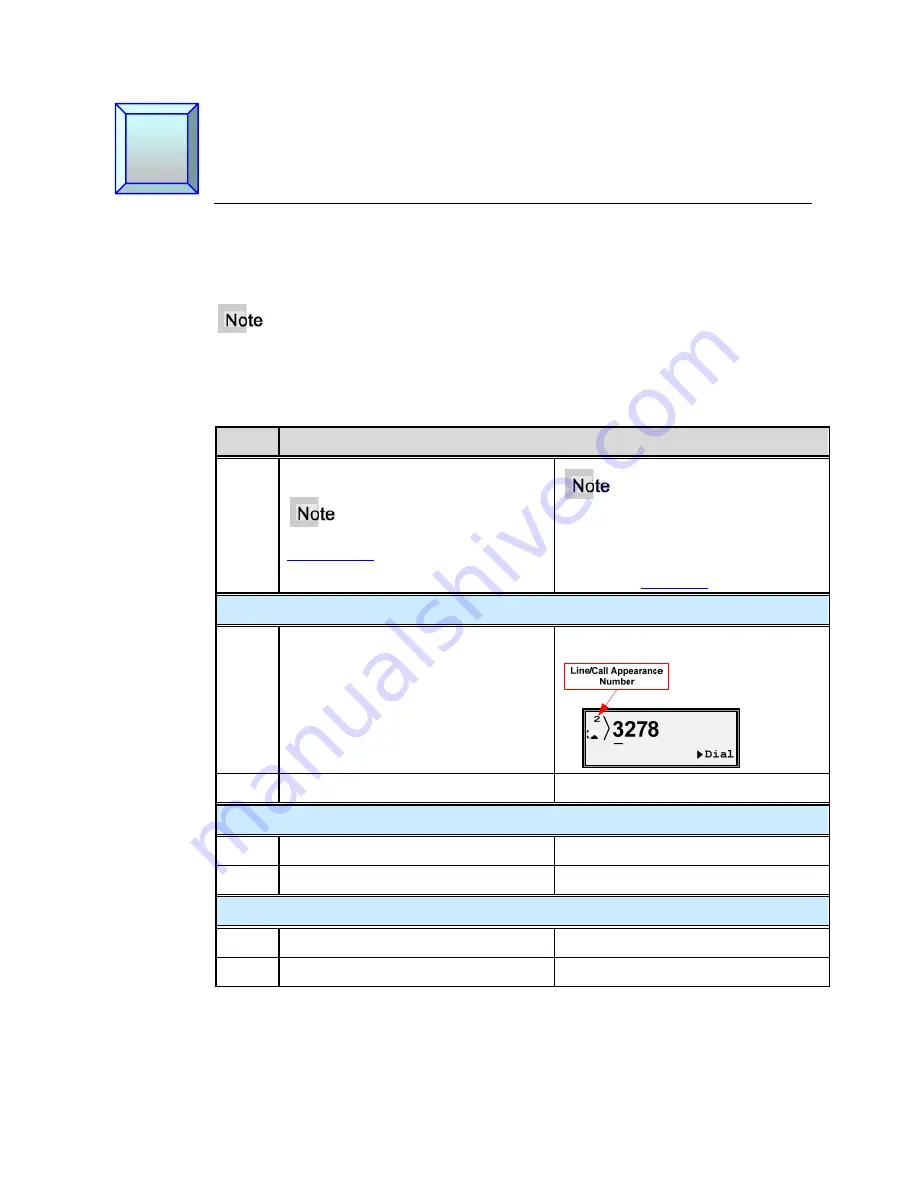
Line/Call Appearance Key: 

1.


Press a line/call appearance key. 

The Dial screen displays 

2.


Dial the number. 


Summary of Contents for 33i

Page 1: ......

Page 2: ...M M Proprietary and Contents Section ii Aastra 2741 002 ...

Page 3: ...y also send email to techpubs aastraintecom com What to Expect when Contacting Company Technical Publications will email responses to customers within seven business days of the contact Note that product support is not available through this email address For product support contact the Aastra Intecom Customer Service Center CSC at 1 800 729 1872 Aastra Intecom may use or distribute review comment...

Page 4: ...n as Seller grants to Customer a personal worldwide non transferable non sublicenseable and non exclusive restricted use license to use Software in object form solely with the Equipment for which the Software was intended This Product may integrate programs licensed to Aastra by third party Suppliers for distribution under the terms of this agreement These programs are confidential and proprietary...

Page 5: ...place the telephone set at no charge if returned within the warranty period If replacement parts are used in making repairs these parts may be refurbished or may contain refurbished materials If it is necessary to replace the telephone set it may be replaced with a refurbished telephone of the same design and color If it should become necessary to repair or replace a defective or malfunctioning te...

Page 6: ...002 warranties expressed or implied including warranties or fitness for particular purpose and merchantability Warranty Repair Service Should the set fail during the warranty period contact the Aastra Intecom Customer Service Center CSC at 1 800 729 1872 ...

Page 7: ...istory iv 33i Product iv Product Liability iv Software License Agreement iv Limited Warranty v Exclusions v Warranty Repair Service vi About This Publication xi Overview xi Audience xi Organization xi Terms and Definitions xi References xii Chapter 1 Introduction 1 Overview 1 The 33i Telephone 1 Phone Features 2 General Requirements 2 Headset Handset Connection 2 Handset 2 Headset Optional 2 Chapt...

Page 8: ...arance Keys 5 Line Call Appearance Hard Keys 5 Programmable Hard Keys as Line Call Appearances 5 Status Lamps for Line and Call Appearances 6 Speaker and MWI Status Lamps 6 Speaker 6 Message Waiting Indicator 6 Volume Key 7 Call Timer 7 Mute 8 Idle State Display 8 Chapter 3 Call Handling 9 Place a Call 9 Receive a Call 10 Answer an Incoming Call 10 Connected Call 10 One Directory Number Assigned t...

Page 9: ... 15 Retrieve a Held Call 15 Automatic Hold 16 Manage Multiple Calls on Hold 16 Do Not Disturb 16 Transfer 17 Unannounced Transfer 17 Announced Transfer 17 Conference 18 Establish the Conference 18 Release a Conferenced Party 19 Conference Two Previously Connected Calls 20 Call Forward 20 Multiple Call Forward Assignments 21 Call Park 21 Call Pickup 22 Call Waiting 23 Message Desk Operator 23 Voice...

Page 10: ...ndix A Customize your 33i Phone 31 Options List 31 Access the Options List 32 Preferences Menu 33 Tones 33 Contrast Level 34 Speed Dial Edit 34 Live Dialpad 35 Set Audio 35 Set the Audio Option and Headset Volume 36 Time and Date 37 Time Server 37 Set Time and Date Manually 38 Language 41 Phone Status Menu 42 User Password 43 Administrator Menu 44 Restart Phone 44 Phone Lock 45 Appendix B Troubles...

Page 11: ...re starting the phone descriptions of keys and their functions status lamps etc Chapter 3 Call Handling Provides procedures for handling calls Chapter 4 Phone Features Provides procedures for using additional features of the phone Appendix A Customize your 33i IP Phone Provides ways to customize your 33i phone Appendix B Troubleshooting Provides solutions to common problems Terms and Definitions T...

Page 12: ...h as instant messaging video online games and other services VoIP Voice Over IP A technology that allows you to make telephone calls using a broadband Internet connection instead of a regular or analog phone line References The following publications provide related information Title Description Aastra Model 33i IP Phone Installation Guide Installation and set up instructions general features and ...

Page 13: ...1 Introduction Overview The 33i IP telephone provides communications over an IP Network using SIP IP telephony protocol The 33i has all the features of a regular business phone allowing you to place and receive calls transfer conference and more The 33i Telephone ...

Page 14: ...nsfer Protocol TFTP server Ethernet Fast Ethernet LAN 10 100mb Category 5 5e straight through cabling Power Options Power over Ethernet PoE 802 3af Inline power injector An optional accessory necessary only if your network provides no inline power AC power adapter included with the phone Headset Handset Connection Handset Turn the phone over and locate the handset jack marked Insert one end of han...

Page 15: ...dministrator Automatic updates are scheduled during non business hours or slow call periods Startup The 33i automatically begins the startup sequence as soon as it is connected The phone goes through this process the first time you plug in your phone and every time you restart your phone The first screen to display is the Aastra splash screen Configuration and Updates The 33i then checks settings ...

Page 16: ...ork Disconnected for information 33i Keys and Functions Xfer Key Transfer Three Line Appearance Programmable Keys Redial Key Conf Key Conference Callers List Key Mute Key with Status Lamp Hold Key Speaker Key Handsfree 7 Programmable Keys with Status Lamps Hang Up key Navigation Keys Options Key with Status Lamp Directory Key with Status Lamp Directory Save Key with Status Lamp Directory Delete Ke...

Page 17: ...L3 3 line call appearance hard keys Speaker Headset Activates the Speaker or Headset depending upon audio mode Adjusts the volume for the handset headset ringer and speaker Navigation keys Up and Down arrows or Allow you to view status and text messages on the display if the message consists of more than one line Allow you to scroll through menu selections such as the Options List Right and Left a...

Page 18: ...port 6 programmable functions or line call appearances Programmable keys are configured by the system administrator according to the requirements of your organization There is a key card provided with the phone that provides label identification for these keys Features The programmable keys can be configured for any of the following features Key Name Key Label Description Line Call Appearances Dir...

Page 19: ...ly assigned as a supporting call appearance for the Line 1 line to provide another open line to perform Call Transfer Conference and Call Waiting An incoming call will ring in on the line appearance where the directory number is assigned If that line is busy it will ring in on the associated call appearance If both the line appearance and the call appearance are busy the call follows the call forw...

Page 20: ...e busy and there is no call forward busy destination assigned the caller hears busy tone Status Lamps for Line and Call Appearances Activity Lamp Description Idle Off There is no call activity on this line call appearance Connected Solid A call is connected to the phone on this line call appearance Ringing Fast Flash A call is ringing in on this line call appearance On Hold Slow Flash A call is on...

Page 21: ...ess the Volume key The Ringer displays on the screen and you hear the current ringer volume You can also set the volume to OFF Set Handset Volume 1 Lift the handset 2 Press the Volume key The handset remains at this volume until it is adjusted again Set Headset Volume 1 Press the Volume key while on a call The headset remains at this volume until it is adjusted again Set Speaker Volume 1 Press the...

Page 22: ...all on hold the phone automatically takes the call off mute when you reconnect to the call The red Mute lamp flashes rapidly You can hear the caller The caller cannot hear you There is no visual indicator on the screen when Mute is activated Deactivate the Mute feature 1 Press the Mute key again Mute is deactivated Idle State Display The idle state screen displays when your 33i phone is not in use...

Page 23: ...ea codes or dialing prefixes Step Action 1 Dial the number Live Dialpad is set to ON by default Speaker mode is the default The Speaker turns on automatically when you dial the number and the call is placed See Set Audio Handset 1 Lift the handset the phone automatically selects the next available line call appearance The Dial screen displays 2 Dial the number Speaker Key 1 Press the Speaker key T...

Page 24: ...stination such as your voice mailbox Step Action Handsfree Operation 1 Press the line call appearance key Or Press the Speaker key Headset 1 Press the Speaker key Handset 1 Lift the handset Connected Call The connected state screen displays when you are talking to someone on the phone One Directory Number Assigned to Multiple Phones Occasionally the same directory number is assigned to more than o...

Page 25: ...t reorder is heard If the shared directory number is assigned to a programmable hard key status lamps are always red but the same rules apply Calls on Hold with BLA If Phone A places the call on hold it can be retrieved by Phone B by pressing the key of the red flashing lamp on Phone B When Phone B takes control of the call the line lamp changes to green and the display changes to reflect the deta...

Page 26: ...between the speaker and the headset in speaker headset audio mode 1 Press the Speaker key Handle Calls Using a Headset Ensure that you have selected a headset audio mode by accessing the Options list For more information on how to set this audio option in your phone see the Set Audio options in Appendix A Step Action 1 Plug the headset into the jack 2 Press the Speaker key or the line call appeara...

Page 27: ...M M 33i IP Phone User Guide for SPN Aastra 2741 002 13 Emergency Call Handling for Remote SIP Workers Emergency Call Handling 911 calling is not supported for Remote SIP Workers at this time ...

Page 28: ...M M Chapter 3 Call Handling 14 Aastra 2741 002 ...

Page 29: ...nswer the call When you answer you are re connected to the held party Step Action Result 1 From a connected call Press the Hold key The line lamp flashes slowly The MWI lamp on the top of the phone flashes Retrieve a Held Call Only the phone that placed the call on hold can retrieve the call on hold unless the held call is on a directory number that appears on more than one phone Step Action Resul...

Page 30: ...ll or re connect to a call you placed on hold 1 Press the line key If the phone is already connected to a call 1 Press the line key for the new incoming call The current call is automatically placed on hold and the new call is answered Do Not Disturb The Do Not Disturb DND feature allows you to block incoming calls When DND is activated an incoming call does not ring at the phone Depending upon yo...

Page 31: ...en you transfer a call to another party and remain on the line to talk to the other party before you complete the transfer it is called an announced transfer After you consult with the other party you can either complete the transfer or go back to the original caller Step Action Result Unannounced transfer 1 You are connected to the call to transfer 2 Press the Xfer key The calling party is placed...

Page 32: ...inging The ringing line drops and you are reconnected to the original party Conference The 33i phone supports up to three parties in a conference call Establish the Conference Step Action Result 1 Connect to the first party to include in the conference 2 Press the Conf key The first party is placed on hold and the line lamp flashes slowly A new line goes off hook and you hear dial tone 3 Dial the ...

Page 33: ...s screen 6 Use and to navigate between screens to view information about the other two parties you are in conference with If you do not wish to add the third party to the conference 1 Press the line key of the party on hold You are reconnected to the original party Release a Conferenced Party Step Action 1 Use or to point to the party to drop You are still connected to the other party 2 Press Drop...

Page 34: ...ward feature allows you to temporarily redirect your incoming calls to another number Each directory number on the phone must be forwarded separately If you have more than one directory number on your phone you must press the line key first Step Action Result Forward your main directory number 1 On hook or off hook Press the Forward key Hear the 2 beep confirmation tone 2 Dial the destination numb...

Page 35: ...and down navigation keys or to see each number forwarded In the following example two directory numbers are forwarded Screen 1 Screen 2 Call Park The Call Park feature allows you to temporarily place a call on hold for a pre set time limit The call can be retrieved on any phone in the system If the call if not retrieved within the time limit the call automatically reverts back to the extension tha...

Page 36: ...our directory number is assigned to a Call Pickup group You can answer the ringing extension of another member of the group using the Call Pkup key Directed You can answer a call directed to a phone outside of your group using the Call Pkup key and dialing the extension number of the ringing phone Both You can use both of the above options Step Action Result Pick up a call in your Call Pickup grou...

Page 37: ...call appearance key number 2 To answer the second call Press the Line key of the second call If you already have a call on hold when the second call rings in the second call goes directly to voicemail The first caller is placed on hold You are connected to the second caller See Manage Multiple Calls On Hold for information on alternating between calls Message Desk Operator A Message Desk Operator ...

Page 38: ... call time and date and missed answered call status for all calls that ring in to this phone You can view scroll through and delete entries in the Callers List and dial directly from a displayed entry When the Callers List is full the oldest call records are deleted to accommodate the information of new callers Callers List Display Display Description N The N at the left of the screen indicates a ...

Page 39: ...Press the Speaker key Or Press a line call appearance key The number is automatically dialed Edit the number before dialing You can add numbers to the beginning of the number displayed in the Callers List before you dial The Callers list does not save changes 1 Press the Callers key 2 Press or to scroll through the Callers List to find the entry you want to dial 3 Press the number s on the keypad ...

Page 40: ...screen display Access Missed Calls Step Action Result 1 Press the Callers key The Callers List menu displays 2 Use or to scroll through the entries Missed calls are those marked with the telephone icon with the handset ON Delete Entries in the Callers List The delete key is Hard Key 4 at the top right of the phone Step Action Result Delete all entries 1 Press the Callers key The Callers list opens...

Page 41: ...s deleted Cancel the delete function 1 Press or Exit the Callers List Step Action Result 1 Press the Goodbye key Or Press the Callers key The idle screen displays Redial Last Number Redial You can redial the last number you dialed using the Redial key Step Action Result Redial Off hook 1 Lift the handset The last number you dialed displays on the screen 2 Press the Redial key 2 times The number is...

Page 42: ...n scroll through it to select a number to redial The list contains the name if known the number you dialed the time and date the number was dialed and the line used You cannot edit an entry in the Redial List Step Action Result Redial from the Redial List On hook 1 While on hook Press the Redial key one time The Redial List displays the first entry 2395 John Smith 012 Aug 9 04 55pm L1 Entry Number...

Page 43: ...e Entries in the Redial List Individual entries cannot be deleted The Delete key is Hard Key 4 at the top right of the phone 1 Find the entry to delete 2 Press the Delete key The confirmation message displays 3 Press the Delete key again All entries are deleted ...

Page 44: ...M M Chapter 4 Phone Features 30 Aastra 2741 002 ...

Page 45: ...evel Sets the contrast level for the phone display Speed Dial Edit A feature that edits a Speed Dial key created by the user This feature will be available in a future release Live Dialpad Controls the Live Dialpad feature This feature is set to ON by default Set Audio Sets the audio type used to handle calls your calls The audio mode is set to Speaker by default It also set the headset microphone...

Page 46: ...t Step Action Result Enter the Options list 1 Press the Options key The Options screen displays 2 Use or to scroll through the options menu Press Enter Or Press the menu item number to go directory into the option Save the changes 1 Press Set The message displays and the change is saved Cancel the changes 1 Press to return to the previous screen without making changes Or Use the Cancel option when...

Page 47: ...4 Press Enter The Ring Tone setting screen displays The check mark indicates the current ring tone selection 5 Press Next until you hear the desired ring tone or to select the silent ring tone As you navigate through the list each tone plays 6 Press Set The message displays and the change is saved Tone Sets Provides country specific tone set options for call progress tones The US tone set is the d...

Page 48: ...vides 8 contrast settings that brighten or darken the display Step Action Result Contrast Level 1 Go to Options Preferences 2 Press Enter 3 Press Next to go to Contrast Level The Contrast Level screen displays 4 Press Enter The Contrast Level settings screen displays 5 Press or until you reach the desired contrast level 6 Press Set The message displays and the change is saved Speed Dial Edit The n...

Page 49: ...matically dials Step Action Result 1 Go to Options Preferences 2 Press Enter 3 Press Next to go to Live Dialpad The Live Dialpad screen displays and shows the current status The default is ON 4 Press the Change key to toggle between OFF and ON The message displays and the change is saved Set Audio The Set Audio option provides 4 audio combinations to provide maximum flexibility for handling calls ...

Page 50: ...r key to switch between the speaker headset and handset Lift the handset at anytime to switch back to the handset from either the headset or the speaker Set the Audio Option and Headset Volume Step Action Result 1 Go to Options Preferences 2 Press Enter 3 Press Next to scroll to Set Audio The Set Audio screen displays 4 Press Enter The Audio Mode screen displays 5 Press Enter The Audio Mode screen...

Page 51: ... The checkmark indicates the current setting 5 Press Next to select the volume 6 Press Set The message displays and the change is saved Time and Date This option sets the date and time on the phone but can be overwritten by the time server when the phone is restarted Time Server The phone acquires the time and date from the time server The time server is already assigned and this option requires a...

Page 52: ...e and Date The Time and Date screen displays Time Zone Sets the current time zone US Central is the default 1 Press Enter The Time Zone screen displays 2 Press Enter The Country Code screen displays US is the default 3 Press to list the countries A check mark appears next to the currently selected country 4 Press or to scroll to through the list Press to exit the countries list 5 Press Set when th...

Page 53: ...ark indicates the current setting 3 Press Next to scroll to the desired daylight savings option 4 Press Set Press to exit without change The message displays and the change is saved Time Format Sets the time format display 12h or 24h clock 1 Go to the Time Format option The Time Format screen displays 2 Press Change to toggle between 12 hour and 24 hour format Each time you press the Change key th...

Page 54: ...ess Set Press to exit without change The message displays and the change is saved Time Server Requires an Administrator Password Set Time Displays the network time if the Time Server option is enabled and also allows you to set the time manually If you set the time manually the phone will not try to synchronize the time with the Time Server until the next time the phone is restarted 1 Go to the Se...

Page 55: ...ou do set the date manually the phone will not try to synchronize with the Time Server until the next time the phone is restarted 1 Go to the Set Date option The Set Date screen displays 2 Press Enter The time setting screen displays 3 Use the keypad to enter the date in the format displayed 4 Press Set Press Cancel to exit without change The message displays and the change is saved Language This ...

Page 56: ...Press Next to go to IP MAC addresses 2 Press Enter The IP Address displays 3 Press Next The MAC address displays 4 Press Exit LAN Port 1 Press Next to go to LAN Port 2 Press Enter 3 Press Next until all of the LAN port information displays 4 Press Exit PC Port 1 Press Next to go to PC Port 2 Press Enter 3 Press Next until all of the PC port information displays 4 Press Exit ...

Page 57: ... to change the user password for your phone so that only you can alter your phone settings and helps keep your system secure Valid values for the password are 0 to 4294967295 integers only symbols and alpha characters are not allowed The default password is an empty string field is blank Step Action Result 1 Go to Options User Password 2 Press Enter The Current Password screen displays If the pass...

Page 58: ...rator password Restart Phone Occasionally you may be instructed to restart your phone to check for updates from the configuration server This option allows you to restart the phone Your phone is temporarily out of service during the restart and download processes Do not unplug or remove power to the phone while it is checking or installing firmware Step Action Result 1 Go to Options Restart Phone ...

Page 59: ...Phone Lock The Phone Lock screen displays 2 Press Enter The confirmation prompt displays 3 Press Lock to lock the phone The following message displays The red status lamp MWI at the top right of the phone turns on Unlock the Phone 1 Press the Options key 2 Enter your user password If the user password has never been set up press Enter without a password 3 Press Enter The phone is unlocked The red ...

Page 60: ...M M Appendix A Customize your 33i Phone 46 Aastra 2741 002 ...

Page 61: ...phone If your network does not provide inline power over Ethernet you can obtain an additional accessory the Aastra PoE Power over Ethernet inline power supply to provide power over Ethernet locally to your phone See the section Connecting to the Network and to Power in the Aastra Model 33i IP Phone Installation Guide for details Why is my speaker not working If you press the Speaker key and the s...

Page 62: ...ensure that the handset cord is fully connected to both the phone and handset The handset connection on the bottom of the phone is marked with the handset symbol How do I find the IP address of my phone This setting is in the Options list See IP and MAC Address in Appendix A How do I change my User Password This setting is in the Options list See User Password in Appendix A Why does my phone displ...

Page 63: ...ngs time 39 DND 16 do not disturb 16 F firmware info 43 forward 20 multiple lines 21 Forward key 20 G Goodbye key 3 H handset 2 handset not working 48 handset volume 7 headset 2 35 place and receive calls 12 volume 37 headset connection 2 headset volume 7 36 headset speaker 36 I idle state display 8 incoming call 10 IP address xi 42 48 K key description 3 L lamp hard keys 6 message waiting indicat...

Page 64: ... 29 Requirements 2 restart phone 44 ring tone 33 ring volume 48 ringer volume 7 S set audio 35 set date 41 set time option 40 speaker 35 47 place and receive calls 12 speaker lamp 6 speaker volume 7 speaker headset 36 speed dial edit feature 34 status lamp 6 T time 37 time format 39 time server 37 time zone 38 timer 7 tone sets 33 transfer 17 announced 17 blind 17 unannounced 17 U unannounced tran...

Reviews: