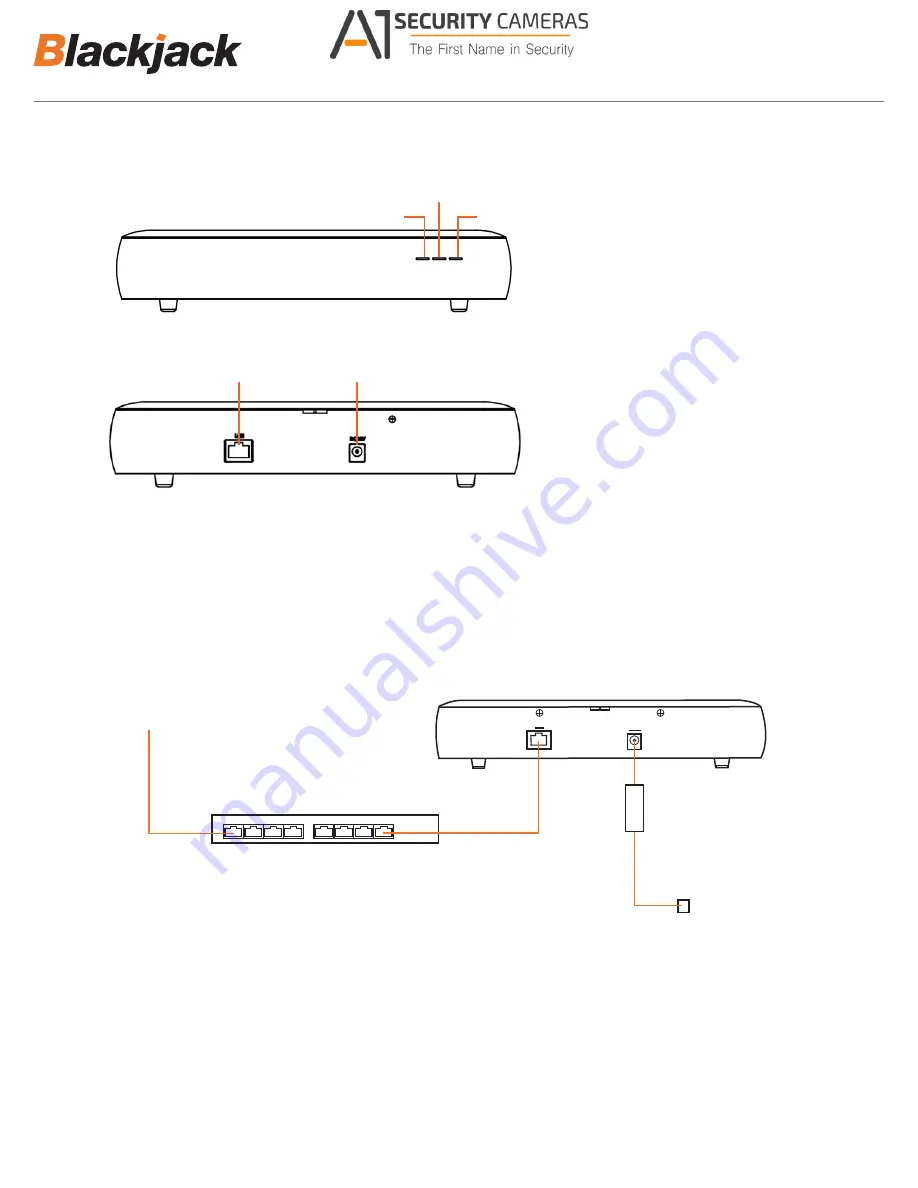
A1 Security Cameras Blackjack NAS DW-BJNAS4T Quick Start Manual Download Page 2

HARDWARE


Gigabit Ethernet Port

DC Power Port(12V)
(No power switch)

Front

Back

Network Attached Storage 

®

NAS


HDD1 LED


HDD2 LED


POWER LED

F1

F1

B1

B2

F2

F2

F3

F3

B1

B2

SETTING UP THE BLACKJACK

®

 NAS

STEP 1:


Connecting the power cable.


1. Connect the power cable to the DC power port. The device will automatically power on.


2. You can check whether the power is on at the front power LED.

2

Connecting to

BlackJack Server

1Gbps Switch

Connect to power source.

Recommend to connect

directly to UPS

                    Available from A1 Security Cameras 

    www.a1securitycameras.com email: [email protected]

Summary of Contents for Blackjack NAS DW-BJNAS4T

Page 1: ...e Search by Product search bar Results for applicable part num bers will populate automatically based on the part number you enter 3 Click Search All supported materials including manuals Quick Start...

Page 2: ...NAS STEP 1 Connecting the power cable 1 Connect the power cable to the DC power port The device will automatically power on 2 You can check whether the power is on at the front power LED 2 Connecting...

Page 3: ...When the DW IP Finder is opened it will scan and list all the DW cameras and Blackjack NAS that are on the selected network STEP 2 Connecting to the Network 1 Locate the network switch where the DW S...

Page 4: ...g the drop down and select another network if exist Then click to scan the network for the Blackjack NAS If it s showing incorrect network select the correct network from the dropdown list 5 Find the...

Page 5: ...NAS will be connecting to 8 Click the Apply or Cancel to close the window 7 Once the new IP have been applied reopen the Device Settings to verify the Storage URL for the DW Spectrum IPVMS Note the St...

Page 6: ...d External Storage 4 Input the URL of volume 1 E g 192 168 1 152 Recording1 3 Click Add External Storage 4 Input the URL of volume 1 E g 192 168 1 152 Recording1 4 From Storage Management tab click Ad...

Page 7: ...admin1234 6 Input the login name and the password then click OK NOTE Default login Information Login admin Password admin1234 6 5 Input the login name and the password then click OK 6 Select storage...

Page 8: ...ge Location automatically 9 Click Apply or OK to save the changes CONFIGURE STORAGE FOR CAAS 7 me network and add to the Storage be disabled et as Main 7 8 Click Apply or OK to save the changes CONFIG...

Reviews: