background image

6253M Mainboard                                 Chapter 3  Award BIOS Setup

3-1-1 UPDATE MICROCODE API

       Intel also provides MICROCODE API(Applications Programming Interface) for
Pentium

II/III processor-based mainboard user to update data block in BIOS quickly

and easily. (You can find this utility in the All-In-One CD in the mainboard package).

      The BIOS code on the Pentium

II/III processor-based mainboards contains data

that is specific to each silicon stepping of the processor. Integrators must ensure that
this BIOS stepping data matches the used processor stepping. When the BIOS does
not contain stepping data that matches the processor stepping, integrators must update
the data in the BIOS before shipping the system. Historically, Pentium

II/III systems

have been updated by replacing the entire BIOS with a new revision of BIOS that
contains the correct stepping data.

       Intel‘s BIOS update API allows just the stepping  data within the BIOS to be
updated  as needed.  Mainboards  that  contain  a BIOS with  the  Intel-defined  BIOS
update   API   can   be   quickly   and   easily   updated,   if   required,   without   obtaining   a
complete   BIOS   upgrade.   Using   this   utility,   integrators   can   easily   verify   that   the
correct  stepping  data  is present  in  all  Pentium

II/III processor-based  mainboards.

However,   if the  stepping   data  requires  to  be   updated,  the  mainboard  BIOS  must
contain the Intel-defined BIOS update API, otherwise a complete BIOS upgrade is
required from the mainboard vendor.

Since API program can only be executed under 

DOS Real Mode

, you must 

enter 

Real Mode first

 and load the API program to Drive C.

 To load the program to C by following steps:

(1) Type “ md c:\ api ” and press Enter. Directory “api” is made in Drive C now.
(2) Insert the Driver/Utility CD into CD ROM Drive E.
(3) Then type “ copy e:\api\*.* c:\api ” and press Enter.

(API program is loaded to Drive C now.)

 (4) Type “ C:\ api \checkup ” to execute this program.

 
    The main menu should now be displayed with the following four options :

1) Check and load update
2) Specify stepping data file [current : pep.pdb]
3) Help
4) Quit without loading update

      Select 1) to know the stepping filename, select 2) to load right patch code, then
select 1 to update proper patch code. Now, the screen will show the message “please
remove the CD from CD-ROM drive”. Then cold boot (mechanical power off) system
to continue. For more information, please refer to “CHECKUP.HLP“ file. 

Summary of Contents for 6253M

Page 1: ...Installation 14 2 2 1 Core Bus Freq Ratio 14 2 2 2 CPU Setting 15 2 3 System Memory Installation 16 2 4 IDE Driver Installation 17 2 5 Sound Driver Installation 17 2 6 VGA Driver Installation 18 2 7 H...

Page 2: ...up for updating your mainboard BIOS and setting up your BIOS Configuration 5 For Installing Pentium II III Celeron or Processors with SECC2 Package Read APPENDIX A for setting up Intel Pentium III Pen...

Page 3: ...or 1GB registered SDRAM with parity chip ECC support Built in Switching Voltage Regulator VRM 8 2 SPEC Auto detect CPU core voltage range from 1 3V to 3 5V Two16 bit ISA slots and four PCI slots compl...

Page 4: ...st ck unterst tzen Ultra DMA 33 3MB sec hoch bis zu vier Vorrichtungen in zwei Kan len das Einsetzten der Hardscheibe ist in hoherAufnahmf igkeit CD Rom LS 120MB Softwaredrive Tapereserven etc Winbond...

Page 5: ...necteurs ma tres IDE avec support d Ultra DMA 33 33MB sec sur quatre p riph riques dans deux cha nes pour connecter un disque dur de grande capacit un lecteur de CD ROM de disquette LS 120MB une machi...

Page 6: ...Conectores IDE Master Duales soportan Ultra DMA 33 33MB seg hasta cuatro dispositivos en dos canales para conectar disco r gido de alta capacidad CD ROM lector de floppy LS 120MB respaldo de cinta etc...

Page 7: ...portanti Ultra DMA 33 33 MB sec fino a due dispositivi in due canali per la connessione di hard disk ad alta capacit CD ROM floppy drive LS 120 MB backup di nastro ecc Winbond 83977 alta velocit Ultra...

Page 8: ...els sec 2000 300MHz RAMDAC 2048x1536 65Hz 3000 350MHz RAMDAC 2048x1536 75Hz 2000 125MHz Core Graphics Clock 3000 183MHz Core Graphics Clock Audio Features True Full Duplex Playback and Capture with di...

Page 9: ...rt the system just press the power switch button and the system will be powered on Note If you are going to leave your system idle for several days we suggest you use hardware power off to shutdown yo...

Page 10: ...oreover the SDRAM memory module must be 8 nano second Maximum Frequency 125 MHz speed of memory die or less However based on Intel s design we don t recommend users to run over 100MHz CPU host bus Ple...

Page 11: ...sword to confirm it Save selection and shut down system Now computer will only be powered on by entering correct password In case the set password is forgotten carry out Clear CMOS Page 14 to clear pa...

Page 12: ...Magic Packet prior to waking up the system WOL LAN Card should provide a 3 pin cable to connect itself to the mainboard CAUTION To implement Wake on LAN the standby power supply should be capable of d...

Page 13: ...ck up and restore system configuration files Whenever you plan on changing the system configuration you can make a backup set If the system no longer works correctly after you the change the system co...

Page 14: ...components and devices are well connected turn on the power and setup System BIOS based on your configuration Install peripheral devices add on card drivers and test them If all of above procedures ar...

Page 15: ...x5 5 400MHz 66x6 0 433MHz 66x6 5 466MHz 66x7 0 b For 350 450MHz Intel Pentium II and 450 550MHz Pentium III CPUs INTERNAL CPU CLOCK SW1 350MHz 100x3 5 400MHz 100x4 0 450MHz 100x4 5 500MHz 100x5 0 550M...

Page 16: ...SPD Both parity or non parity are available 3 3V Single double side 8 16 32 64 128 256Mbytes Max memory size 256MB registered SDRAM or EDO DRAM Both 4Mbx4 and 16Mbx4 Each side has 16 chips SDRAM devi...

Page 17: ...following steps 1 Start WinNT 4 0 and insert the Driver Utility CD into your CD ROM Drive 2 The screen will automatically show the autorun main menu which includes Install Yamaha 724 740 PCI Driver 3...

Page 18: ...ve 2 The screen will automatically show the autorun main menu which includes Install Voodoo III AGP Driver 3 Click this item to begin installing 4 Click Drivers Setup and driver setup will automatical...

Page 19: ...n the ROMBIOS along with all the other data the BIOS must contain After the BIOS is updated if you want to clear the old setup data stored in the CMOS then you can clear CMOS NOTE In case CMOS should...

Page 20: ...4 Type cd flash then press ENTER 5 Type awdflash then press ENTER for running the BIOS update utility 6 Type update BIOS file name with version number bin ENTER 7 If you do not want to save the old BI...

Page 21: ...obtaining a complete BIOS upgrade Using this utility integrators can easily verify that the correct stepping data is present in all Pentium II III processor based mainboards However if the stepping da...

Page 22: ...SETUP to enter the next screen ROM PCI ISA BIOS CMOS SETUP UTILITY AWARD SOFTWARE INC STANDARD CMOS SETUP INTEGRATED PERIPHERALS BIOS FEATURES SETUP SUPERVISOR PASSWORD CHIPSET FEATURES SETUP USER PAS...

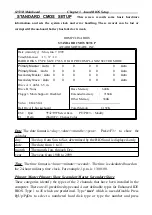
Page 23: ...Video EGA VGA Halt On All but keyboard Total Memory 8192K ESC Quit Select Item PU PD Modify F1 Help Shift F2 Change Color Date The date format is day date month year Press F3 to show the calendar day...

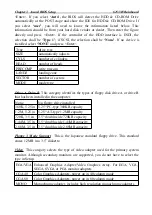
Page 24: ...tegory identifies the types of floppy disk drive A or drive B that has been installed in the computer None No floppy drive installed 360K 5 25 in 5 25 PC type 360KB capacity 1 2M 5 25 in 5 25 AT type...

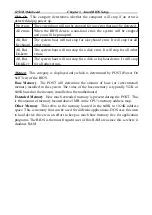
Page 25: ...top for all other errors Memory This category is displayed only which is determined by POST Power On Self Test of the BIOS Base Memory The POST will determine the amount of base or conventional memory...

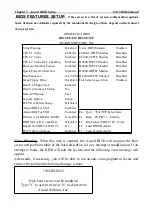
Page 26: ...bled Boot Up Floppy Seek Enabled Boot Up NumLock Status On Gate A20 Option Fast Security Option Setup PCI VGA Palette Snoop Disabled Assign IRQ For VGA Enabled Assign IRQ For USB Enabled Esc Quit Sele...

Page 27: ...m and thus adds to the system security features When this feature is Enabled the Processor Serial Number is detectable and can be utilized in information Management etc When Disabled the Processor Ser...

Page 28: ...t entered at the prompt Setup The system will boot but access to Setup will be denied if the correct password is not entered at the prompt To disable the security select PASSWORD SETTING at Main Menu...

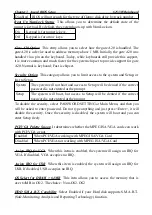
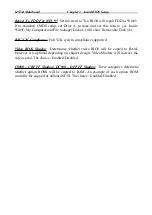
Page 29: ...Disk A RTC Y2K Compliance Full Y2K system compliance supported Video BIOS Shadow Determines whether video BIOS will be copied to RAM However it is optional depending on chipset design Video Shadow wi...

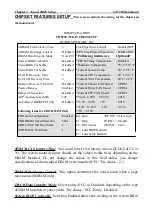
Page 30: ...bled Current CPU FAN Speed 0 PRM AGP Aperture Size MB 128 Vcore 2 80V VTT V 2 81V Auto Detect DIMM PCI ClK Disabled 3 3V 3 45V 5V 4 91V 12V 12 22V 12V 11 76 Following items for EDO DRAM Only 5V 5 16V...

Page 31: ...for 8 bit I O Choices are from NA 1 to 8 CPU clocks 16 Bit I O Recovery Time This item allows you to determine the recovery time allowed for 16 bit I O Choices are from NA 1 to 4 CPU clocks Memory Ho...

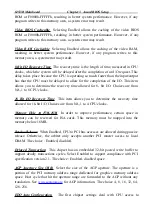
Page 32: ...t will still get the active clock signal Clock Spectrum Control When Disabled Off or Disabled On the system will automatically set the base frequency according to the CPU type Pentium II 233 333MHz Ce...

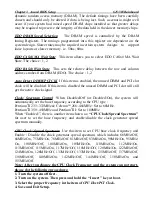
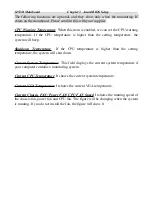
Page 33: ...emperature If the CPU temperature is higher than the setting temperature the system will shut down Current System Temperature This field displays the current system temperature if your computer contai...

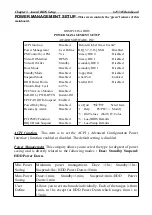
Page 34: ...Off CPUFAN Off In Suspend Enabled PowerOn by Ring Disabled Esc Quit Select Item Resume by Alarm Disabled F1 Help PU PD Modify F5 Old Values Shift F2 Color PCI PME Function Disabled F6 Load BIOS Defau...

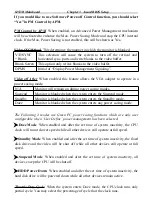
Page 35: ...lanked when the system enters the Suspend mode Standby Monitor is blanked when the system enters the Standby mode Doze Monitor is blanked when the system enters any power saving mode The Following 4 m...

Page 36: ...up by modem Disabled it cannot be waked up by modem Resume by Alarm When Enabled two additional lines will be added to the screen Date of Month Alarm Time hh mm ss Alarm to let user set the desired da...

Page 37: ...ility means absolutely nothing unless you are using a Plug and Play OS such as Windows 95 Choices are Auto and Manual Only when Manual is chosen will the IRQs and DMA choises show up Reset Configurati...

Page 38: ...Chapter 3 Award BIOS Setup 6253M Mainboard Used MEM Length This item determines the memory length of address which is for some special ISA Card used Choices are 8K 16K 32K 64K...

Page 39: ...bled Init Display first PCI Slot Power On Function Button Only KB Power On Passward Enter Esc Quit Select Item Hot Key Power On Ctrl F1 F1 Help PU PD Modify KBC input clock 8 MHz F5 Old Values Shift F...

Page 40: ...CMOS to clear old password and set a new one Hot Key This is also an ATX Power supported function Please refer to Page 7 Hot Key via Keyboard for setting this Hot Key Power on function Mouse Left Mous...

Page 41: ...t When Disabled the parallel port will be disabled On Board Parallel Mode Let user select parallel port protocol This item is not recommended to change except user has special request ECP Mode Use DMA...

Page 42: ...ccept them Press N to reject the values and enter the correct ones manually on the Standard CMOS Setup screen ROM PCI ISA BIOS CMOS SETUP UTILITY AWARD SOFTWARE INC Hard Disks Type Size CYLS HEAD PREC...

Page 43: ...ad the Setup default values Press Yes and Enter then the Setup default values will be loaded SUPERVISOR PASSWORD USER PASSWORD This allows you to set the password The mainboard defaults with password...

Page 44: ...current page and return to main menu PgUp KEY Increase the numeric value or make changes PgDn KEY Decrease the numeric value or make changes F1 KEY Help General help F2 KEY Shift F2 Change color from...

Reviews: