NEED HELP? GIVE US A CALL
833.232.9711
NEED HELP? GIVE US A CALL
833.232.9711
INSTALLATION GUIDE
2
3
2
3
4
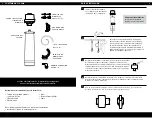
Installment Orientation
Suggested installation orientation
is vertically mounted.
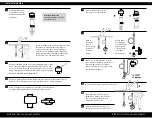
After penciling in the mounting placement, use a 7/32" drill bit to drill holes for
plastic anchors. Carefully tap anchors into the drilled hole with a hammer.
Locate a suitable area under the sink to mount
the system, noting that three (3) inches of
clearance from the base of the cartridge is
needed for easy cartridge replacement. The
System Head must be installed less than three
(3) feet from the cold-water inlet valve.
After determining placement, remove Cartridge from System
Head. Place System Head in desired mounting location and
use a pencil to mark the top left mounting hole. Use a level
and measuring tape to mark the remaining holes for System
Head and Cartridge Mounting Brackets.
1
Attach System Head
to Cartridge to help
determine under sink
placement.
5
6
7
8
9
10
11
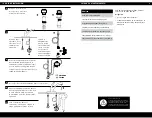
Using a Philips head screwdriver, mount the System Head and
Cartridge Mounting Brackets using the provided screws.
With an
adjustable
wrench,
turn off and
disconnect
cold water
supply.
Place Cartridge into brackets
and connect to System Head.
Attach Dual
Port Adapter
to shutoff valve
and re-attach
cold water line
to the Dual
Port Adapter.
Use 3/8" quick connect elbows if necessary.
Connect 3/8" tubing to the bottom
port. Measure tubing to system inlet
(marked “IN”) and cut to length.
Repeat this step for the top port and
outlet (marked “OUT”).
Once tubing is installed, turn on
COLD water kitchen faucet. With
faucet on, slowly open the cold
water line shutoff valve.
Flush cartridge for 15 minutes or
until water is clear of carbon fines.
1
2
1
2
3"
1
2


