background image

14

6.  Remove the blade by 

guiding it through the 

slot in the work table 

and the upper and lower 

blade guides.

7.  Fit the new saw blade 

ensuring that the teeth 

are pointing towards the 

front of the saw where 

the doors are.

8.  Lightly tension the new blade 

by rotating the blade tension 

knob.

9.  Centre the band saw blade on 

the rubber tyres of the band 

saw wheels.

10.  Turn the upper wheel by 

hand to ensure the blade is 

running in the centre of the rubber-lined wheels.

11. If required, adjust the saw blade tracking.
12.  Once the tracking is correct, tighten the blade tension 

knob. Adjust the thrust bearings and guide pins as 

described earlier.

13.  Close the housing doors.
14.  Place the lower blade guard back into position and fit 

the hex screw to secure the guard in position. 

15. Replace the table insert.
16.  Attach the bracket to the front of the work table by 

tightening the hex head screw using the 10mm wrench.

Operation

1.  Adjust the bevel angle, rip fence, mitre gauge and upper 

blade guide as required.

2.  Ensure that the table insert is in place and flush  

with the table.

3.  To start the saw push the on/off switch to the  

‘ON’ position.

4.  To begin the cut guide the wood into the moving  

saw blade.

5.  Use only enough pressure to keep the saw cutting. Do 

not force the cutting, allow the blade and the saw to do 

the work.

6.  When cutting on a bevel angle ensure that the rip fence 

is located on the right hand side of the blade.

7.  When cutting rod, use a jig or fixture to prevent the 

workpiece from turning.

8.  When cutting boards vertically, use a suitable push block 

to feed the workpiece into the saw.

9.  Once finished turn off the tool by pushing the red button 

on the switch cover and unplug the tool from the power 

point to prevent unauthorised use.

Power cord maintenance

If the supply cord needs replacing, the task must be carried 

out by the manufacturer, the manufacturer’s agent, or an 

authorised service centre in order to avoid a safety hazard.

Cleaning

1. Keep the tool’s air vents unclogged and clean at all times.
2.  Remove dust and dirt regularly. Cleaning is best done 

with a soft brush or a rag.

3. Re-lubricate all moving parts at regular intervals.
4. Never use caustic agents to clean plastic parts.

CAUTION.

 Do not use cleaning agents to clean the 

plastic parts of the tool. A mild detergent on a damp  

cloth is recommended.

General inspection

Regularly check that all the fixing screws are tight. They 

may vibrate loose over time.

Summary of Contents for BS9

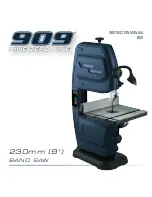
Page 1: ...INSTRUCTION MANUAL BS9 230mm 9 BAND SAW ...

Page 2: ...a workbench 9 Upper blade guide adjustment 9 Thrust bearing adjustment 9 Lower blade guide adjustment 10 Thrust bearing adjustment 10 Housing doors 11 Adjusting the rip fence 11 Adjusting the mitre gauge 11 Adjusting the bevel angle 11 Adjusting the saw blade tension 12 Adjusting the blade tracking 12 Dust collector connection 12 Turning on and off 13 Turning the LED lights on and off 13 Removing ...

Page 3: ...will more than satisfy your expectations It has been manufactured under stringent 909 Quality Standards to meet superior performance criteria You will find your new tool easy and safe to operate and with proper care it will give you many years of dependable service CAUTION Carefully read through this entire Instruction Manual before using your new 909 Power Tool Take special care to heed the Cauti...

Page 4: ...rease the risk of electric shock e When operating a power tool outdoors use an extension cord suitable for outdoor use Use of a cord suitable for outdoor use reduces the risk of electric shock 3 Personal safety a Stay alert watch what you are doing and use common sense when operating a power tool Do not use a power tool while you are tired or under the influence of drugs alcohol or medication A mo...

Page 5: ...use by persons including children with reduced physical sensory or mental capabilities or lack of experience and knowledge unless they have been given supervision or instruction concerning use of the appliance by a person responsible for their safety i Children should be supervised to ensure that they do not play with the appliance 5 Service a Have your power tool serviced by a qualified repair pe...

Page 6: ...h Supplied Assembly time The BS9 band saw will take approximately 10 minutes to assemble Know your product 1 On Off switch 2 Power On indicator 3 Work light on off switch 4 Work light 5 Base 6 Housing door 7 Lower housing door lock 8 Upper housing door lock 9 Work table 10 Work table trunnion 11 Table insert 12 Table angle locking knob 13 Table angle adjustment knob 14 Table angle adjustable screw...

Page 7: ...7 1 1 4 8 5 9 6 30 16 12 13 22 21 26 32 31 24 10 7 2 11 18 17 27 28 15 27 3 10 23 25 29 33 20 19 14 ...

Page 8: ...r to use 1 Place the work table on the table trunnion 10 by threading the saw blade through the slot in the table 2 Secure the work table to the table trunnion using the four hex bolts and star washers i CAUTION Make sure the screws are tightened securely to ensure they do not loosen in use 3 Place the table bracket h onto the front of the work table Place the washer over the hex screw and feed th...

Page 9: ...ainst the workpiece maximum distance 3mm 3 To adjust the height of the upper blade guide first release the blade guide height adjustment lock 18 by turning approx 1 turn in an anti clockwise direction and then rotate the blade guide height adjustment knob 17 Rotate in a clockwise direction to move the blade guide up rotate in an anti clockwise direction to move the blade guide down After adjustmen...

Page 10: ...open before the thrust bearing locking screw and guide pins can be adjusted This helps give better access to the adjustment screws Thrust bearing adjustment 1 To adjust the thrust bearing loosen the thrust bearing locking screw using the 3mm hex key supplied It is easier to access the thrust bearing screw if the work table is placed on a 45 angle 2 Adjust the thrust bearing position until it is 0 ...

Page 11: ... at the same width 1 Adjust the rip fence to the required width and secure it in position using the rip fence locking handle 26 2 The rip fence can be positioned on both sides of the blade 3 Ensure that the fence rests against the wood along its entire length to give a consistent parallel cut Adjusting the mitre gauge 1 The mitre gauge is used to help support the workpiece and can be adjusted when...

Page 12: ...lade should flex no more than 2mm to 3mm 5 Correct the tension if necessary Adjusting the blade tracking WARNING Always ensure that the saw is switched off and unplugged from the power supply before making any adjustments The blade tracking adjustment knob is used to adjust the upper band saw wheel to have the blade run centrally on the rubber tyres of the band saw wheels 1 Loosen the blade tracki...

Page 13: ...e work area and cutting line 1 To turn the worklight on press the light on off switch 3 2 To turn the worklight off press the light on off switch one more time 3 Adjust the work light to the most convenient position for the task being undertaken Removing and installing band saw blades WARNING Always ensure that the saw is switched off and unplugged from the power supply before making any adjustmen...

Page 14: ...o the ON position 4 To begin the cut guide the wood into the moving saw blade 5 Use only enough pressure to keep the saw cutting Do not force the cutting allow the blade and the saw to do the work 6 When cutting on a bevel angle ensure that the rip fence is located on the right hand side of the blade 7 When cutting rod use a jig or fixture to prevent the workpiece from turning 8 When cutting board...

Page 15: ...ck front door ensure it is fully closed and locked Blade does not reach full speed Extension cord too long or undersized Use extension cord heavy enough to carry the current Tool is overheating Turn off the tool and let it cool down to room temperature Inspect and clean the ventilation slots Blade not running straight Loose blade Check to see that the blade is tightened on the wheels adjust the bl...

Page 16: ......

Reviews: