background image

06

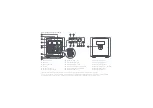
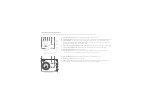
LCD display

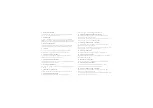
Setting

The power station includes the following settings:

1. Timing function: 

When the power station is turned on, the AC/

DC ON and OFF timer can be set respectively.

Ӫ

AC/DC ON timer: 

When the AC/DC output of the power 

station is off, the AC/DC ON timer can be set. At set time, the 

AC/DC output automatically turns on and can supply power to 

electrical appliances.
If the AC/DC output is manually turned on before the set time, 

the timer will not take effect.

Ӫ

AC/DC OFF timer: 

When the AC/DC output of the power 

station is on, the AC/DC OFF timer can be set. At set time, the 

AC/DC output automatically turns off, and the power station 

cannot supply power to electrical appliances.
If the AC/DC output is manually turned off before the set time, 

the timer will not take effect.

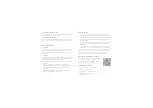
2. Factory reset:

 Restore the power station to default settings.

3. Output setting: 

Switch to the appropriate AC voltage and 

frequency according to the actual situation of the country and 

region.

4. Troubleshooting guide:

 Scan the QR code on the screen to 

obtain the fault manual of the product.

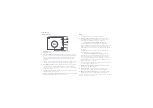
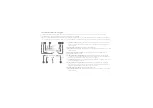
Main interface

1. Bluetooth:

 Bluetooth is always on by default.

2. Output auto off (no load):

 Press the corresponding function 

button to enable or disable this function. When enabled, the 

output ports of the power station will automatically turn off 

when the output is idle or at low load*.

3. LED light:

 Press the corresponding function button to switch 

between the three states of LED lights on, SOS, and LED lights 

off.

4. AC fast charge:

 Press the corresponding function button to 

enable or disable this function. When enabled, the power 

station will be charged with a higher power, and the charging 

time will be shortened.

5. Setting: 

Press the corresponding function button to enter 

settings of the power station.

6. Remaining battery power: 

Displays the current remaining 

battery power and percentage of the power station.

* Low load indicates the case when the AC output <10W or DC output 

<100mA for 10 hours.

Summary of Contents for Tera 1000

Page 1: ...70mai Power Station Tera 1000 User Manual ...

Page 2: ...Contents English Español Português Français 仼儗鏥 籖넒 俒 01 14 25 36 47 58 ...

Page 3: ...power cable of the product from the socket to reduce the risk of electric shock Please read this manual carefully before using the product and keep it in a safe place for future reference Safety use 1 Please use the product in a dry and ventilated environment The product is not waterproof Do not expose the product to any liquid Keep the product dry and do not submerge it in liquid Do not use the p...

Page 4: ...mmended to fully charge the product every 3 months 3 The product and its accessories may contain some small parts Please keep the product and its accessories out of the reach of children Children may inadvertently damage the product and its accessories or swallow small parts causing suffocation or other safety hazards SAVE THESE INSTRUCTIONS 10 In extreme cases the product may eject liquid Avoid d...

Page 5: ...rence only Due to product updates and upgrades the actual product may be slightly different from the diagrams Please refer to the actual product Γ Γ AC output ports AC output ports Δ Δ AC output indicator AC output indicator Ε Ε AC output switch AC output switch Ζ Ζ Quick charge USB A output port Quick charge USB A output port Η Η Type C output port PD 60W Type C output port PD 60W Θ Θ 5521 output...

Page 6: ...r turns on 9 AC output switch When the power station is turned on press this switch to turn on off the AC output 10 Quick charge USB A output port Applicable to devices charged through USB A port and supports up to 18W quick charge Devices connected to this port that do not support quick charge are still charged at standard speed 11 Type C output port PD 60W Applicable to devices charged through T...

Page 7: ...off ƽ If the built in battery power is low the power station will automatically turn off Downloading 70mai App How to use 1 Press and hold the power button for about 3 seconds to turn on the power station 2 Press the DC or AC output switch The corresponding output indicator lights up and the output port is enabled 3 Connect the power supply of the electrical equipment to the output port of the pow...

Page 8: ...ropriate AC voltage and frequency according to the actual situation of the country and region 4 Troubleshooting guide Scan the QR code on the screen to obtain the fault manual of the product Main interface 1 Bluetooth Bluetooth is always on by default 2 Output auto off no load Press the corresponding function button to enable or disable this function When enabled the output ports of the power stat...

Page 9: ...tion is enabled 11 AC fast charge icon Indicates that the AC fast charge function is enabled 12 Current input Total power of input 13 Charging time Time required to fully charge the power station The value is estimated based on the current battery level and total input power When the power station is charging or discharging only the display shows the following interface Charging state Discharging ...

Page 10: ...al power of DC output 19 DC output indicator Currently the DC output is enabled and the indicator is on 20 21 Remaining battery power Current remaining battery power and percentage of the power station 22 DC OFF timer A DC OFF timer is set Currently the DC output port of the power station is turned on and will automatically turn off after 2 hours and 40 minutes 23 DC input power The power station ...

Page 11: ...power station and attach the other end to the mains The standard charging time is about 5 hours If AC fast charge is enabled the charging time can be shortened to about 2 hours Notes ƽ Please turn on the power station before AC charging ƽ The AC output is disabled when the power station is in AC charging Charging the power station ƽ Charging with solar panel Connect the solar panel to the power st...

Page 12: ...ation Tera 1000 USB A output 1 5V 2 4 A Model PN1010A Car port 1 13 6V 10A Max Capacity 1043 9Wh USB A QC output 1 5V 3A 9V 2A 12V 1 5A 18W Max Weight 27lbs 12 3kg Type C PD output 1 5V 3A 9V 3A 12V 3A 15V 3 A 20V 3A 60W Max Size 11 8 8 9 11 3inch 30 22 5 28 7cm Type C PD output 1 5V 3A 9V 2A 12V 1 5A 18W Max Charge temperature ૢ WR ૢ WR AC output 1200W Surge 2400W 100 120V 50 60Hz Pure Sine Wave ...

Page 13: ... Check if the cable or connector is broken or loose ƽ Ensure that the connection is tight and secure 5 For AC charging the power station was not first turned on ƽ Turn on the power station first 6 Other causes ƽ Contact the service center Power station has no output 1 The power cable of the electrical device is not connected to the output port of the power station ƽ Check if the power cable or the...

Page 14: ...n reception which can be determined by turning the equipment off and on the user is encouraged to try to correct the interference by one or more of the following measures Reorient or relocate the receiving antenna Increase the separation between the equipment and receiver Connect the equipment into an outlet on a circuit different from that to which the receiver is connected Consult the dealer or ...

Page 15: ...letters I O U V For example in the SN XXXXXXXXX1BWXXXX 1BW means that the product was produced on November 28th 2021 Reportez vous aux règles de codage SN pour obtenir la date de production de ce produit Le SN comporte 16 chiffres au total les 10e et 12e chiffres représentant l année le mois et le jour Les règles sont les suivantes Année Prenez le dernier chiffre de l année par exemple 2021 est re...

Page 16: ...venta 9 Si se produce un fallo del producto desenchufe el cable de alimentación de la toma para reducir el riesgo de descarga eléctrica Lea este manual con atención antes de utilizar el producto y consérvelo en un lugar seguro para futuras referencias Uso seguro 1 Utilice el producto en un ambiente seco y ventilado Este producto no es resistente al agua No exponga el producto a líquidos Mantenga e...

Page 17: ...recomienda cargar completamente el producto cada 3 meses 3 El producto y sus accesorios pueden contener algunas piezas pequeñas Mantenga el producto y sus accesorios fuera del alcance de los niños Los niños pueden de manera involuntaria dañar el producto y sus accesorios o tragarse las piezas pequeñas lo que puede causar asfixia u otros peligros GUARDE ESTAS INSTRUCCIONES 10 En casos extremos el p...

Page 18: ... real puede diferir ligeramente de los diagramas Observe el dispositivo real Γ Γ Puertos de salida de CA Puertos de salida de CA Δ Δ Indicador de salida de CA Indicador de salida de CA Ε Ε Interruptor de salida de CA Interruptor de salida de CA Ζ Ζ Puerto de salida USB A de carga rápida Puerto de salida USB A de carga rápida Η Η Puerto de salida de Tipo C PD 60W Puerto de salida de Tipo C PD 60W Θ...

Page 19: ... CA Cuando la central eléctrica está encendida presione este interruptor para encender apagar la salida de CA 10 Puerto de salida USB A de carga rápida Aplicable a dispositivos cargados a través del puerto USB A y admite carga rápida de hasta 18W Los dispositivos conectados a este puerto que todavía no admiten la carga rápida se cargan a velocidad estándar 11 Puerto de salida de Tipo C PD 60W Apli...

Page 20: ... eléctrica se apaga automáticamente Descarga de la aplicación de 70mai Modo de empleo 1 Presione y mantenga presionado el botón de encendido durante unos 3 segundos para encender la central eléctrica 2 Presione el interruptor de salida de CA y CC El indicador de salida correspondiente se enciende cuando el puerto de salida está habilitado 3 Conecte la fuente de alimentación del equipo eléctrico al...

Page 21: ...rica a los ajustes de fábrica 3 Ajustes de salida Cambie a la tensión y frecuencia de CA adecuadas según la situación real del país y la región 4 Guía para resolver problemas Escanee el código QR en la pantalla para obtener el manual de fallos del producto Interfaz principal 1 Bluetooth Bluetooth está activado siempre de forma predeterminada 2 Apagado automático de salida sin carga Presione el bot...

Page 22: ...no de carga rápida de CA Indica que la función de carga rápida de CA está habilitada 12 Entrada de corriente Energía total de entrada 13 Tiempo de carga Tiempo necesario para cargar completamente la central eléctrica El valor se estima en función del nivel actual de la batería y la energía total de entrada Cuando la central eléctrica se está únicamente cargando o descargando la pantalla muestra la...

Page 23: ... de CC En la actualidad la salida de CC está habilitada y el indicador está encendido 20 21 Energía restante en la betería La energía restante actual de la batería y el porcentaje de la central eléctrica 22 Temporizador de apagado de CC Se establecer un temporizador de apagado de CC Actualmente el puerto de salida de CC de la central eléctrica está encendido y se apagará automáticamente después de...

Page 24: ... la central eléctrica y conecte el otro extremo a la red El tiempo de carga estándar es de aproximadamente 5 horas Si la carga rápida de CA está habilitada el tiempo de carga se puede reducir a aproximadamente 2 horas Notas ƽ Encienda la central eléctrica antes de la carga de CA ƽ La salida de CA se desactiva cuando la central eléctrica está en carga de CA Carga de la Central Eléctrica ƽ Carga con...

Page 25: ...n Tera 1000 Salida USB A 1 5V 2 4 A Modelo PN1010A Puerto de carga de coche 1 13 6V 10A Máx Capacidad 1043 9Wh Salida QC USB A 1 5V 3A 9V 2A 12V 1 5A 18W Máx Peso 12 3 kg 27 libras Salida Tipo C PD 1 5V 3A 9V 3A 12V 3A 15V 3 A 20V 3A 60W Máx Tamaño 30 22 5 28 7 cm 11 8 8 9 11 3 pulgadas Salida Tipo C PD 1 5V 3A 9V 2A 12V 1 5A 18W Máx Temperatura de carga 0 C y 40 C de 32 F a 104 F Salida AC 1200W ...

Page 26: ...la conexión es firme y segura 5 La central eléctrica no se ha encendido en primer lugar para la carga de CA ƽ Encienda en primer lugar la central eléctrica 6 Otras causas ƽ Póngase en contacto con el servicio posventa La central eléctrica no tiene salida 1 El cable de alimentación del dispositivo eléctrico no está conectado al puerto de salida de la central eléctrica ƽ Compruebe si el cable de ali...

Page 27: ...tência técnica 9 Se o produto falhar desligue o cabo de alimentação do produto da tomada para reduzir o risco de choque elétrico Leia este manual com atenção antes de utilizar o produto e guarde o num local seguro para consulta futura Utilização segura 1 Utilize o produto num ambiente seco e ventilado O produto não é impermeável Não exponha o produto a qualquer tipo de líquido Mantenha o produto s...

Page 28: ...to recomenda se carregar totalmente o produto a cada 3 meses 3 O produto e os seus acessórios podem conter peças pequenas Mantenha o produto e os seus acessórios fora do alcance das crianças As crianças podem danificar inadvertidamente o produto e os seus acessórios ou engolir peças pequenas que podem causar asfixia ou outros perigos de segurança GUARDE ESTAS INSTRUÇÕES 10 Em casos extremos o prod...

Page 29: ... o produto efetivo pode ser ligeiramente diferente dos diagramas Consulte o produto efetivo Γ Γ Portas de saída CA Portas de saída CA Δ Δ Indicador de saída CA Indicador de saída CA Ε Ε Interruptor de saída CA Interruptor de saída CA Ζ Ζ Porta de saída USB A de carregamento rápido Porta de saída USB A de carregamento rápido Η Η Porta de saída Tipo C PD 60 W Porta de saída Tipo C PD 60 W Θ Θ Portas...

Page 30: ...ver ligada prima este interruptor para ligar desligar a saída CA 10 Porta de saída USB A de carregamento rápido Aplicável a dispositivos carregados através da porta USB A suportando um carregamento rápido de até 18 W Os dispositivos ligados a esta porta que não suportem carregamento rápido são carregados à velocidade normal 11 Porta de saída Tipo C PD 60 W Aplicável a dispositivos carregados atrav...

Page 31: ...for baixa a central desliga se automaticamente Download da aplicação 70mai Como Utilizar 1 Mantenha premido o botão de ligar desligar durante aprox 3 segundos para ligar a central 2 Prima o interruptor de saída CC ou CA O indicador de saída correspondente acende e a porta de saída está ativada 3 Ligue a fonte de alimentação do equipamento elétrico à porta de saída da central para fornecer energia ...

Page 32: ...s da central 3 Definição da saída Mude para a frequência e a tensão CA adequadas de acordo com a situação real do país e da região 4 Guia de resolução de problemas Leia o código QR no ecrã para obter o manual de falhas do produto Interface principal 1 Bluetooth O Bluetooth está sempre ligado por defeito 2 Desligação automática saída sem carga Prima o botão de função correspondente para ativar ou d...

Page 33: ...regamento rápido CA Indica que a função de carregamento rápido CA está ativada 12 Entrada de corrente Potência total de entrada 13 Tempo de carregamento Tempo necessário para carregar totalmente a central O valor é estimado com base no nível atual da bateria e na potência total de entrada Quando a central está apenas a carregar ou descarregar o visor mostra a seguinte interface Estado de carregame...

Page 34: ...r de saída CC De momento a saída CC está ativada e o indicador está ligado 20 21 Energia restante da bateria A energia restante da bateria e a percentagem da central no momento 22 Temporizador de desligação CC Um temporizador de desligação CC está definido Atualmente a porta de saída CC da central está ligada e desliga se automaticamente após 2 horas e 40 minutos 23 Potência de entrada CC A centra...

Page 35: ...e carregamento CA da central e ligue a outra extremidade à rede O tempo de carregamento padrão é de cerca de 5 horas Se o carregamento rápido CA estiver ativado o tempo de carregamento pode ser encurtado para cerca de 2 horas Notas ƽ Ligue a central antes do carregamento CA ƽ A saída CA é desativada quando a central está em carregamento CA A carregar a central elétrica ƽ Carregamento com painel so...

Page 36: ...1000 Saída USB A 1 5V 2 4 A Modelo PN1010A Porta de carga do automóvel 1 13 6V 10A no máximo Capacidade 1043 9 Wh Saída USB A QC 1 5V 3A 9V 2A 12V 1 5A 18W máx Peso 12 3kg 27 lbs Saída PD Tipo C 1 5V 3A 9V 3A 12V 3A 15V 3 A 20V 3A 60W máx Tamanho 30 x 22 5 x 28 7 cm 11 8 x 8 9 x 11 3 polegadas Saída PD Tipo C 1 5V 3A 9V 2A 12V 1 5A 18W máx 7HPSHUDWXUD GH FDUUHJDPHQWR D ૢ D ૢ Saída CA 1200W pico 24...

Page 37: ... carregamento CA a central não foi ligada primeiro ƽ Ligue a central primeiro 6 Outras causas ƽ Contacte o serviço de assistência técnica Central sem saída de corrente 1 O cabo de alimentação do dispositivo elétrico não está ligado à porta de saída da central ƽ Verifique se o cabo de alimentação ou a porta do dispositivo elétrico estão partidos ou deformados ƽ Certifique se de que a ligação está b...

Page 38: ...iser le produit et contactez le centre de service 9 Si le produit tombe en panne débranchez le câble d alimentation du produit de la prise pour réduire le risque de choc électrique Veuillez lire attentivement ce manuel avant d utiliser le produit et le conserver dans un endroit sûr Utilisation en toute sécurité 1 Veuillez utiliser le produit dans un environnement sec et aéré Le produit n est pas é...

Page 39: ...tement le produit tous les 3 mois 3 Le produit et ses accessoires peuvent contenir de petites pièces Veuillez garder le produit et ses accessoires hors de portée des enfants Les enfants peuvent endommager par inadvertance le produit et ses accessoires ou avaler de petites pièces provoquant une suffocation ou d autres risques pour la sécurité CONSERVEZ CES INSTRUCTIONS 9 Évitez de cogner le produit...

Page 40: ...ses à jour et des mises à niveau du produit le produit réel peut être légèrement différent des schémas Veuillez vous référer au produit réel Γ Γ Ports de sortie CA Ports de sortie CA Δ Δ Indicateur de sortie CA Indicateur de sortie CA Ε Ε Commutateur de sortie CA Commutateur de sortie CA Ζ Ζ Port de sortie USB A à charge rapide Port de sortie USB A à charge rapide Η Η Port de sortie de type C PD 6...

Page 41: ...tie CA est activée le voyant s allume 9 Commutateur de sortie CA Lorsque la centrale électrique est allumée appuyez sur cet interrupteur pour activer désactiver la sortie CA 10 Port de sortie USB A à charge rapide Applicable aux appareils chargés via le port USB A et prend en charge une charge rapide jusqu à 18 W Les appareils connectés à ce port qui ne prennent pas en charge la charge rapide sont...

Page 42: ...tomatiquement ƽ Si la puissance de la batterie intégrée est faible la centrale s éteint automatiquement Téléchargement de l application 70mai Utiliser 1 Appuyez sur le bouton d alimentation et maintenez le enfoncé pendant environ 3 secondes pour allumer la station d alimentation 2 Appuyez sur le commutateur de sortie CC ou CA L indicateur de sortie correspondant s allume et le port de sortie est a...

Reviews: