background image


The Power Beyond Port can connect to another valve for conveyor and clamp, or must go to the filter and tank. The 
return hose can be #12 or 3/4” diameter for the first two feet. If a longer hose is required it must be #16 or 1” up to 
twenty feet. If the total return hose length is greater than thirty three feet #20 or 1 1/4” hose should be used. The 
filter must be rated for 40 GPM plus any additional pump flowing into it. The saw motor should run between 4000 
RPM and 5500 RPM. At this speed the pressure at the return to filter connection should not exceed 80 psi when the 
saw motor is running. We do not recommend using quick disconnects but if you choose to use quick disconnects in 
the tank line, first consult the manufacture to determine the correct size to keep the back pressure low enough in 
cold temperatures. Failure to properly size the hose and filter or properly connect the return hose to a filter and 
tank will shorten the motor shaft seal life and will not be covered by warranty. 

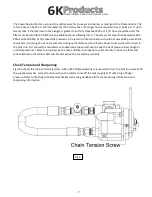
Chain Tension and Sharpening 

Figure 5 shows the chain tensioning screw. A #2 or #3 Phillips screwdriver is required to turn the tension screw. With 
the supplied saw bar, correct tension is when the cutters come off the rails roughly 1/8” with a tug of finger 
pressure. Refer to the Oregon Mechanical Timber Harvesting Handbook for more tensioning information and 
sharpening information.  


Fig. 5 

Summary of Contents for 30G36

Page 1: ...OPERATION AND PARTS MANUAL DH0630 30G36 Simple Saw System Information subject to change without notice ...

Page 2: ...ersons working near this machine must wear eye protection and hearing protection Use extreme caution around the cutting chain It is sharp and may cause bodily harm or injury Petroleum products are used with this product Use appropriate caution when operating or servicing These products are flammable and may cause eye or skin irritation Always use 6K Products approved parts when making repairs Repl...

Page 3: ...tallation 4 Hydraulic Connections 6 Chain Tension and Sharpening 7 Sprocket Removal and Replacement 8 Bar Oil Pump Adjustment 9 Operating Instruction 10 Parts and Service Information 10 Main Sub Assembly Parts 11 Simple Saw Assembly Parts 12 Bar Oil Pump Assembly Parts 13 Bar Oil Tank Assembly Parts 14 ...

Page 4: ...res warranty This warranty does not cover normal wear from use damage from abuse or misuse damage from contamination damage from natural disasters fire damage or incorrect installation This warranty does not cover labor to remove and replace parts shipping and handling of parts or shipping and handling for items returned for repair If any component fails you must contact 6K Products at 360 264 214...

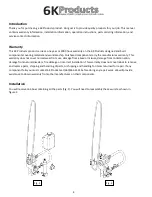
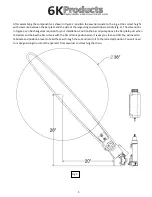
Page 5: ...figure 3 can be changed as required for your installation Position the bar oil pump above the bar plate port when retracted and below the bar oil tank with the bar oil tank positioned so it is easy to clean and fill You will need to fabricate and position a lever to feed the saw through the cut and return it to the retracted position You will need to make guarding to protect the operator from sawd...

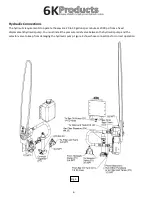
Page 6: ... 29 to 35 gallons per minute at 2000 psi from a fixed displacement hydraulic pump You must install the pressure relief valve between the hydraulic pump and the selector valve to keep from damaging the hydraulic pump Figure 4 shows hose connections for correct operation Fig 4 ...

Page 7: ...ng We do not recommend using quick disconnects but if you choose to use quick disconnects in the tank line first consult the manufacture to determine the correct size to keep the back pressure low enough in cold temperatures Failure to properly size the hose and filter or properly connect the return hose to a filter and tank will shorten the motor shaft seal life and will not be covered by warrant...

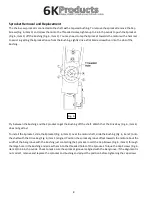
Page 8: ...the shaft Watch that the Drive Key Fig 6 item 4 does not get lost To install the Sprocket slide the Sprocket Fig 6 item 1 over the motor shaft slide the Bushing Fig 6 item 2 onto the shaft with the Drive Key Fig 6 item 4 aligned Position the sprocket groove offset towards the motor about the width of the bar groove with the Bushing just contacting the Sprocket Insert the Cap Screws Fig 6 item 3 th...

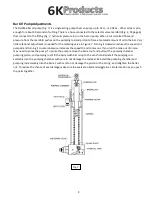
Page 9: ...ve in Figure 7 Turning it clockwise reduces the speed oil is pumped and turning it counterclockwise increases the speed the oil comes out If you run the tank out of oil you may need to prime the pump To prime the pump remove the barrel nut and pull out the pumping chamber pumping piston and pumping rod Fill the barrel with bar oil up to the vent hole Reinstall the pumping rod assembly into the pum...

Page 10: ...cribed on page 7 The log being cut must be clamped prior to sawing Lowering the saw bar will allow the selector valve to shift starting the saw chain and pumping bar oil Returning the saw to the up stop will stop the saw chain and reset the bar oil pump Parts and Service Information For parts and service contact 6K Products Our hours of operation are 8 00 AM to 4 30 PM Monday through Friday Pacifi...

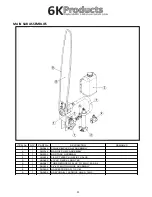
Page 11: ...BLY 2 1 DH0144 BAR OIL PUMP ASSEMBLY 3 1 DH0152 BAR TANK ASSEMBLY 4 1 VH0014 3 4 NPT 2000 PSI RELIEF VALVE 5 1 HH0822 12 JIC SWIVEL RUN TEE 6 1 HH0947 TUBE REDUCER FM JIC TO M JIC 892 6 4 7 1 DH0634 24 12 MOTOR HOSE ASSEMBLY 8 1 DH0205 HARVESTER BAR 113 CM 9 1 DH0206 SAW CHAIN 126 DRIVE LINKS 18HX ...

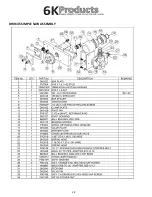
Page 12: ...12 DH0645 SIMPLE SAW ASSEMBLY ...

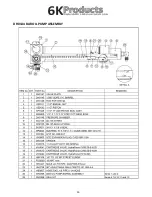
Page 13: ...13 DH0144 BAR OIL PUMP ASSEMBLY ...

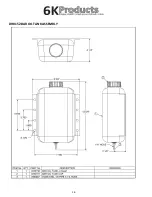
Page 14: ...14 DH0152 BAR OIL TANK ASSEMBLY ...

Reviews: