


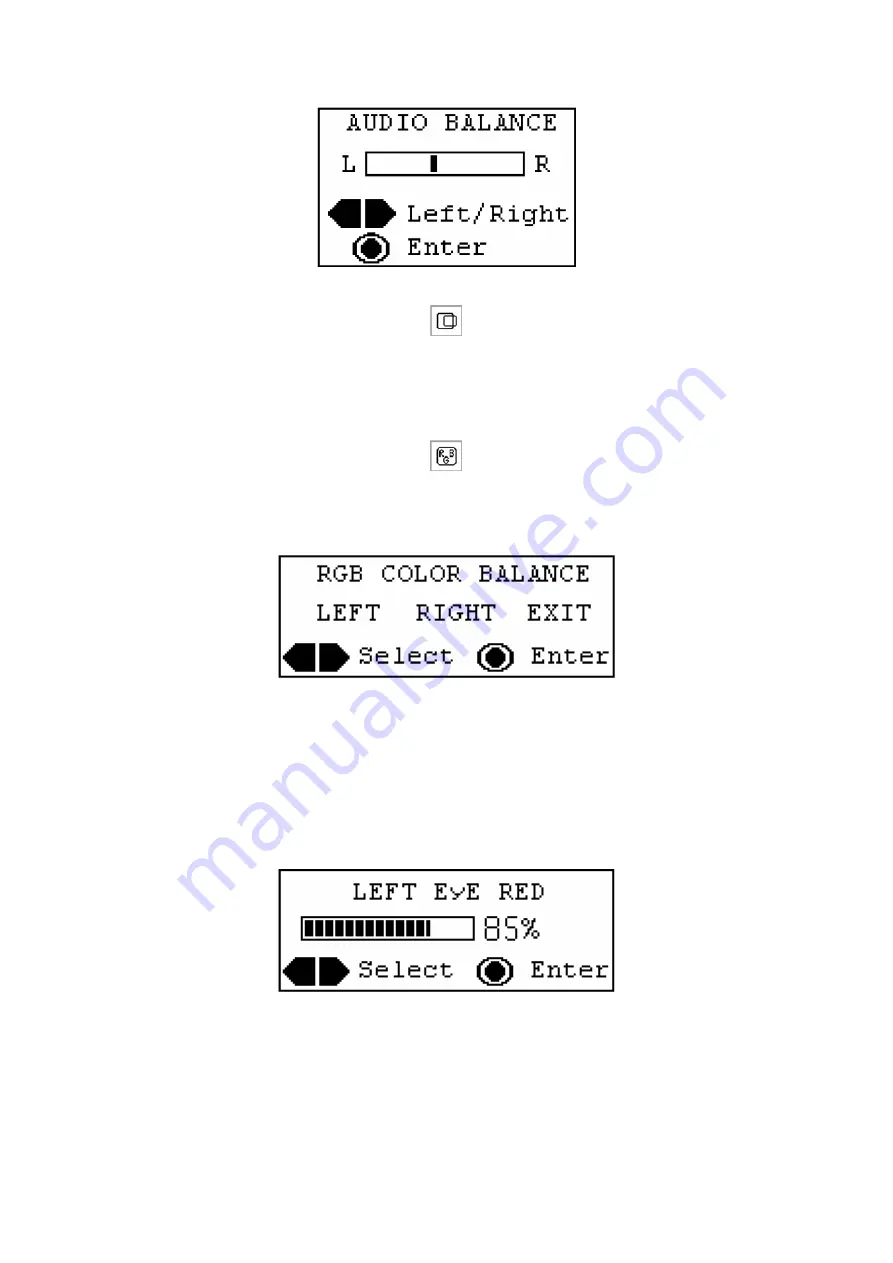
Figure 9 – The Audio Balance OSD menu
D. Centering Screen:
If the image on the screen appears to be off center, you can make adjustments by
selecting this function. Again, use the
Vol
(
+
/
-
) buttons to position the image on the
screen as desired. Press the
Power/Menu
button to save any changes you have
made to the settings.
E. RGB Color Balance:
Selecting the RGB (Red / Green / Blue) Color Balance icon allows you to make
individual changes in the primary colors in each eye. From the main OSD menu
select the RGB icon, which brings up the next sub-menu (see Figure 10).
Figure 10 – The RGB Color Balance OSD menu
Use the
Vol
(
+
/
-
) buttons to select which eye (LEFT or RIGHT) you want to adjust or
EXIT to return to the main OSD menu. Then use the
Vol
(
+
/
-
) buttons to select one of
the RGB colors, notice that the color name (Red, Green, Blue) toggles as you press
one of the Up (
+
) or Down (
-
) buttons. Press the
Power/Menu
button to go into the
next sub-menu (see Figure 11). Using the
Vol
(
+
/
-
) buttons, make the necessary
adjustments to the color you have chosen. Once you have made the adjustments,
press the
Power/Menu
button to save the setting and return to the main OSD menu.
Figure 11 – The RGB Color Balance OSD sub-menu
11


