background image

5.3 

Using the HMD 800 Controls 

Turn on the 5DT HMD 800

Press and release the 

Power/Menu

 button located on the middle right-hand of the 

headset. This will illuminate the green LED above to the 

Power/Menu

 button and, 

within a few seconds, an image will appear on the headset. Your 5DT HMD 800-26 
has been preset at the factory and no further adjustments should be required. 

Audio Controls 

If you have an audio source, you can increase or decrease the volume level using 
the 

Vol

. (

+

/

-

) buttons on the bottom right side of the headset. 


5.4 

Accessing the On-Screen-Display Menu (OSD) 

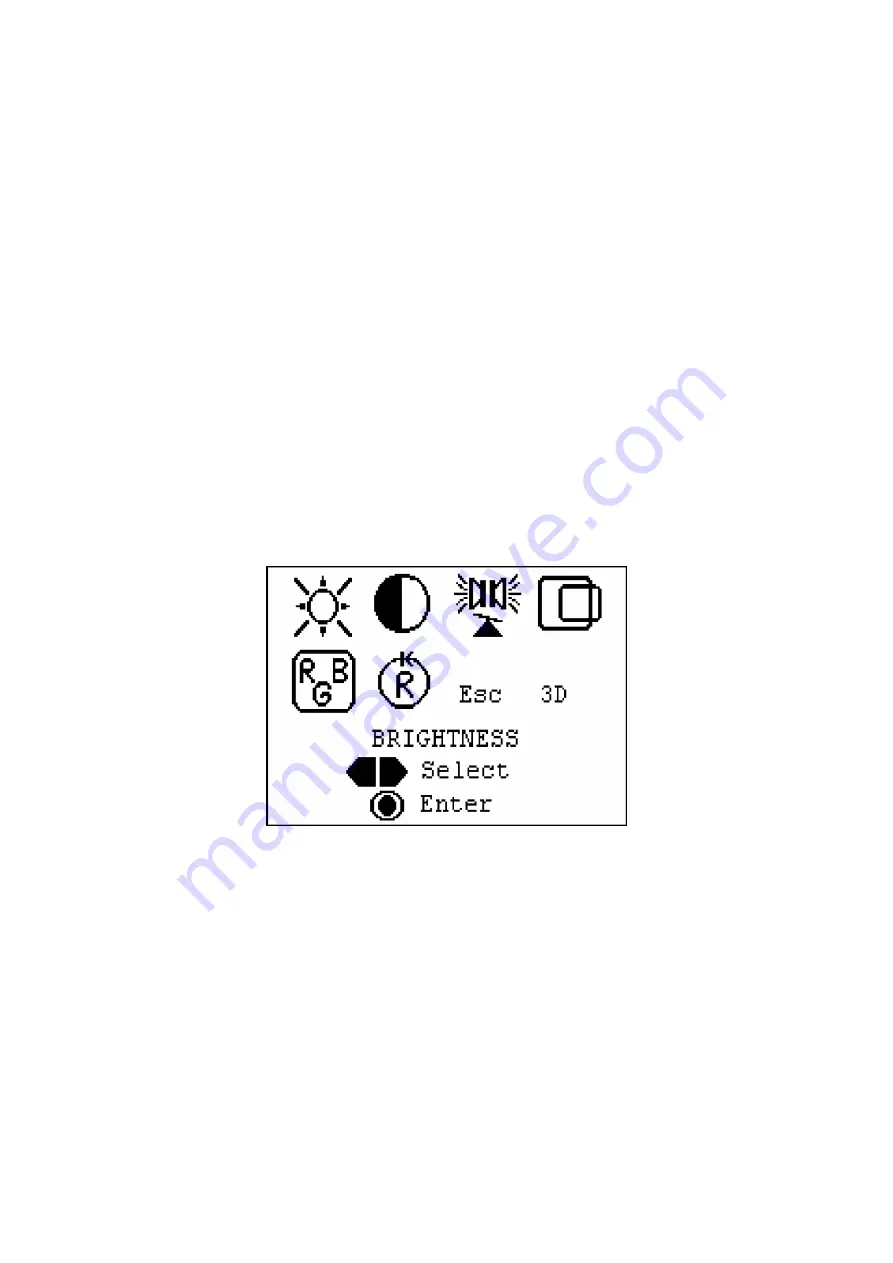
Access to the ON-SCREEN-DISPLAY (OSD) allows the user to make additional 
image corrections and adjustments to the image quality. Changes that can be made 
include: BRIGHTNESS, CONTRAST, COLOR, AUDIO BALANCE, HORIZONTAL 
CENTERING as well as a FACTORY RESET option. You can activate and 
deactivate the 3D mode by accessing the OSD at any time. 

To access the OSD, press and hold down the 

Power/Menu

 button for approximately 

3 seconds and then release. The on-screen-display window will appear on your 
screen (see Figure 6). 


Figure 6 – The OSD main menu display 

Use the 

Vol

 (

+

/

-

) buttons to select the icon for the display function you would like to 

activate. Notice that the selected icon is highlighted. Once you have highlighted the 
desired icon, press and release the 

Power/Menu

 button once to activate. Once 

activated, a new screen will open. Use the 

Vol

 (

+

/

-

) buttons to increase or decrease 

the setting between 0 and 100%. Once you are satisfied with the new setting, 
depress the 

Power/Menu

 button to save the changes and the main OSD menu will 

appear. To select another display function icon, use the 

Vol

  (

+

/

-

) buttons to scroll 

between icons. 


Summary of Contents for HMD 800-26 Series

Page 1: ...5DT HMD 800 26 Series User s Manual Fifth Dimension Technologies www 5DT com...

Page 2: ...electronic medium or machine readable format without the written consent of 5DT Fifth Dimension Technologies All trademarks and trade names are the respective property of their owners Unless otherwise...

Page 3: ...5 Cleaning the Product 3 2 6 Personal Hygiene 3 3 PACKAGE CONTENTS 4 4 CONNECTING THE HMD 5 5 USING YOUR HMD 6 5 1 Basic Use Donning the Headset 6 5 2 PC Setup 7 5 3 Using the HMD 800 Controls 9 5 4...

Page 4: ...APPENDIX C PRODUCT WARRANTY 19 3 Month Product Warranty 19 Exclusions 19 Warranty Claim Instructions 19...

Page 5: ...solution This product is particularly useful for research and development virtual reality simulation computer graphics applications 3D CAD systems virtual showrooms and personal entertainment Features...

Page 6: ...ience discomfort of any nature You develop a headache You start feeling nauseous You start experiencing vertigo dizziness Do not wear the product for longer than one hour at a time When this period ha...

Page 7: ...for multiple user applications Alcohol will remove skin oil and makeup that has been transferred to the HMD The front back and top foam inserts should also be cleaned or replaced as necessary Soak the...

Page 8: ...3 Package Contents Please confirm that the package contains the following 5DT HMD with connected interface cable Power supply This manual 4...

Page 9: ...ied D sub SVGA connector of the 5DT HMD 800 26 to the output of your video card b Connect the audio connection cable of the 5DT HMD 800 26 to the audio out line of your soundcard c Connect the power s...

Page 10: ...tes To don the HMD follow these steps a Place the headset on top of the head and gently slide it down b Adjust the top and back ratchets see Figure 2 so that the headset is comfortable and that the di...

Page 11: ...ixels When you have selected the desired screen resolution click on Apply to accept the change Step 2 Set Color Resolution For best results make sure that your computer is set for a minimum of 16 Bit...

Page 12: ...Figure 4 Setting the display resolution for Windows 95 98 Me XP Figure 5 Setting the refresh rate for Windows 95 98 Me XP 8...

Page 13: ...CONTRAST COLOR AUDIO BALANCE HORIZONTAL CENTERING as well as a FACTORY RESET option You can activate and deactivate the 3D mode by accessing the OSD at any time To access the OSD press and hold down...

Page 14: ...lecting the Contrast icon allows you to make adjustments to the display contrast When the Contrast submenu is displayed as shown in Figure 8 you may change the setting between 0 100 by pressing the Vo...

Page 15: ...t the RGB icon which brings up the next sub menu see Figure 10 Figure 10 The RGB Color Balance OSD menu Use the Vol buttons to select which eye LEFT or RIGHT you want to adjust or EXIT to return to th...

Page 16: ...mode 3D Modes 3D1 and 3D2 The 5DT HMD 800 26 3D supports two 3D modes In both modes full resolution frame sequential image input is required Figure 13 The 3D Mode Selection OSD menu Mode 1 DDC Line Pr...

Page 17: ...Data Glove MRI 14 For Magnetic Resonance Imaging environments 5DT Data Glove Ultra Wireless Kit 5DT Head Mounted Display 800 40 5DT Head Mounted Display HMD 800 26 2D 5DT Head Mounted Display HMD 800...

Page 18: ...e Operator Training Simulator Marine Marine Technology Demonstrator Unmanned Underwater Vehicle UUV ROV Training Simulators Medical Bronchoscope Training Simulator Exposure Treatment Phobia Simulator...

Page 19: ...92618 Tel 1 949 450 9044 Fax 1 949 450 9045 e mail info us 5dt com Web www 5dt com Rest of World 5DT Fifth Dimension Technologies 25 De Havilland Crescent P O Box 5 Persequor Park 0020 Pretoria South...

Page 20: ...is jumpy The 5DT HMD 800 is looking for a very precise 800 x 600 input signal at 60Hz Some computers may output a signal at a frequency other than 60Hz despite the fact that your computer is set at 60...

Page 21: ...eration If you experience problems or have complaints suggestions or other comments please feel free to contact your supplier preferably via e mail Please have the following information available or i...

Page 22: ...600 V Virtual Image Size 44 inch at 2m Viewing Angle 26 Diagonal PC Input RGB Positive Sync in SGVA Mode Connectors PC Input PC Input D sub 15 pin Audio Input Stereo Mini Jack Power Consumption Appro...

Page 23: ...soon as possible In order to do this we request your full cooperation with respect to the warranty claim instructions below Please adhere strictly to the following instructions a Contact your supplier...

Page 24: ...shipment The invoice must indicate a value We suggest that you assign a value of US 50 maximum on the invoice so that 5DT is not required to pay excessive import taxes on this product i It is importan...

Reviews: