Managing the LTE | 75
Aprisa LTE User Manual 2.1
Cellular
See ‘
23 for a general understanding of 4G LTE.
Single and Dual SIMs/Operators Connection
Connecting the Aprisa LTE to the network requires the following setup options:
1. Install the SIM cards, following the steps outlined
in ‘
’ on page
44. This is a
prerequisite setup stage for any settings in this section.
2. Setup the APN for cellular connection and its APN backup connection if required. This is discussed
in this section.
3. Setup of VPNs, for secure connection to the customer data center and/or to another Aprisa LTE
router over a public /
private cellular network. This is discussed under the ‘
’ section.
4. Checking and monitoring the cellular connections. This is discussed in this section.
The cellular menu allows to configure and monitor a single, dual SIM / operator, backup connection.
Single SIM / Operator Connections and Backup
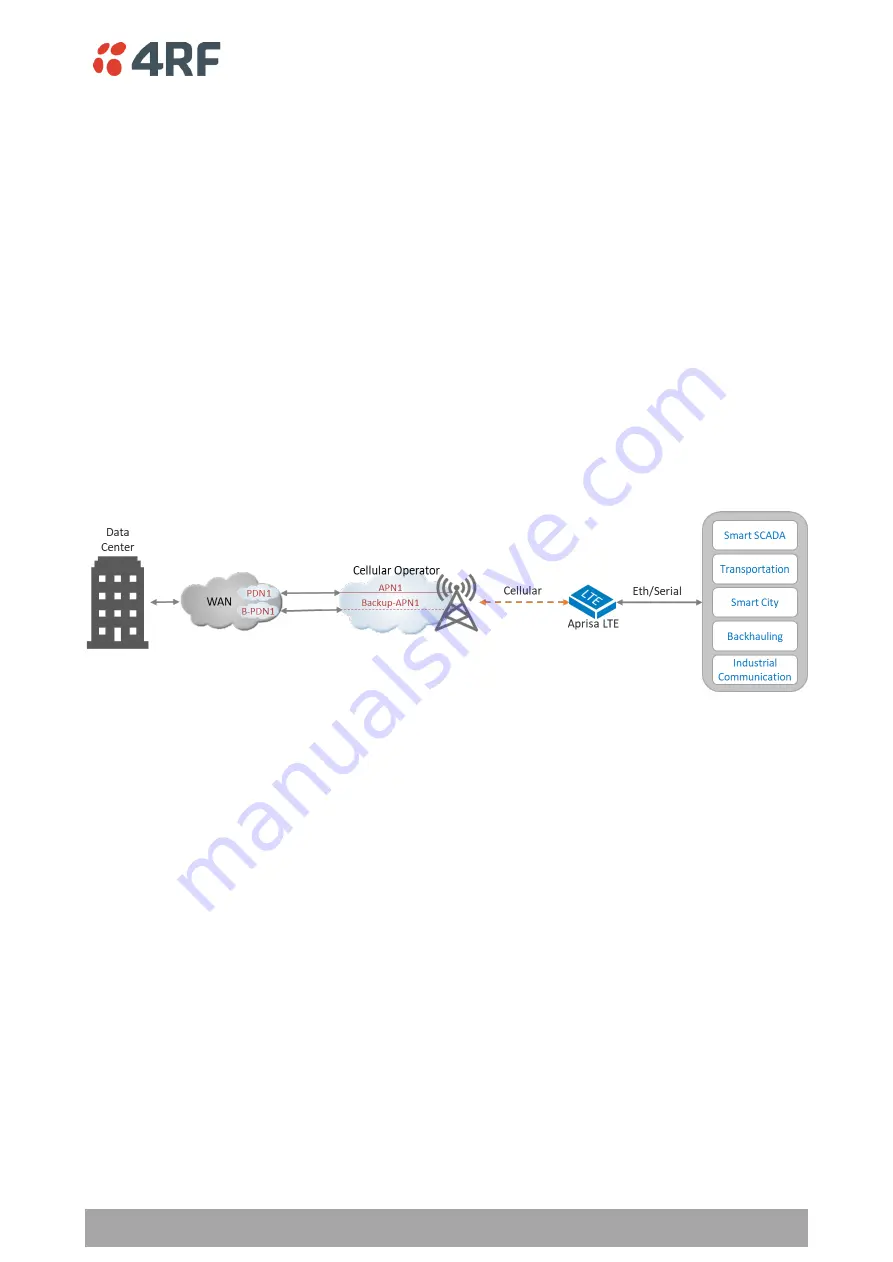
Figure 17 describes a single SIM / operator APN connection with a backup APN as an option withing the same
operator.
Figure 17 Single SIM / Operator Connections and Backup
To setup the cellular LTE connection, perform the following steps:
1. Navigate to SuperVisor
’ and select the required LTE bands supported by the SIM
/ operator in use.
If you are not sure, use the ‘
Select All
’
to select all bands or select only the
supported bands to minimize band search and connection time or restoration time.
2. On the same page, set the cellular operator APN name that identifies the PDN Gateway (P-GW) to
create the connection to the PDN/WAN network. Setup the required active SIM, IP version and
roaming and enable the service connection. Enabling roaming allows the Aprisa LTE being used
outside the range of its home network operator and connects to another available cellular network
operator (high charges might apply).
3. In case of backup connection within the same cellular operator, setup a second APN name identifier
for the backup connection withing the same cellular operator (same SIM). Note: The order of the
APN settings is important, since the first APN is the highest priority followed by lower priority APNs
and in this example the setting should be APN1, B-APN1, respectively).
4. Navigate to Cellular > Carrier/Redundancy and set the cellular redundancy parameters or keep the
default settings. Note: in case of a backup APN connection, set the reverting mode and time as
required.
5. On the same page and once the cellular connection is established, check the health of the
connection. Set the ping test mode for one-time (time or count) or continuous health check and the
rest of the parameters as required. Note: if the link health check fails for the duration of the ‘Link
Failure Timeout’ parameter under the ‘Redundancy Settings’, the Aprisa LTE will automatically
Summary of Contents for Aprisa LTE
Page 1: ...User Manual February 2021 Version 2 1 released with software build 2 1 00811003 ...
Page 2: ......
Page 6: ...6 Aprisa LTE User Manual 2 1 Compliance Canada ISED future compliance ...
Page 10: ......
Page 110: ...110 Aprisa LTE User Manual ...
Page 130: ...130 Aprisa LTE User Manual ...
Page 149: ...Managing the LTE 149 Aprisa LTE User Manual 2 1 Services Services Summary ...


