EE
C o p y r i g h t ©
4I P N E T , I N C . A l l r ig h ts r es er v ed .
4ipnet W H G 3 0 3
Q u ic k I ns ta l l a tio n G u id e
ENGLISH
4ipnet
W H G 3 0 3 S e c u r e W L A N C o n t r o l l e r
System Overview
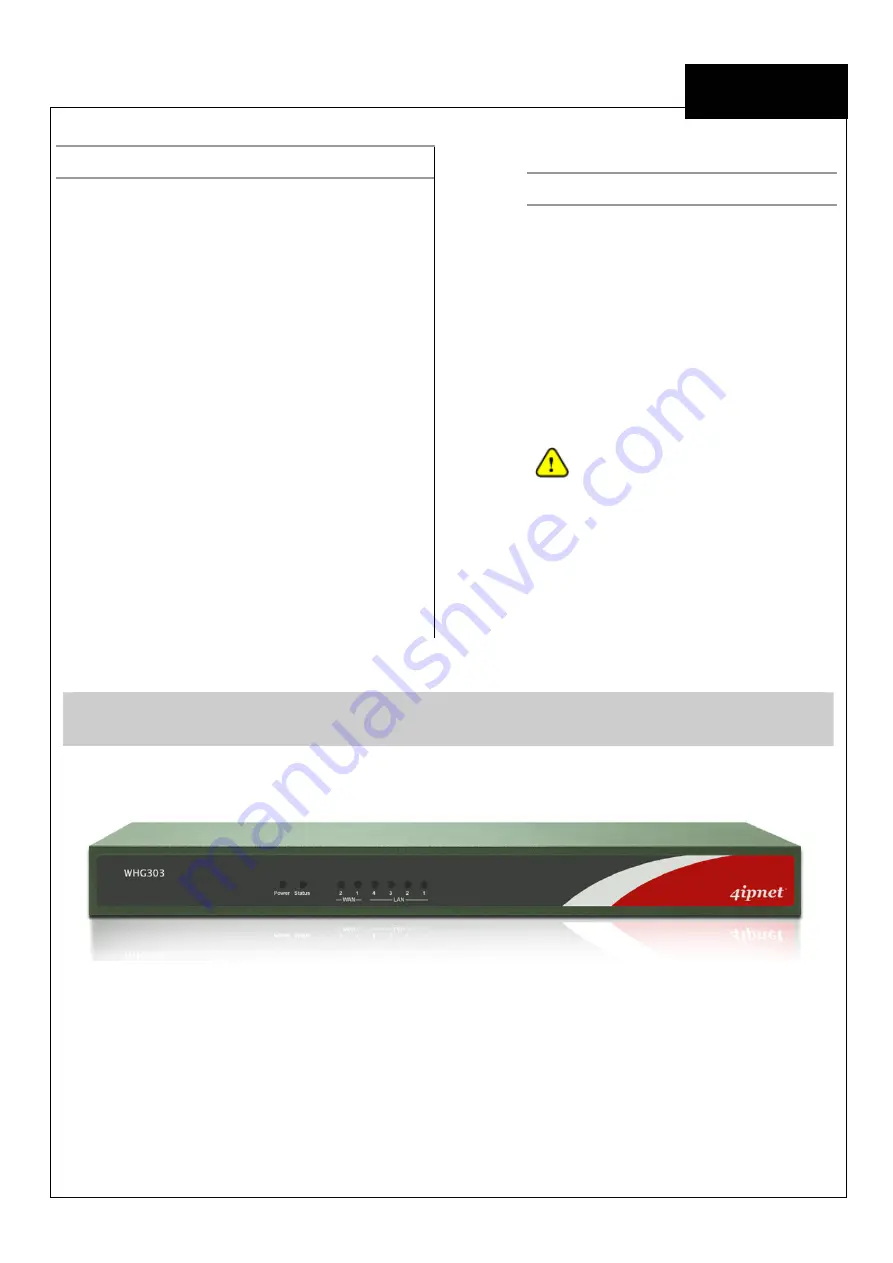
Front Panel
1.
Power
ON indicates the power on, and OFF indicates the power off.
2.
Status
Power and Status both ON indicate system ready, OFF indicates BIOS running, and BLINKING
indicates OS running.
3.
WAN
ON indicates connection, OFF indicates no connection, and BLINKING indicates data transmitting.
4.
LAN
ON indicates connection, OFF indicates no connection, and BLINKING indicates data transmitting.
Preface
4ipnet WHG303 Secure WLAN Controller
is an
ideal solution for small to medium hotspot
deployments, such as in hotels, hospitals,
convention centers, libraries, airport terminals, and
MDUs/MTUs. The WHG303 integrates “secure
access control”, “visitor account provisioning”,
“flexible accounting and billing”, and “high-speed
secure wireless connection” into one box to fulfill the
needs demanded by a public wireless network. It
also provides advanced functions suitable for larger
networks to accommodate more users with multiple
APs to cover a wider service area.
This Quick Installation Guide provides instructions
and reference materials for getting started with
4ipnet WHG303. This guide will also show how to
connect WHG303 to other network devices.
Package Contents
1.
4ipnet WHG303 x 1
2.
Quick Installation Guide x 1
3.
CD-ROM
(with User Manual and QIG)
x 1
4.
Power Cord x 1
5.
Power Adaptor (12DC, 2A) x 1
6.
Cross-over Ethernet RJ-45 Cable x 1
7.
RS-232 DB9 Console Cable x 1
It is recommended to keep the original
packing material for possible future
shipment when repair or maintenance is
required. Any returned product should be
packed in its original packaging to prevent
damage during delivery.