


V-Series Camera Quick Start Guide |
VX-2V-MD-RIWH
12000 Pecos St., Suite 290, Westminster, CO 80234 | www.3xlogic.com | (877) 3XLOGIC
18
Quick Start - Remote Monitoring and Viewing - Adding a V-Series Camera to VIGIL
Client
Steps:
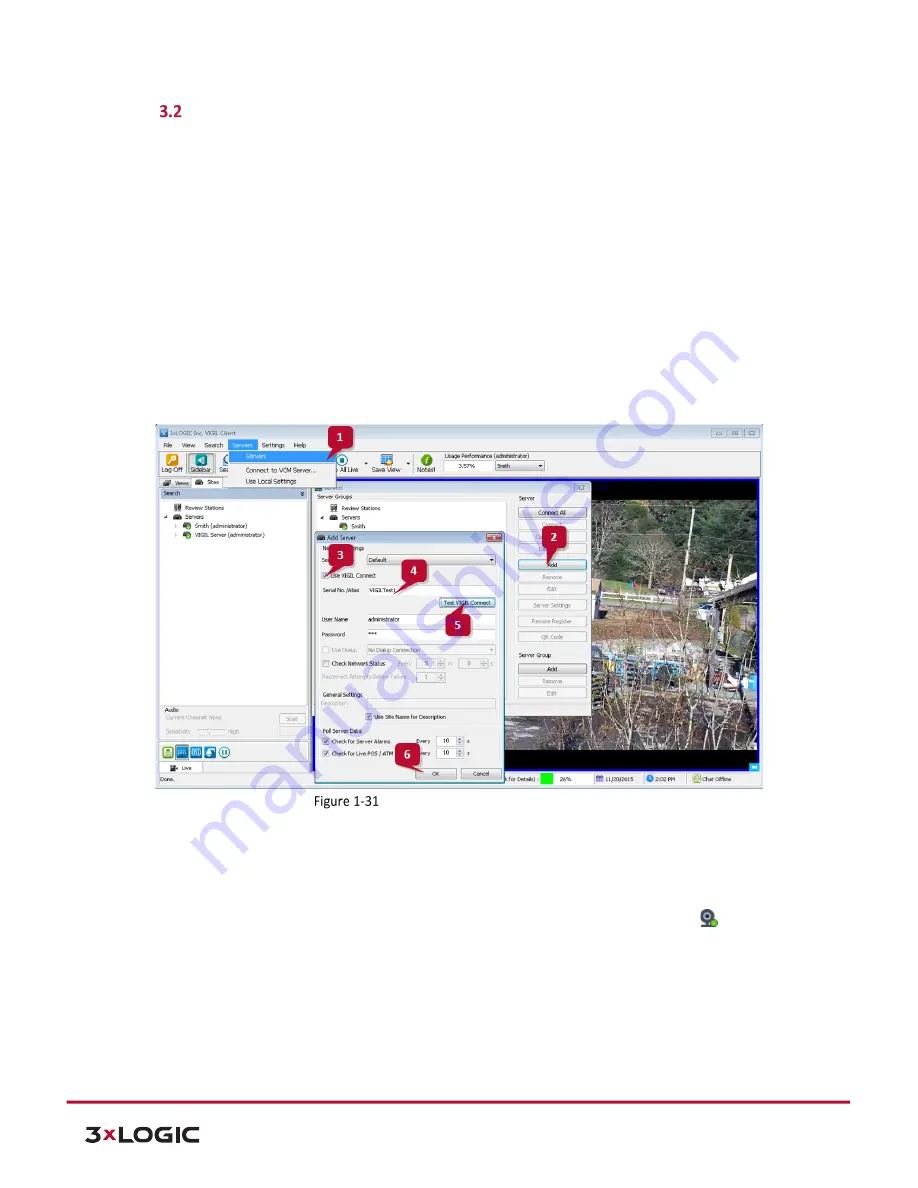
To interface a V-Series Camera with VIGIL Client:
1.
Launch VIGIL Client (
Local Mode
only; VCM mode will only display Servers from a networked VCM Server)
and select
Servers
from the
Servers
top menu. This will launch the Servers window. VISIX V-Series
devices are considered edge recording devices and thus are recognized as their own VIGIL Server within
the VIGIL suite.
2.
Click
Add
. This will deploy the
Add/Edit VIGIL Server
window.
3.
Enable the
Use VIGIL Connect
option. If connecting using traditional network connection criteria is
desired, enter the cameras
IP Address/DNS Name
and confirm TCP/IP port status.
4.
Enter in the VIGIL Connect alias of the desired V-Series Camera (
VIGILTest1
used in the below example).
Skip this step if using traditional network connection criteria (IP/Port).
5.
Click
Test VIGIL Connect
to confirm the camera can be communicated with through the Connect system
using the provided alias. Skip this step if using traditional network connection criteria (IP/Port).
Adding V-Series Camera to VIGIL Client
6.
If the test is successful, then VIGIL Client can successfully communicate with the Server. Click
OK
at the
bottom of the
Add Server
window after configuring all required fields to save the new Server to VIGIL
Client. For more information on configuring VIGIL Servers, please see
Section 5.1
of the VIGIL Client
Users Guide.
NOTE:
The camera will be visible in the Client treeview and will be represented by a
icon. The
camera video stream can be added to the VIGIL Client viewer in the same manner as VIGIL Server
cameras; Simply extend the camera’s drop-down menu and double click the icon to add it to the
viewer. Alternatively, a user can drag-and-drop the camera stream icon into the desired frame of
the VIGIL Client viewer.
For more information on configuring VIGIL Servers/V-Series All-in-One camera in VIGIL Client, please see
Section 5.1
of the VIGIL Client Users Guide