


10
When you squeeze the brake levers
hard or all the way to the end of their
leverage, the braking force can in
-
crease sharply! Please familiarise yourself
with this new braking behaviour. Ensure that
you receive and read the manufacturer‘s op-
erating manual.
Setting up the brake levers
Set up your brake levels in such a way that you
can safely apply them and brake comfortably.
Please familiarise yourself with which lever oper-
ates the front and which the rear brake!
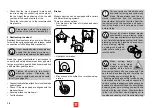
Some brakes are now equipped with power
modulators. This guards against “overbraking”
and any dangerous locking of the wheels.
In order to be able to apply the brake lever if you
have smaller hands, in some models it is possi
-
ble to position the brake levers closer to the han-
dlebars using special equipment. For more on
this, please read the enclosed instructions from
the respective manufacturer.
In some models it is possible to bring the brake
levers closer to the handlebars, using special de
-
vices.
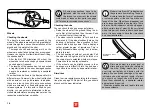
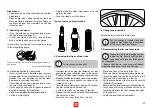
Set up the cable
tension in such a
way that the brake
levers do not touch
the handlebar grip,
even when they
are applied to their
fullest!
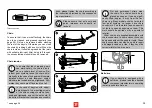
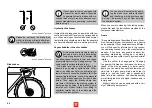
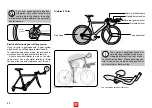
Threadless stem
Adjustable stem
Please ensure that you read the man-
ufacturer‘s operating manual for your
stem. Only allow specialists to work on
your handlebars and stem, do not attempt to do
this yourself!
Height change possible as follows:
•
Exchange of fitted spacers under or above the
stem
• Turning of the stem
• Exchange of the stem
Adjustment of stem tilt possible
Only to be carried out by a special-
ised dealer
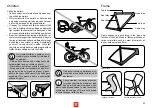
Setting up the position of the handlebars/stem
Various types of stem are used on bicycles:
Changing the position of the stem
also changes the position of the
handlebars. You should always
be able to safely reach and use grips and
controls. Please ensure that all cables and
lines are long enough to allow you to turn
the handlebars in every possible way.
Quill stem
Height adjustment possible
STOP
When adjusting the height of the
seat, never pull the seat post further
out than the maximum extension
length marked! If your tube does not have a
maximum marking, then you must leave a
minimum insertion length of 7.5 cm.