background image

NR Series Precision Colorimeter 


17 

Notes :   

1.  When  performing black calibration, direct the  measuring port to the 

air.    Be sure the black calibration is starting in a dark , no bright light 
source  environment. Kee p the measuring port more than  1m away 
from any reflective items (hands, desks, walls etc.).


2.  No need to enforce black and white calibra tion. Once  turning it on, 

you  can  start  the  measurement .  It  is  suggested  to  perform 
calibration  in  following  occasions :  first  use,  great  change  of  the 
environment,  long-term unused or  inaccura te data.   


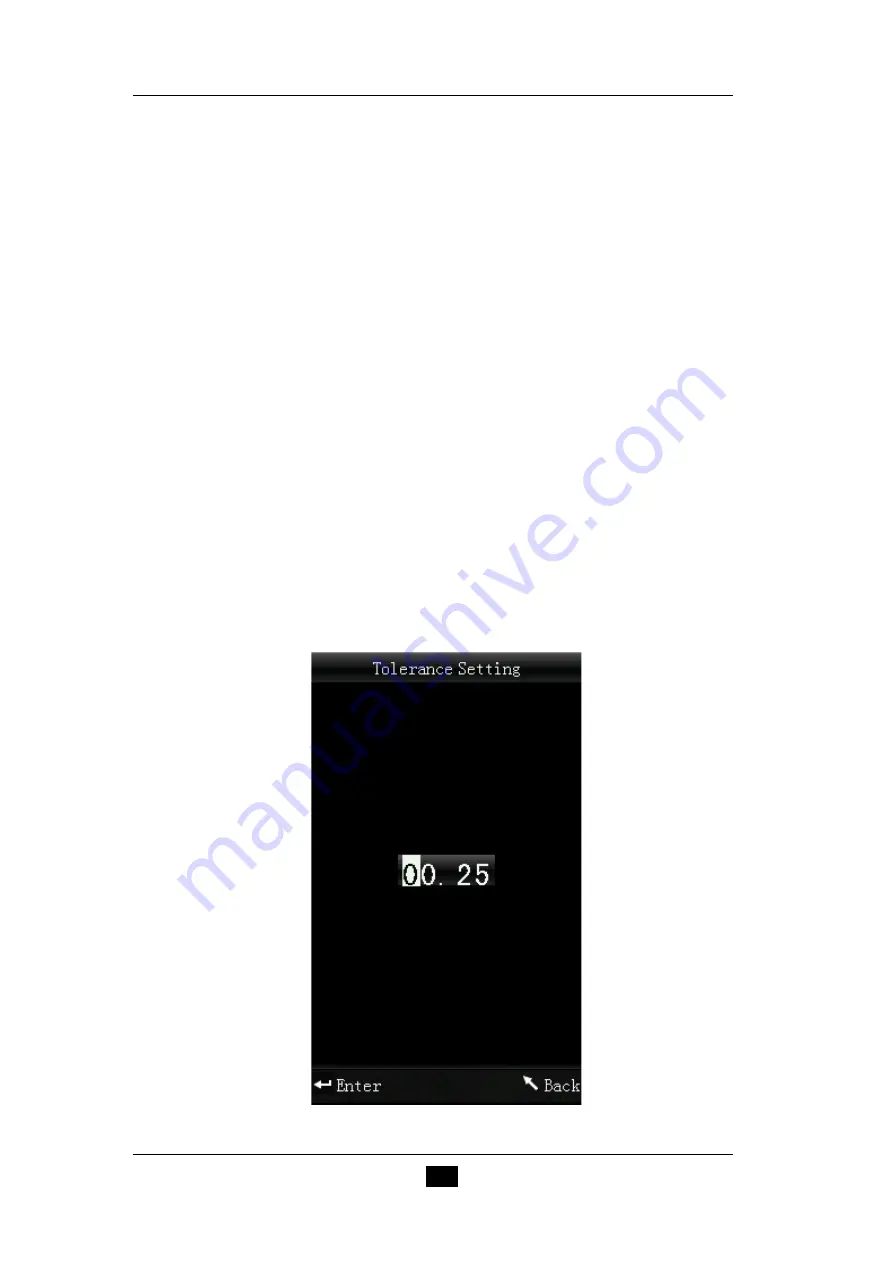
3.  Tolerance Setting 

Select “Tolerance” in main menu to enter tolerance setting interface, as 
shown in Figure 14. You can add or subtract the number in which the 
cursor is positioned through “Up” and “Down” button. After setting the 
number to the needed one, press “Enter” button, the cursor will jump to 
the last number. When  the cursor is in the last number,  press “Enter” 
button to save the settings and return to the main menu. 


If you don’t want to set or modify the tolerance, you can press “Back” 
button to return to the main menu. 


Figure 14 Tolerance Setting 

Summary of Contents for NR10QC

Page 1: ......

Page 2: ...Measurement Locating 9 2 Standard Measurement 9 3 Sample Measurement 10 III Connect Colorimeter to PC 11 IV Print 13 VI System Function Description 14 1 Record and Standard Entering 14 2 White and Black Calibration 16 3 Tolerance Setting 17 4 Delete Records 18 5 Average Measurement 21 6 Display Mode 221 7 Function Setting 25 VII Product Parameters 32 1 Product Features 32 2 Product Specifications 3...

Page 3: ...ng aperture for more measurement occasions Save data automatically The precise and stable hand head structure to make the measurement easier Cautions This colorimeter is a precise measuring instrument Please avoid dramatic changes of external environment when measuring These changes including the flicker of surrounding light the rapid change of temperature will affect the measuring accuracy Keep the...

Page 4: ...t cabinet when not in use Please take out the battery to prevent the colorimeter from damage if you don t use it for a long time Please keep the colorimeter in a cool dry place Any unauthorized changes to the colorimeter are not permitted or it will affect the measuring accuracy even cause irreversible damage ...

Page 5: ...Colorimeter 3 I Button Description The following is a brief introduction of the buttons We will give more detailed information about its function separately in next chapters Figure 1 Button Function Up Down Back Menu Enter ...

Page 6: ...NR Series Precision Colorimeter 4 Figure 2 Testing Button Diagram Button Function Introduction 1 Menu 2 Up 3 Down 4 Enter 5 Back 6 Testing Testing ...

Page 7: ... is used to connect to external power source The specification of external power source is 5V 2A 3 USB Interface RS 232 Interface This interface is a common interface The instrument judges the connection status automatically USB interface is used to transfer data to PC Its baud rate is 115200bps RS 232 interface is used to connect to the printer Note When connecting to external power s ource please...

Page 8: ... external power source or USB cable to connect the PC Meanwhile push the switch to 1 and then the battery will be charging If not charge the battery then take out the battery and connect external power source the instrument still works normally 5 When charging the battery dynamic battery icon will display on the top right corner of measurement interface Battery Installation 1 When installing batte...

Page 9: ...NR Series Precision Colorimeter 7 Figure 4 Battery Installation Li ion Battery Battery Cover ...

Page 10: ...th integrating sphere Then the installation is finished 2 Measuring Aperture Dismantlement As shown in Figure 5 gently turn measuring aperture clockwise When hear slight Da it means the measuring aperture is separated with the buckling parts of integrating sphere Then the measuring aperture is dismantled Figure 5 Installation and Dismantlement of Measuring Aperture Note some models are only equippe...

Page 11: ...rement or Sample Measurement interface press the Testing key and hold it The facula will appear at the moment You can observe the matching status between the facula and the measured sample At the same time hold the measuring aperture close to the measured sample and adjust it Then the alignment is achieved After the locating release Testing button The instrument will finish sample testing in approx...

Page 12: ...ement Interface 3 Sample Measurement After completing standard measurement press Enter button the instrument will enter Sample Measurement interface automatically as shown in Figure 7 Align the measuring aperture to the test sample to perform sample measurement ...

Page 13: ...nnect Colorimeter to PC only for models equipped with software Press MENU button to enter the main menu as shown in Figure 8 Then select Comm to enter an interface shown in Figure 9 Follow the tips in the interface connect colorimeter to the PC with USB cable Press Enter button the instrument will enter Communicating interface as shown in Figure 10 ...

Page 14: ...NR Series Precision Colorimeter 12 Figure 8 Main Menu Figure 9 USB Communication ...

Page 15: ...n Colorimeter 13 Figure 10 Communicating Interface IV print Connect colorimeter to the printer When the colorimeter is in Standard Measurement or Sample Measurement interface you can print measurement data automatically ...

Page 16: ...n menu to enter Standard Record as shown in Figure 11 The figure shows the standard sample data You can check different standard data through Up and Down T002 is a standard number After selecting a standard you can press Enter to check test sample data and color difference as shown in Figure 12 You can check different data through Up and Down No 001 is the serial number of sample measurement Figure 11...

Page 17: ... standard record is entered to the measurement interface press Enter you can perform sample measurement under this standard c Sample Record Entered to a Standard In some cases it s needed to use a stored sample as a standard Then you can select Record to enter sample records interface as shown in Figure 12 You can search the needed sample data through Up and Down After finding it press Menu button ...

Page 18: ...g aperture upwards then put the white calibration board in the center of the colorimeter and make sure it is closed to measuring aperture Re press Testing key to perform white calibration Next step is black calibration remove white calibration board Select Black Calibration and press Enter button the instrument will prompt to direct the measuring aperture to the air please refer to the Notes under...

Page 19: ...lowing occasions first use great change of the environment long term unused or inaccura te data 3 Tolerance Setting Select Tolerance in main menu to enter tolerance setting interface as shown in Figure 14 You can add or subtract the number in which the cursor is positioned through Up and Down button After setting the number to the needed one press Enter button the cursor will jump to the last numb...

Page 20: ...nagement If ΔE is smaller than tolerance value then it is qualified If ΔE is bigger than tolerance value then it is unqualified As shown in Figure 14 1 the ΔE in sample measurement interface is unqualified Figure 14 1 Sample Measurement Interface 4 Delete Records Select Delete in main menu to enter the interface shown in Figure 15 There are two options Delete All Samples and Delete All Records ...

Page 21: ...ples When select Delete All Samples it will delete all test samples in the instrument and save the standard records Then the instrument will display a warning interface as shown in Figure 16 Press Enter all sample data will be deleted but the standard records are still retained ...

Page 22: ...cords in the instrument will be deleted including all standard records and all sample records Then the instrument will pop up a warning interface as shown in Figure 17 Press Enter button all records in the instrument will be deleted Note Please operate this interface carefully in case of accidental deletion of the needed historical records ...

Page 23: ...e 18 You can set the times of average measurements according to your need You can add or subtract the times by pressing Up and Down buttons Press Enter to save the settings and return to the main menu When the number is set to 00 01 the instrument will only make single measurement and will not perform average measurement The instrument is defaulted to one time measurement ...

Page 24: ...ain menu to enter an interface as shown in Figure 19 You can select different color spaces according to your need This selection will affect the display in Standard Measurement and Sample Measurement interfaces You can make settings by pressing Up and Down button Then press Enter to save the settings and return to main menu ...

Page 25: ... Colorimeter 23 Figure 19 Display Mode Interface The display mode will default to CIE L a b C H Other options are CIE L a b CIE XYZ Measurement interfaces of each option are corresponding Figure 20 Figure 21 and Figure 22 ...

Page 26: ...NR Series Precision Colorimeter 24 Figure 20 CIE L a b C H Measurement Interface Figure 21 CIE L a b Measurement Interface ...

Page 27: ...ettings in main menu to enter an interface shown in Figure 23 You can select the object according to your need by pressing Up and Down buttons Press Enter to enter the corresponding setting interface After completing these settings press Enter button to save the settings and return to the previous menu ...

Page 28: ...unction Settings Interface a Select Function Settings Language to enter an interface shown in Figure 24 You can select the language according to your need by pressing Up and Down buttons Press Enter to save the settings and return to the main menu ...

Page 29: ...ton Up and Down In Figure 26 and Figure 27 you can add or subtract time and date by pressing the button Up and Down In Figure 28 and Figure 29 you can set display format of time and date by pressing Up and Down Press Enter to save the settings and return to the previous menu If you don t want to set or modify time and date you can press Back button to return to the main menu ...

Page 30: ...NR Series Precision Colorimeter 28 Figure 25 Time Date Setting Figure 26 Time Setting ...

Page 31: ...NR Series Precision Colorimeter 29 Figure 27 Date Setting Figure 28 Time Format ...

Page 32: ...nter an interface shown in Figure 30 Press Enter button The instrument will restore to factory default setting and clear all records Note When you choose this setting it will pop up a warning Please operate it carefully If you don t want to carry out Restore Factory Settings please press Back button ...

Page 33: ...NR Series Precision Colorimeter 31 Figure 30 Restore Factory Settings ...

Page 34: ...ly and accurately Small measuring aperture easy to measure concave convex object No need to calibrate each time which simplify the operation New integrating sphere optical path design improve measurement stability and precision This colorimeter has various color spaces The users can select it according to their needs And the instrument can display Whiteness Yellowness and Color Fastness which is u...

Page 35: ...ace Detector Silicon photoelectric diode Color Space CIEL a b C h CIEL a b CIEXYZ Color Difference Formula ΔE ab ΔL a b ΔE C h Light Source D65 Measuring light source LED blue light excitation Errors between each equipment 0 50ΔE ab Storage 100 pcs standard samples 20000 pcs test samples Repeatability Standard deviation within ΔE ab 0 08 Measurement conditions Average of 30 measurements of standard...

Page 36: ...ty range relative humidity 0 85 with no condensation PC Software CQCS3 Color Quality Management Software Data interface USB RS232 Portable packing bag Original Standard accessories Powder adapter Li ion battery operating instruction white calibration cover wristband cross platform 4mm measuring aperture software USB cable 4mm aperture for small concave convex surface Optional accessories Miniature...

Page 37: ... have modulated the light source spectrum Different objects have different reflectance spectra transmittance spectra The light source spectrum modulates the reflectance spectra transmittance spectra of different objects to obtain different results The observer is the same so it shows different colors The theory is shown in the figure below The Size of E Total Color Aberration L is large positive the color...

Page 38: ... the color difference units calculated by other color difference formulas are all NBS In national standards GB7705 87 lithograph GB7706 87 letterpress GB7707 87 gravure which promulgated by the National Bureau of Standards the color printings rating in the same batch and same color according to color difference are defined as follows General Product ΔE ab 5 00 6 00 Fine Product ΔE ab 4 00 5 00 Meanwhi...

Page 39: ......

Reviews: