Disassembly: Remove
the End Caps
1. To reduce the stress on the plastic parts,
partially loosen the 12 bolts on the end cap in a
star shaped pattern.
2. Completely loosen the bolts in the same star
shaped pattern.
3. Remove all hardware from the end cap,
including the nuts, bolts, backing rings,lifting
rings, etc. Save these parts to use when
reassembling the end caps.
Note:
Even with the hardware removed, the end
cap should remain in place due to the o-rings still
seated on the center nozzle of the end cap.
4.
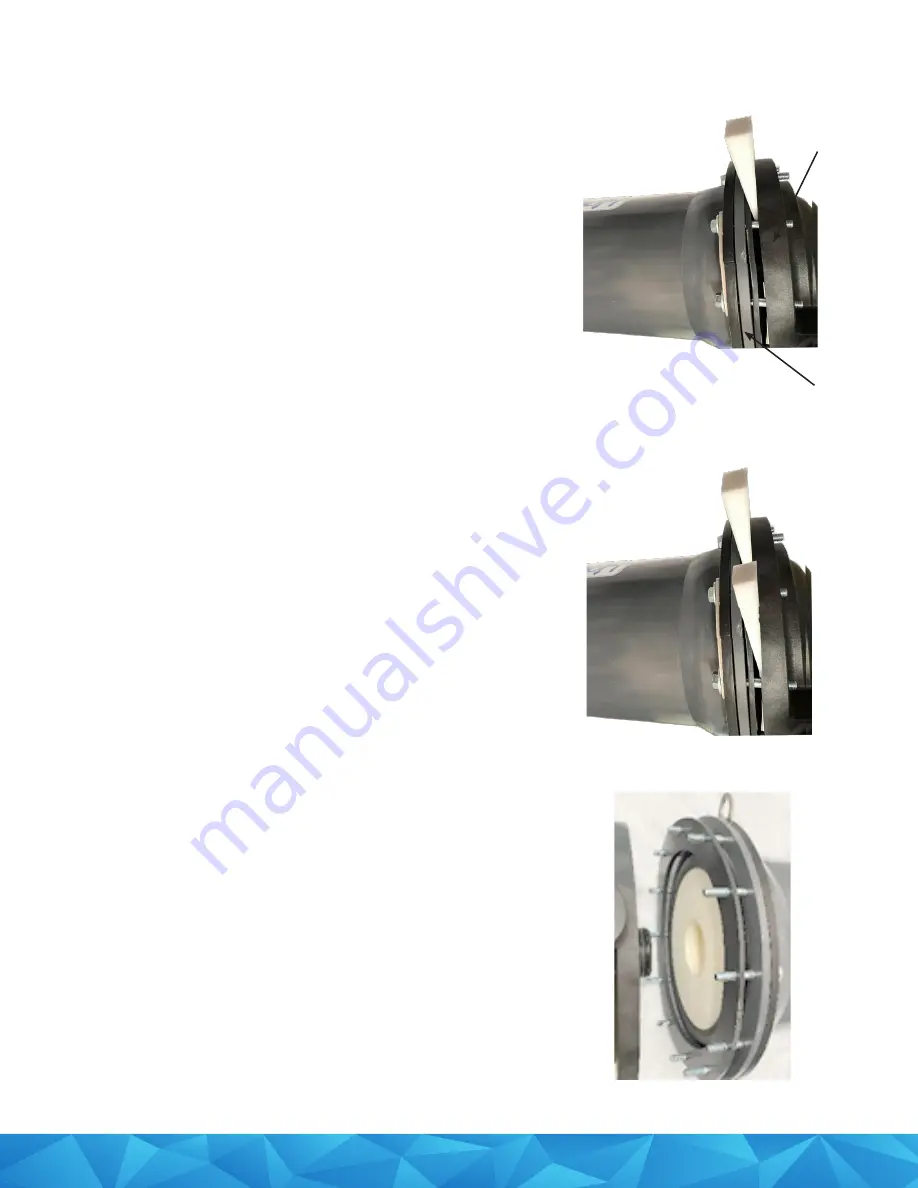
Place a wedge between the gasket and the
end cap. The flat side of the wedge should face
toward the end cap as shown in figure 1.
NOTICE:
Placing the wedge between the gasket
and the vessel could lead to wedge or vessel
damage when the wedge hits internal parts of the
contactor. Tap gently to avoid damage.
5. Using a rubber mallet, gently tap the wedge until
there is enough space between the gasket and
the end cap for a second wedge as shown in
figure 2.
6.
Insert a second wedge between the gasket and
the end cap at 90° from first one. Gently tap the
second wedge until there is a large enough gap
for a third wedge at 90°. See figure 2.
7. Repeat this process for a third wedge. If needed,
repeat the process again for a fourth wedge.
8. After all of the wedges are in place, gently tap
each wedge, one at a time to evenly move the
end cap away from the contactor vessel.
9.
When the wedges can go no further, the first
o-ring may come free because it will no longer
be seated on the center nozzle.
10.
Gently and evenly pull the end cap past the
second o-ring.
Note:
Move slowly so that the end cap does not
suddenly come loose and fall.
Figure 1: Wedge inserted between the
gasket and end cap.
Figure 2: Two wedges inserted
between the gasket and end cap.
Figure 3: End cap moved away from the
vessel


