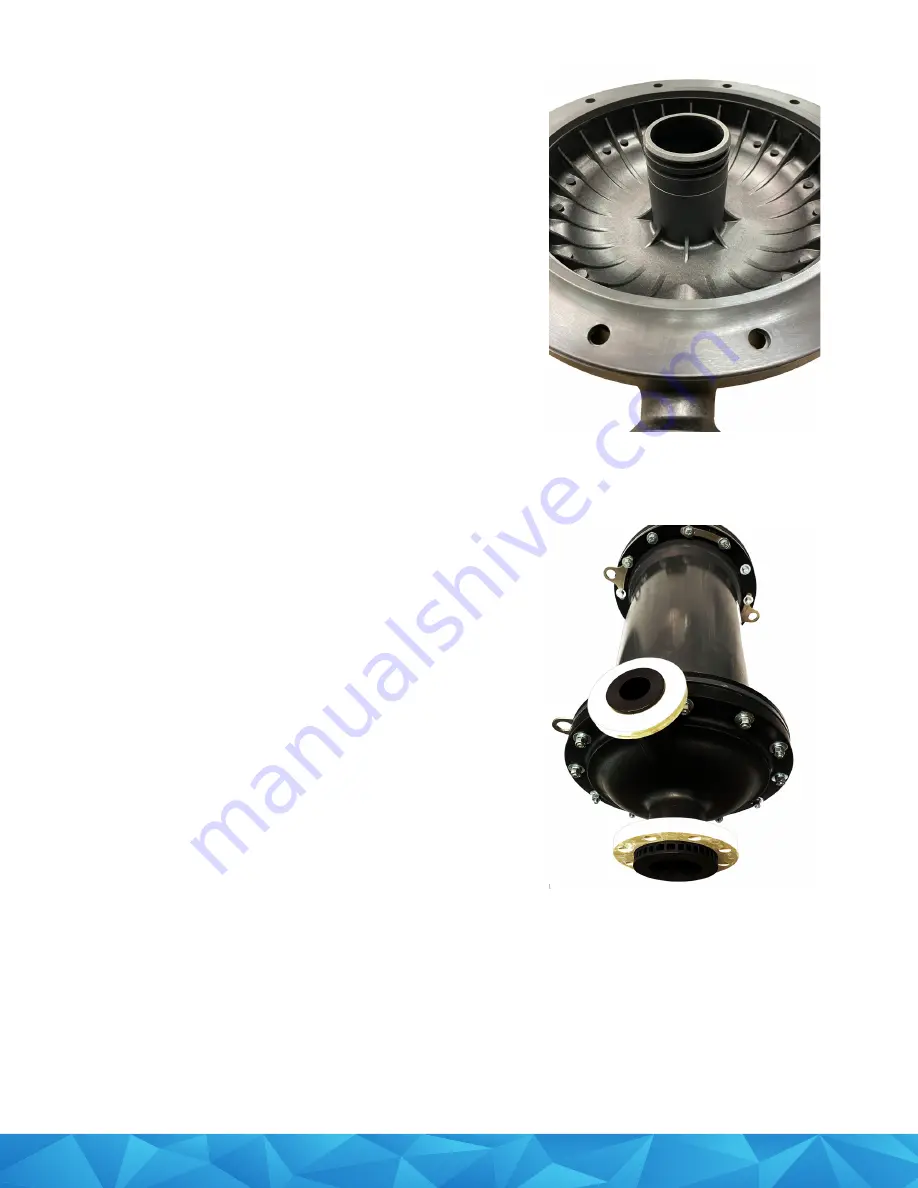
7. Place two o-rings into the grooves on the center
nozzle on both end caps as shown in figure 7.
•
If the first o-ring will not go into the groove
by hand:
1. Put a nut on every fourth bolt.
2. Use an impact wrench set to 30 ft-lbs and
slowly tighten each bolt in a star pattern.
Be sure that the o-ring does not get
pinched.
3. When the second o-ring gets to the
groove, remove the four nuts.
8. Lubricate the o-rings with deionized (DI) water.
Attach the End Cap to
the Contactor Vessel
1.
Make sure that the bolts on the contactor vessel
flange are sticking out so that they will hold the
end cap.
2. Line up the holes in the end cap with the bolts
on the contactor vessel flange and press the end
cap nozzle into the contactor vessel center tube
as far as it will go.
3.
Add a large flat washer, a lock washer, and a nut
to each bolt, and tighten by hand.
4. Use an impact or torque wrench, set to 30 ft-
lbs, in a star pattern to tighten the nuts. This will
evenly pull the end cap into the center tube.
Note:
Use a wrench on the bolt head to prevent the
bolt from rotating during tightening.
5. Set calibrated torque wrench to 40 ft-lbs. With
the wrench on the bolt and the torque wrench
on the nut, turn until the torque wrench starts
clicking.
6. Repeat this action for each bolt in a star pattern
to equalize the flange stresses.
7. Verify the torque on all bolts.
8. Repeat the end cap disassembly and assembly
process for the other end of the contactor.
Figure 7: O-rings on the center
nozzle grooves of the end cap
Figure 8: Attach the end cap to
the contactor vessel.


