background image

http://www.3jtech.com.tw  

http://www.3jtech.com


CAMit I+gsm 

Copyright of 3JTech Co., Ltd. (also doing business as A3J Engineering Inc.) 


27 

Select a Modem 

If you have more then 2 modems installed on your 
compute, you will be able to decide which one is used to 
connect to the camera. To select the modem, please 
select from File menu 

Setup 

Æ

 Select Modem

. When the 

page loads, simply select the modem you would like to 
perform the task and click 

OK

 when done.   


Hang Up: 

If you have made a call to wrong site, click on the 

Hang Up

 button at anytime to terminate 

the dialing. 

5.2.3 Browsing Camera 

This section will show you how to utilize the browsing window of your camera. 

5.2.3.1 Browsing Window 

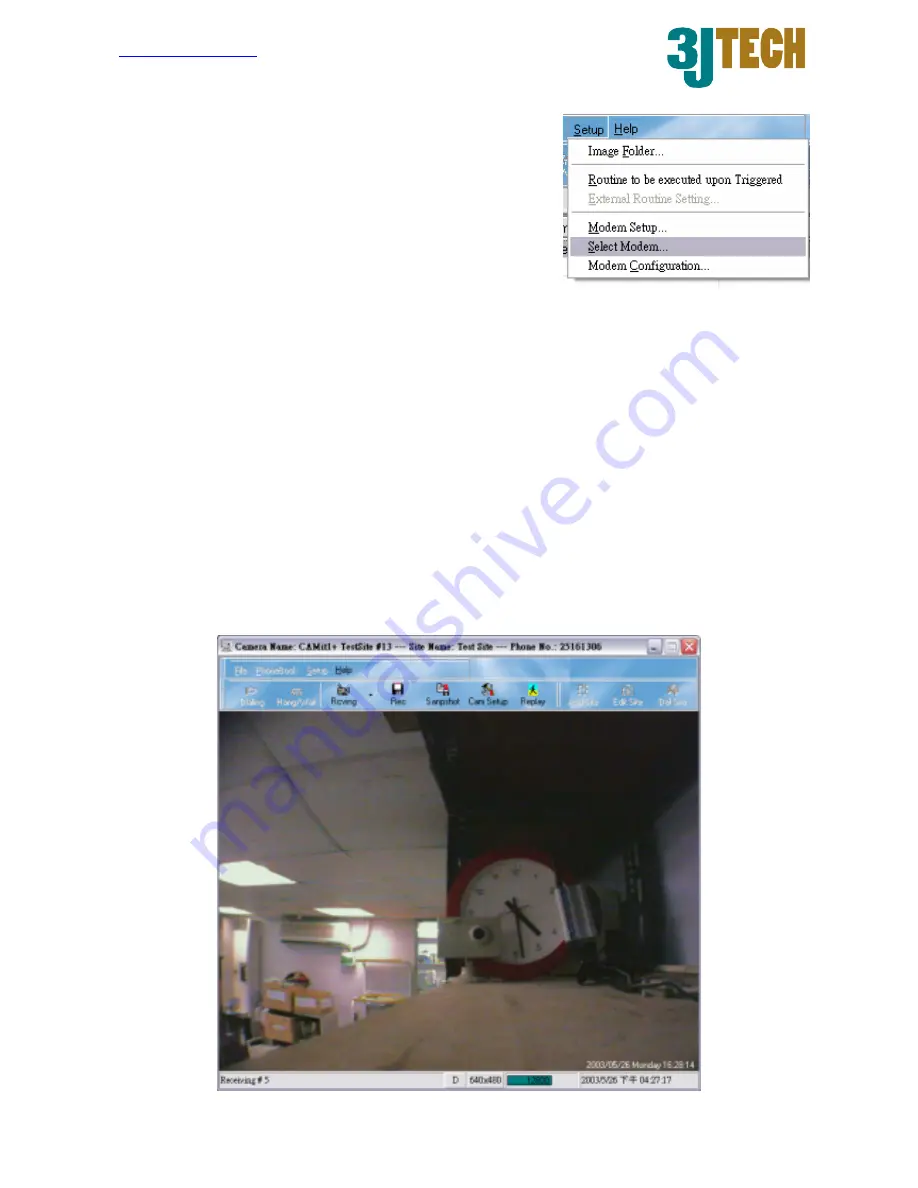
When you have established the connection between your camera and your computer, the 
images will start loading. The progress bar at the button will show you how your 
connections have been, and indicate when the image is about to complete. 


Summary of Contents for CAMit I+gsm

Page 1: ...ht of 3JTech Co Ltd also doing business as A3J Engineering Inc 1 CAMit I gsm Camera with built in Modem User s Manual CAMit I gsm Manual revision 1 1 Date August 22 2003 3JTech Co Ltd 342 Fu Hsing N Rd 2F Taipei Taiwan Tel 886 2 2500 6919 e mail info 3jtech com tw ...

Page 2: ...ch We carefully manufactured our products for you Each unit is assembled within our own premises with the highest standard of quality Our personnel are pleased to provide you with the best engineered technology If for whatever reason you are not satisfied and the product is not up to the specifications posted our products are fully guaranteed You are invited to visit our website http www 3jtech co...

Page 3: ...8 Serial Number Firmware version 8 2 3 Power Supply Adaptor 9 Power Point Adaptor 9 RJ 22 Camera Point 9 Trigger In Out Connector 9 Trigger Out 9 Trigger In 9 Ground 9 3 Assembling Camera 10 3 1 Mounting Methods 10 3 2 Outdoor Housings 10 4 Quick Setup Installing Your Camera Software 11 4 1 Installing Software 11 4 2 Modem 13 4 3 Installing Your Camera 13 5 Application Software provided 14 5 1 CAM...

Page 4: ... Remotely Setup the Camera 29 5 2 4 1 Primary Setup 29 5 2 4 2 Security Setup 31 5 2 5 Recording Image 33 5 2 5 1 Setup Recording Directory 33 5 2 5 2 Recording 34 5 2 5 3 Call Back Recording 34 5 2 6 Play Recorded Images 34 5 2 6 1 Delete Recorded Images 36 5 2 6 2 Save Images into JPG files 36 5 2 7 Modem Configurations 37 5 2 8 External Routine 37 5 2 9 Help 37 6 Frequently Asked Questions 38 C...

Page 5: ...e to transmit live images via phone line You can also link the device with an external GSM modem together with GSM sim cards you have created a wireless environment for your CAMit I You can dial in the CAMit I from any remote location using a computer and a modem to monitor in real time and record images CAMit I can also be triggered by its built in motion detection normal close to open or other e...

Page 6: ...for security purposes 9 Trigger In Out connector for connecting external sensor for monitoring and security purposes 9 Up to 8 external Trigger In Out upgradeable 9 Record images onto hard drive of computer Jpeg format available 9 Password protection 9 Small size and low power consumption 9 Automatic Manual gamma correction 9 Non aging CMOS image capture device 1 3 Package Content 1 1 CAMit I came...

Page 7: ...era This includes the functions and the locations of each connector and indicator The information provides useful reference when installing the product Please familiarize yourself with CAMit cameras 2 1 The Front Panel Lens CAMit I box includes a standard 120 wide angle lens fix to the camera For custom user other types of lens are also available upon request Please note that different price may o...

Page 8: ... GSM is designed for connection via phone lines and modems please plug the phone line here Power Supply Connector CAMit adopts unique RJ22 cable for power supply The special featured RJ22 cable includes Input Output I O function Simply connect the Input Output cable to desire address and no hardware jumper fixing on camera is required Serial Number Firmware version The label sticker includes the s...

Page 9: ...g this end to the camera s RJ22 slot Trigger In Out Connector The Trigger In Out connector cable is connected to the RJ22 AC power adaptor Trigger Out The Red cable is for Trigger Out and it needs to be connected to TTL level 0 5 V external devices Trigger In The White cable is for Trigger In and it also required to be connected to TTL level 0 5 V external devices Ground The Ground cable is the bl...

Page 10: ...ition the camera fasten the camera with screws in the holes at the base of the mount The default mount configuration is the desktop mount In case of ceiling mount remove the screws attaching the mount to the camera and re attach the mount to the spare hole on the top of the camera Wall mounting leg is optional accessory upon request with additional charge Please contact your local dealer for more ...

Page 11: ...mera step by step including the installation of application software and using the software to configure the camera 4 1 Installing Software 1 Place the Application CD into your CD Rom drive 2 When the Install window show up select Setup CAMit I AP If the window does not load automatically please go to my computers and double click on the CD Rom drive with installation CD or run the setup exe file ...

Page 12: ...and press Next 4 The window will then ask you for your user information Please enter the user information accordingly 5 Choose Destination Location If you wish to change the destination folder for CAMit I GSM software please press browse and select your desired folder else press Next 6 Start Copying Files Please click Next to continue or Back to go back to Choose Destination Location 7 Please wait...

Page 13: ...SM Most common ones are the following 8 bits no parity 1 stop bit Hardware Flow Control Clear to Send CTS Carrier Detect ON Normal DTR Operations Auto Answer ON if you wish to received a call dialed by a triggered CAMit I Please refer to your modem user manual for more information on installing the modem 4 3 Installing Your Camera After you have set up your modem and installed the software we prov...

Page 14: ...P and Image Player and downloaded this user s manual from the CD provided in the package The CAMit I Setup are used to setup the parameters of the camera It needs to be connected to the camera using a PC via a serial port To do so a DB9 RS232 serial cable is provided from the package The CAMit I AP is the application software to communicate with the CAMit I GSM remotely Please read this user s man...

Page 15: ... may also download new softwares from http www 3jtech com Downloads htm web site Start the CAMit I Setup Application After selecting the correct com port with valid connections between PC and CAMit I GSM you will be able to begin setting the parameters of CAMit I 5 1 1 Setting Parameters You will be able to select 2 different sections for the setup the Primary Settings and the Security Settings Yo...

Page 16: ...e you wish for up to 24 characters and numbers Camera Password You can set the password to your camera It will protect others from accessing your camera Simply enter the desire password with any combination of characters and numbers up to 24 characters Country Code The country code is the section where you will be able to select the country the camera is set This is used because different country ...

Page 17: ...an external GSM modem as the method of connection To enable this function please check the check box before the description Note You will need to reset the camera to initiate this function The camera will reset itself after you update the information Please wait for at least 1 minutes before try and connect to you camera Camera s Date This section will show you how to set up the real time clock fo...

Page 18: ...til you click on save button 5 1 2 2 Adjust Sensor Adjust Images To adjust the settings of the images please click on Configure button A window should load when click You will able to adjust the different variables such as brightness contrast saturation sharpness hue backlight and exposure of the camera by drag the scroll bar left and right Click on Auto will allow the camera to do automatic adjus...

Page 19: ...e check the box Sensitivity You can choose between 3 different sensitivities to suit your purpose Please select one of the 3 options from High Mid and Low Trigger In Settings Here you will be able to enable the trigger in function for your camera Please check the trigger in box you wish to enable it Device 1 of Trigger In is the default device that came with the camera the wiring for it is set to ...

Page 20: ...ease insert the time accordingly to the text boxes It operates with 24 hour time and depend on the real time clock built in the camera For more information regarding to setting up the real time clock please refer to the Camera s Date section Number of Images Send This will let you configure the number of pictures for the camera to send when it is triggered Simply enter up to maximum of 20 picture ...

Page 21: ...e area code in order for the number to be valid Please make sure that if you re dialing off state the area code is added Manually Enable Trigger Output By enabling this function you will be able to turn on the trigger out device manually Simply check or uncheck to turn the device on and off Time Output Duration Upon Trigger sec This parameter is used along with the trigger in or motion detection f...

Page 22: ... 160x120 To stop receiving images please click Stop To exit click Exit 5 1 5 Save and Restart the Camera When you are finished setting the camera s parameters you must save the new setting to the camera else you the new settings will not be saved To do so simply click the save button after all parameters are set Certain functions require you to reset the camera To reset the camera remotely without...

Page 23: ... CAMit I GSM is connected to a phone line from a remote PC you can run the CAMit I AP to dial in and connect The system will demand you to select the modem It is this modem that you will be using to dial your camera site You must have a modem selected in order to dial 5 2 1 CAMit I plus Camera Site Menu The main menu would then appear Phonebook List Shortcuts File Menu ...

Page 24: ...ready the system will as you whether to save the old phone book first before creation of the new one Save Phonebook You can save each of the phonebook and open them at later stage To save the Phonebook please select File Æ Save Phonebook Please give the file a name and save it If you have not yet saved the phonebook the system will ask again before you exit the program Open Phonebook To open a pre...

Page 25: ...t and highlight the camera site you wish to delete and click the Del Site button or right click and select Delete Site After confirmation the camera site should be removed from the list immediately Edit Camera Site To edit the camera site on the list first select and highlight the camera site you wish to edit and click on the Edit Site button or right click and choose edit A sub window should appe...

Page 26: ...th the camera select and highlight the site listed on the main menu which you wish to dial and click the Dialing button at the top of the window Or you can simply double click on the site and the program will dial for you If you have set password for your camera you will have to type in the password before the system allows you to browse the images To setup the dialing on your local computer pleas...

Page 27: ... loads simply select the modem you would like to perform the task and click OK when done Hang Up If you have made a call to wrong site click on the Hang Up button at anytime to terminate the dialing 5 2 3 Browsing Camera This section will show you how to utilize the browsing window of your camera 5 2 3 1 Browsing Window When you have established the connection between your camera and your computer...

Page 28: ...You will be able to change the capturing size for the camera to suit the network condition You will be able to select the image size from 640x480 320x240 and 160x120 To change the image size simply click the arrow next to receive and select the desire image size The new image size will be effective on the next coming image 5 2 3 4 Change Screen Size When you re browsing at smaller image size such ...

Page 29: ...n the top of the window The setup is divided into 2 main sections Primary and Security Primary setup contains all the basic attributes for the camera where as Security has the parameter enabling the camera to utilize its security functions 5 2 4 1 Primary Setup Camera Name The Name of the camera site This information will be useful when you record the images as it will identify saved images Camera...

Page 30: ...y check the box Please note that the function will only be available when the camera detects the existence of the GSM modem Camera s Date You will be able to set the camera internal real time Please insert the time you wish to set the camera to be or you can check the synchronize with PC s Date Time and the system will update the current computer time when you exit the setup Adjust Sensor You will...

Page 31: ...puter upon motion detection The files will also automatically be recorded to the hard drive of the computer for future reference To enable the motion detection please check the box Sensibility You will be able to choose 3 different sensibilities for your Motion Detection simple choose High Med or Low according to your need Trigger In Please check the box to enable Trigger In function Please note t...

Page 32: ...the time at the space provided Image Captured This is where you can set the images to be captured after the camera has been triggered and detects unusual intrusion Please insert the number of image to be captured at the space provided Image Size You will also be able to select different image size to be captured Please select between 640x480 320x240 160x96 Call Back Functions Your camera will do a...

Page 33: ...the number of second you wish the camera to trigger the devices Manually Trigger Out You will also be able to manually trigger out the device at your own will Simply click on the button and the device will be triggered until you stop it Security Function Delay Time upon Activation This time is used when you have enabled the security function such as Trigger In or Motion Detection It is the delay s...

Page 34: ...Shot button and the current image will be saved into JPEG format for future reference 5 2 5 3 Call Back Recording When you have set the camera to do call back when triggered the system will be able to record these call back images for your reference in future Please have your computer turn on and the CAMit I AP running in order to the camera to communicate with your computer Once the camera call b...

Page 35: ...the image file to play To stop the image playing at anytime simply press stop You will also be able to decide the playing speed of the image Please right click on the image list and select Set Playing Speed When the menu loaded please enter the speed for each frame per millisecond You will be able to decide whether to display the image information such as Time and the Triggered Device To enable or...

Page 36: ...and press the Delete button After your confirmation of deletion the file will be removed immediately 5 2 6 2 Save Images into JPG files You will be able to extract individual frames from the images recorded into JPG file so that the image maybe used as other reference To do so please pause on the frame you wish to extract and right click your mouse on the image for menu to load Select Save image a...

Page 37: ...call back to alert the computer you will be able to set other software to execute when call back is detected This can be used to integrate the camera together with your system To enable external routine please check Routine to be executed upon Trigger from Setup When checked please select External Routine Setting The menu should load once selected Please select the exe file to be executed when det...

Page 38: ...nt dial tones and frequencies You will need to connect the camera to a PC with the DB9 connector cable for setup to set the country code using the CAMit I Setup program After you are done setting the country code you need to power off then on the camera for settings to be active Why won t my external trigger input work Once the camera is triggered externally the camera will only reset after the tr...

Page 39: ...igh Resolution 640x480 maximum 1 6 frames second o Medium Resolution 320x240 maximum 3 frames second o Low Resolution 160x120 maximum 5 frames second Camera Specification CMOS Camera support Specification o 101 376 pixels 1 4 lens CIF format o 352 H x 288 V CAMit I use Specification 300K pixels 1 3 lens at 120 degree angle others are optional 352 H x 288 V S N Ratio 48dB Gamma Correction 0 45 Lens...

Reviews: