9
How to Configure the General Section?
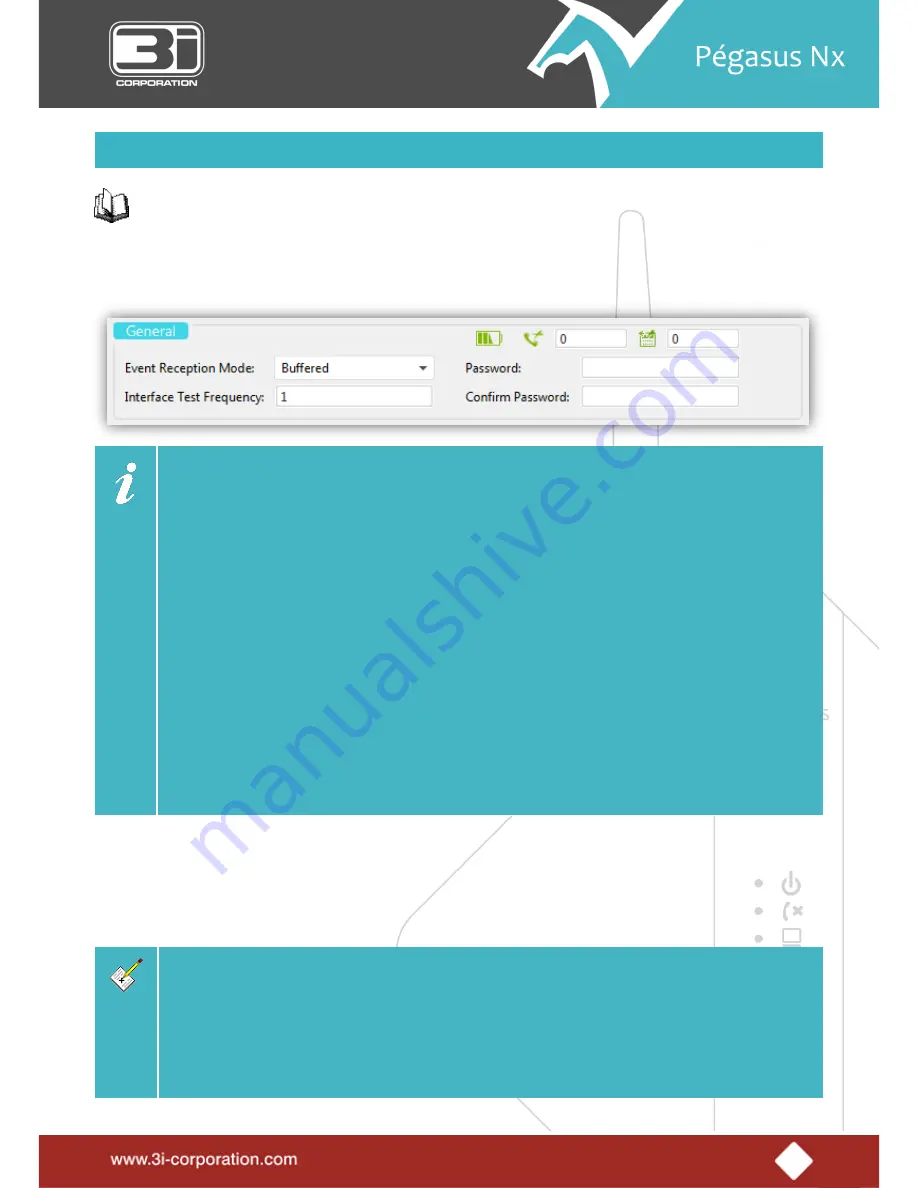
To configure the “general” section
1.
Open the
General Settings
screen.
2.
Under
General
, in the
Event Reception Mode
drop-down box, select the event reception mode as
Buffered
or
Not
Buffered
.
Important Information:
The
Event Reception Mode
drop-down box offers two event reception modes:
Buffered
and
Not
Buffered
.
In the
Buffered Mode
, Pégasus Nx Studio uses a flash memory storage to temporarily hold events while
it is being moved to the Zeus Nx Server. Pégasus Nx (device) receives event and checks the
communication status with the Zeus Server, saves the event in its memory and generates the Kiss-off
tones to the alarm panel, and then the event is sent to the Zeus Server. Use the Buffered Mode if you
want Pégasus Nx to buffer events before sending it to the Zeus Server.
In
Not Buffered Mode
, any event received by the device from the alarm panel is not buffered. Once an
event is received, Pégasus Nx sends it directly to the Zeus Server without buffering. On successful event
reception, the Zeus Nx Server sends an acknowledgement to Pégasus Nx, which in turn sends an
acknowledgement to the alarm panel. In this reception mode, Kiss-off tones are generated to the alarm
panel only after confirmation from the Zeus Server that the event was successfully stored in its database.
Use the not buffered option if you want Pégasus Nx to send occurrences to the Zeus Server without
buffering.
3.
In the
Interface Test Frequency
text box, type-in the interface test frequency duration in hours. The minimum
acceptable duration is 6 hours and the maximum duration is 240 hours.
4.
In the
Password
text box, enter your
Password
.
5.
To confirm your password, in the
Confirm Password
text box, type-in the same password you entered in the
Password
text box.
Note:
The
Password
text box can be used to set password for programming. Password is required to
authenticate your credentials to modify the Pégasus Nx Studio.
You can enter up to nine character password. Password beyond nine characters is not allowed. You can
use alphabets, special characters and numbers to make your password more secure.
Summary of Contents for Pegasus NX
Page 14: ...6 A message box is displayed saying Do you want to reboot the module 2 Click the Yes button ...
Page 19: ...6 A message box is displayed saying Do you want to reboot the module 2 Click the Yes button ...
Page 32: ...19 A message box is displayed saying Do you want to reboot the module 2 Click the Yes button ...
Page 39: ...26 A message box is displayed saying Do you want to reboot the module 2 Click the Yes button ...
Page 62: ...49 2 Enable the required Buzzer Activation Trigger s ...
Page 85: ...72 2 Select the communication port to which device is connected 3 Click the Connect icon ...
Page 86: ...73 Pégasus Nx debugger is connected and debug messages are displayed in the screen ...
Page 87: ...74 To disconnect the debugger 1 Click the Disconnect icon ...
Page 90: ...77 2 The Configuration Commands via SMS screen is displayed ...


