


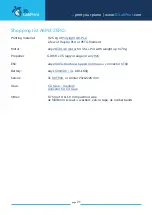

page
17
... print your plane | www.
3DLabPrint
.com
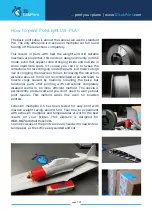
5.2.2 Fuselage tail - elevator pushrods and servos
Glue L1 and L2 parts of the stabilizer and elevator. The profile is symmetric, so the left and
right sides are identical. Glue the stabilizers perfectly perpendicular to the fuselage. Assemble
both sides of the elevator with the elevator control lever on a flat surface. Make a Z bend on
the elevator 0,8 mm pushrod wire. Using hot tool cut loose the hinge of the elevator on the
F4 part of the fuselage and mount the elevator assembly to the stabilizer using the 0,8 - 1,2
mm carbon rod or steel wire. Elevator should move freely controlled by the pushrod and
servo. Check the functionality of the elevator assembly carefully and finally glue in the rear
rudder part. Wall thickness should be 0.60-0.67
you will need:
CA Glue medium viscosity
+
activator
0,8 - 1 mm steel wire for elevator pushrod
Polyair or PLA filament for aileron hinge
Snap knife, SandPaper Some cloth for wiping CA glue...
Video guide A6M2 ZERO Tail Assembly
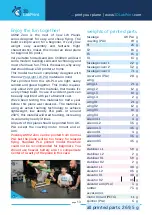
stabiliser L1
5,9g/0.21oz LW
elevator L1
4,8g/0.17oz LW
elevator L2
0,5g/0.02oz LW
elevator arm
normal PLA!
3g/0.10oz
elevator arm
normal PLA!
stabiliser L2
2g/0.07oz LW
rudder
7,3g/0.26oz LW
3D print
funkce
inovace


