


1
Installation Guide:
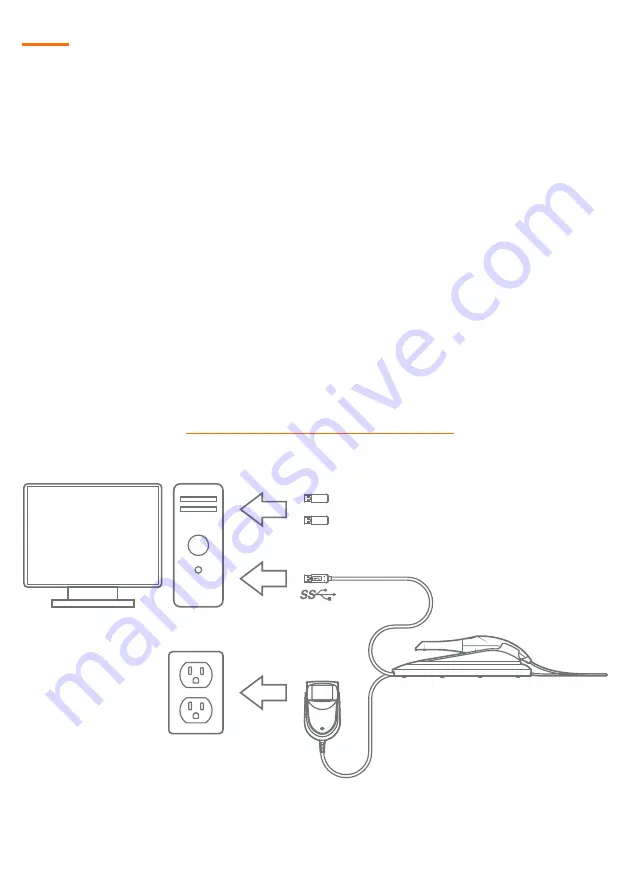
AC/DC
Power Adapter
Heron IOS
USB 3.0 Cable
Plug in the two USB dongles
QuantorClinic(Gray) & Exocad(Blue)
Prior to software installation ensure that the following criteria have been met:
•
The person installing the software has administrative privileges on the PC
•
The PC has an open USB 3.0 port (i.e. SuperSpeed, blue port)
• Make sure that apps are allowed to access the camera in
Settings, Privacy,
Camera, “Allow apps to access your camera”.
Once the system has been carefully unpacked, install the system according to the
following steps:
Step 1:
Place the docking station on a flat, stable surface and place the Heron IOS
hand-piece securely in its docking station
Step 2:
Connect the AC/DC power adapter cable to the docking station; the
connector socket is located underneath the docking station
Step 3:
Connect the provided USB 3.0 cable to the docking station; the connector
socket is located underneath the docking station
Step 4:
Connect the other end of the USB 3.0 cable to the computer
Step 5:
Connect the AC/DC power adapter to a power outlet
Step 6:
Download and install the QuantorClinic software which is located at the
following link:
http://www.3disc.com/support/heron
Connection Guide:
* For PC system requirements please visit http://www.3disc.com/support/heron
** QuantorClinic is 3DISC software that has been bundled with Exocad


