background image

User  Manual 


FireCR  Dental 


TM-801-EN 


13 


Chapter 3. Setting Up 


3.1. 

Positioning 

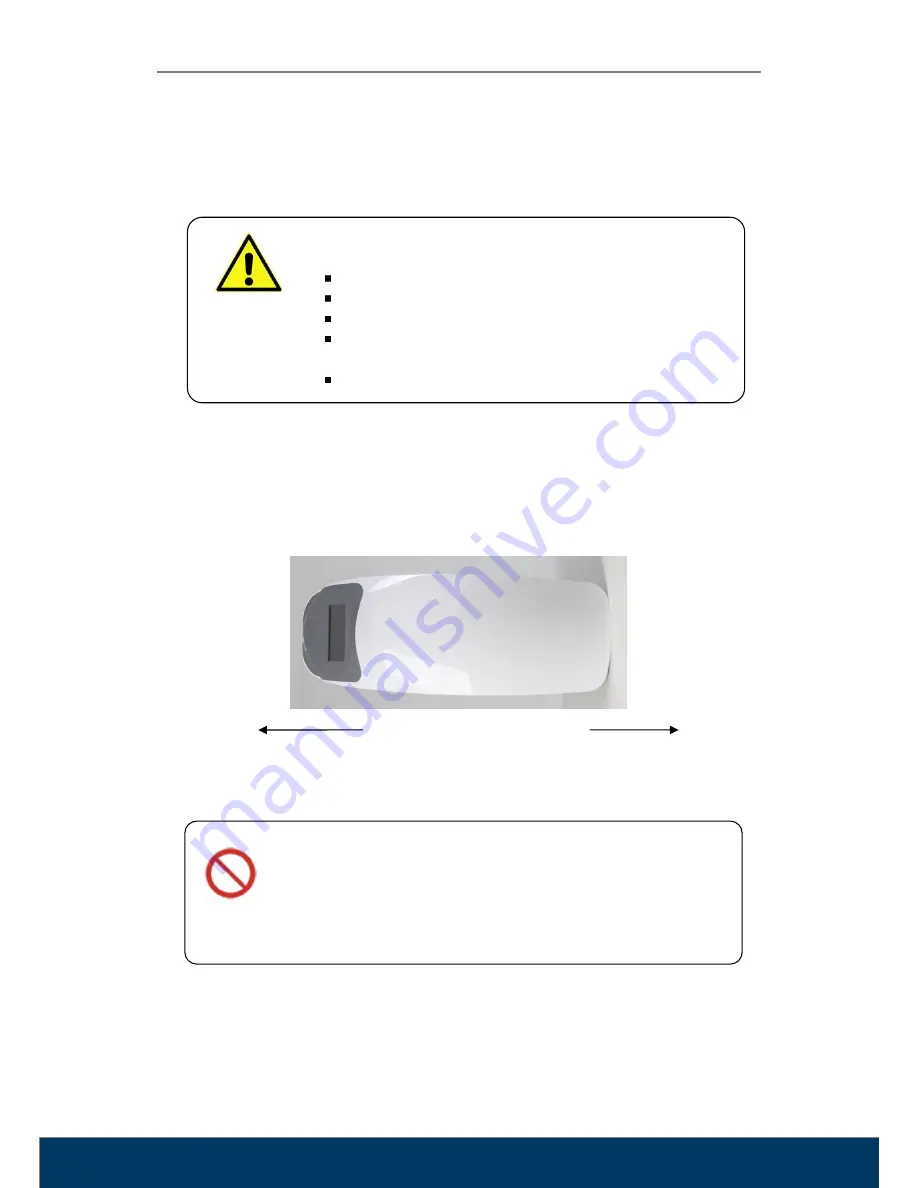
The reader must be placed on a rigid and flat desk or tabletop with at least 5 cm (2 inches) free 

space on both of the sides, 10 cm (4 inches) on rear side and 15 cm (6 inches) on front side for 

imaging plate insertion.    Its space requirements are shown below. 


Figure 1. Space Requirements (Top View)   


D

ANGER


Never place the reader on the floor. 


Install  in  a  location  that  is  level  and  stable.    Installation  in  an 

unsuitable location can cause accidents, or deterioration in image 

quality. 

Allow  a  minimum  free space 

of  10  cm  (4  inches)  on  the   

backside  to  allow  the  power 

switch,  power  cord  and 

interface 

cable 

to 

be 

reached by hand at all times. 

Allow  a  minimum  free  space 

of  15  cm  (6  inches)  on  the 

front  side  for  imaging  plate 

insertion and removal. 

Front Side 

Backside 

W

ARNING


Unsuitable Installation Sites 


Locations with excessive humidity or dust 


Locations subject to high temperature 


Locations subject to shaking or vibration 


Locations  exposed  to  considerable  electrical  or  magnetic 

noise, or other forms of electromagnetic energy 


Locations with poor heat radiation 

Summary of Contents for FireCR Dental

Page 1: ...ingement The data in this publication are for illustration purposes only and do not necessarily represent standards or specifications which must be met by 3D Imaging Simulations Corp All information contained herein is intended for guidance purposes only and characteristics of the products and services described in this publication can be changed at any time without notice Products and services ma...

Page 2: ...gil Yuseong gu Daejeon 34109 Korea Tel 82 42 931 2100 Fax 82 42 931 2299 Website www 3DISC com E mail info 3DISC com 3DISC Americas 22560 Glenn Dr Suite 116 Sterling VA 20164 USA Tel 1 703 430 6080 E mail info 3DISC com 3DISC Europe Gydevang 39 41 3450 Alleroed Denmark Tel 45 88 276 650 E mail info 3DISC com ...

Page 3: ...s and can radiate radio frequency energy and if not installed and used in accordance with the instruction may cause harmful interference to radio communication However there is no guarantee that interference will not occur in a particular installation If this equipment causes harmful interference to radio or television reception which can be determined by turning the equipment off and on the user ...

Page 4: ...ivered system and accessories the warranty by 3D Imaging Simulations Corp becomes void 3D Imaging Simulations Corp will not accept any responsibility or liability for the improper functioning of the product in such a case WARNING The functionality of the system can be limited in the case of incorrect use Hints that require special attention NOTE Notes represent information that is important to kno...

Page 5: ... this device should only be undertaken by qualified and trained personnel The operator should study instructions and precautions carefully here and throughout the manual before starting to use the device There are no user serviceable parts inside this device The device should only be opened and serviced by qualified service personnel Failure to heed this warning may result in injury to service per...

Page 6: ...aw restricts this device to sale by or on the order or a physician Intended Use This device is a Dental Computed Radiography System and intended for use in producing digital X Ray images for dental radiography purposes It comprises of reader reusable imaging plate and workstation software It scans X Ray exposed imaging plate and produces X Ray image in digital form Then digital image is transferre...

Page 7: ... 21 3 4 Installation of Acquisition and Diagnostic Software 21 3 5 Connect the Cable and Power Cord 22 3 5 1 Connecting the USB Interface Cable 22 3 5 2 Connecting the Ethernet Cable 23 3 5 3 Connecting the Power Cord 24 3 5 4 Installation Report 25 Chapter 4 Operating 26 4 1 System Specifications 26 4 2 Operation Conditions 27 4 3 Use Care Maintenance and Infection Control 28 4 3 1 Use Protective...

Page 8: ...mage 32 4 4 6 Circuit Functions 33 Chapter 5 Symbols 35 5 1 Manufacturer s Declaration Electromagnetic Emission 36 5 2 Manufacturer s Declaration Electromagnetic Immunity 37 5 3 Guidance and Manufacturer s Declaration Electromagnetic Immunity 40 5 4 Laser Safety Statement 41 Chapter 6 Technical Assistance 42 ...

Page 9: ...tures a built in erase function and a color touch screen LCD panel without physical push buttons for seamless device operation Please read and follow the instructions given in this User Manual carefully prior to using the FireCR Dental Reader and keep this manual within reach for future reference The purpose of this manual is to direct you through the main functions and interfaces of the FireCR De...

Page 10: ... FPA 01 002 Power Adapter CR FPA 02 001 USB 2 0 Interface Cable CR FPA 02 002 RJ45 CAT 5E FTP Cable 2M Cross type CR FPA 03 00X Power Cord CR FPM 11 001 FireCR Dental User Manual CR PKM 11 004 IP Storage Box Medical application items Part No Item CR FP 12 010 Imaging Plate Starter Kit Dental Contains 2 x IP size 0 and 4 x IP size2 CR FPA 15 001 Size 0 IP Hygienic Bag Box of 100 pcs CR FPA 15 003 S...

Page 11: ...ze 2 Box of 100 pcs CR FP 12 023 Hygienic Bags Size 2 Box of 300 pcs CR FP 12 024 Hygienic Bags Size 3 Box of 100 pcs CR FP 12 025 Hygienic Bags Size 4c Box of 100 pcs CR FP 12 035 Protective Cover Size 0 Box of 100 pcs CR FP 12 036 Protective Cover Size 1 Box of 100 pcs CR FP 12 037 Protective Cover Size 2 Box of 100 pcs CR FP 12 038 Protective Cover Size 2 Box of 300 pcs CR FP 12 039 Protective ...

Page 12: ...NG Improper disposal of this product may result in environmental contamination When disposing of this equipment contact 3D Imaging Simulations Corp s representative or related government agencies Do not dispose of any part of this equipment without consulting a 3D Imaging Simulations Corp representative first 3D Imaging Simulations Corp does not assume any responsibility for damage resulting from ...

Page 13: ...lation in an unsuitable location can cause accidents or deterioration in image quality Allow a minimum free space of 10 cm 4 inches on the backside to allow the power switch power cord and interface cable to be reached by hand at all times Allow a minimum free space of 15 cm 6 inches on the front side for imaging plate insertion and removal Front Side Backside WARNING Unsuitable Installation Sites...

Page 14: ... the reader may result in internal damage or misalignment of the optics External vibration or shock during scanning may affect image quality The reader must be placed on a rigid flat and reinforced desk or tabletop DANGER Do not place anything on top of the reader WARNING This equipment may be interfered with or may interfere with electromagnetic or other interferences Assure a distance of minimum...

Page 15: ... displays the status of the reader and control of the reader can be done through touch display panel Figure 3 Touch Display Panel Display Status Remark Booting screen When the reader is turned on booting screen is displayed during system initialization Touch display panel ...

Page 16: ...cons at status bar Size of imaging plate High resolution standard resolution Temporarily toggles when it is touched USB Ethernet no cable connection respectively Disconnection USB cable is connected but no application program is running on computer Ready for scan but no IP Waiting for IP to be placed Scan will not start with an empty tray ...

Page 17: ...FireCR Dental TM 801 EN 17 Ready for Scan IP size is recognized and the reader is ready Scanning Scanning is in progress Erasing Erasing is in progress System error Unexpected system error Contact technical support ...

Page 18: ...ton is selected from main screen Setting mode is displayed Scanning resolution setting Choose HD or SD HD High Definition SD Standard Definition System setting System setting for Auto Sleep and Auto Trim Auto Sleep setting Choosing time duration until sleep mode ...

Page 19: ...corresponding area of IP detected by the reader Auto trim on Scan whole tray area and crop the image automatically Language Choose language Network Network setting menu DHCP setting Choose DHCP mode for automatic network setting When this setting is changed the system will restart automatically ...

Page 20: ... setting is changed the system will restart automatically Subnet mask setting Type in Subnet mask manually When this setting is changed the system will restart automatically Default Gateway Setting Type in Gateway address manually When this setting is changed the system will restart automatically ...

Page 21: ...s Ethernet USB 2 0 High speed Video 32 bit Color Display Video Resolution 1280 x 1024 3 3 2 Minimum Requirement Operation System Microsoft Windows 7 32 bit or 64 bit CPU Core Duo Core2 Processor Memory RAM 2GB or more Hard Disk 80GB Free Hard Disk Space Network 100Mbps Ethernet USB 2 0 High Speed Video 32 bit Color Display Video Resolution 1280 x 900 3 4 Installation of Acquisition and Diagnostic ...

Page 22: ... and detailed instruction for network sharing mode is provided with FireID Kit 3 5 1 Connecting the USB Interface Cable The reader interfaces with computer via USB2 0 cable 1 Use the supplied USB cable 2 Connect the cable to the reader s USB2 0 port located on the connection panel 3 Connect the other end of the cable to the USB2 0 port on the computer Figure 4 USB Connection DANGER This equipment ...

Page 23: ... Ethernet port located on the connection panel 2 Connect the other end of the cable to the Ethernet port of the Ethernet hub 3 To connect the PC directly use the supplied crossed cable Figure 5 Ethernet Connection DANGER This equipment is for indoor use only and all the communication wiring is limited to inside of the building WARNING Do not pull out the Ethernet cable during scanning ...

Page 24: ... has grounding This is a safety feature If you are unable to insert the plug into the outlet contact your electrician to replace your obsolete outlet For your safety do not remove the ground from the grounding type plug DANGER Do not use with any electrical power supply that does not meet the ratings displayed on the power adapter Usage of any other power adapter may lead to fire or electrocution ...

Page 25: ...nd to 3D Imaging Simulations Corp s service department by fax or e mail Fax 82 42 931 2299 E mail support 3DISC com WARNING Socket outlet should be installed near the device and should be easily accessible Do not place the device where access to appliance inlet is obstructed Do not unplug the power cord or turn the power switch off during scanning ...

Page 26: ...3 SD 421 x 843 HD 771 x 1542 Pixel Matrix Size 4c SD 750 x 843 HD 1370 x 1542 Accepted Imaging Plate Size 0 1 2 3 4c Gray Scale Resolution 16 bit Eraser Embedded Computer Interface USB 2 0 100Mbps Ethernet Dimensions 265 H x 120 W x 318 D mm 10 4 H x 4 7 W x 12 5 D inch Weight 5 5 kg 12 1 lbs Power Requirement 100 240V 50 60Hz Image File Format DICOM 3 0 TIFF BMP JPEG Specifications subject to cha...

Page 27: ...ree 2 Ingress of Liquids IPX0 Altitude Up to 2 000m Protective Class Class 1 Equipment Maintenance No user maintenance is required and no user service is allowed Please contact technical support if there is a problem Cleaning Do not try to clean inside of the reader Wipe outside of the reader for dust removing with soft and dry cloth WARNING There are no user serviceable parts inside the reader Th...

Page 28: ...n most cases to be effective in protecting the imaging plate from becoming contaminated The hygienic bags should be removed after use on each patient to prevent cross contamination The hygienic bags are for single patient use only Never reuse a hygienic bag 4 3 1 Use Protective Cover Put protective cover on active side of imaging plate and fold tail of protective cover to backside of imaging plate...

Page 29: ...of imaging plate into hygienic bag a Blank side should face to X ray source b Insert imaging plate with hygienic bag into hygienic bag correctly c Peel off the adhesive strip and seal the hygienic bag d Prepare imaging plate for X ray exposure WARNING Active side of the imaging plate should face to blank side of the hygienic bag WARNING Active side of the imaging plate and blank side of the hygien...

Page 30: ...re 9 Imaging Plate Tray 4 4 Operating Instructions 4 4 1 Turn on the Reader Turn on the reader Power switch is located on the connection panel 4 4 2 Turn on the Computer Turn on the computer Acquisition and Diagnostic Software must be installed before operating the reader DANGER This device uses laser Avoid looking inside of the reader Tray ...

Page 31: ...h and X ray source Figure 10 Direction of imaging plate for X ray exposure 4 4 4 Imaging Plate Placement and Removal Take imaging plate out of the hygienic bag after tearing off the seal Place the imaging plate towards the front and center of the tray as shown in Figure 11 and remove the protective cover Figure 11 Correct positioning of imaging plate ...

Page 32: ...h left side or right side of tray gently to start scan In order to scan or erase the IP locate the IP on the tray correctly and push the tray into the reader fully until interlock holds the tray 4 4 5 Getting a scanned image To acquire an image refer to Acquisition and Diagnostic Software manual WARNING Do not place the imaging plate in wrong direction or upside down when it is being placed on the...

Page 33: ...the stage PSD Edge Sensor which detects the laser beam rotating speed Door detect sensor which detects status of the door open or closed Photo Interrupters which detects the position of the stage and Laser which is required to radiate laser onto imaging plate Base Board Image Data Controller Core Board This part controls peripherals for image acquisition and delivers amplified digitized signal to ...

Page 34: ...ge Sensor PMT This Photomultiplier Tube receives the signal through scanning of the imaging plate and then sends the signal to the analog readout circuit Power Adapter Supplies power to all modules of the system which are required for operation ...

Page 35: ...r Date of Manufacture Equipment Power ON Warning Consult Accompanying Documents General mandatory action manual General prohibition indication User Manual Reference Directive on Waste Electrical and Electronic Equipment Authorized Representative in the European Community Keep Dry Fragile ...

Page 36: ... of FireCR Dental system should assure that it is used in such an environment Emission test Compliance Electromagnetic environment guidance RF emissions CISPR 11 Group 1 The FireCR Dental system uses RF energy only for its internal function Therefore its RF emissions are very low and are not likely to cause any interference in nearby electronic equipment RF emissions CISPR 11 Class B The Model Fir...

Page 37: ...l environment Surge IEC 61000 4 5 1 kV differential mode 2 kV common mode 1 kV differential mode 2 kV common mode Main power quality should be that of a typical commercial or hospital environment Power frequency 50 60Hz Magnetic field IEC 61000 4 8 3 0 A m 3 0 A m Power frequency magnetic fields should be at levels characteristic of a typical location in a typical commercial or hospital environmen...

Page 38: ...e P is the maximum output power rating of the transmitter in watts W according to the transmitter manufacturer and d is the recommended separation distance in meters m Field strengths from fixed RF transmitters as deter mined by an electromagnetic site survey a Should be less than the compliance level in each frequency range b Interference may occur in the vicinity of equipment marked with the fol...

Page 39: ...m distance between portable and mobile RF communications equipment transmitters and the FireCR Dental system as recommended below according to the maximum output power of the communications equipment Rated maximum output power W of transmitter Separation distance m according to frequency of transmitter 150 kHz to 80 MHz 80 MHz to 800 MHz 800 MHz to 2 5 GHz 0 01 0 12 0 12 0 23 0 1 0 37 0 37 0 74 1 ...

Page 40: ... the vicinity of equipment marked with the following symbol Note 1 These guidelines may not apply in all situations Electromagnetic propagation is affected by absorption and reflection from structures objects and people Note 2 It is essential that the actual shielding effectiveness and filter attenuation of the shielded location be verified to assure that they meet the minimum specification a Fiel...

Page 41: ...r Radiation above a Class I 1 level during normal Operation user Maintenance or Prescribed Service Condition Wavelength 658 nm Typ Beam Divergence Paraller 9 5 degrees 2 5 2 5 Perpendicular 17 degrees 3 3 Maximum Power of Energy Output 80 mW CW WARNING Never operate or service the product with the protective cover removed from Laser Reader assembly The reflected beam although invisible can damage ...

Page 42: ...has any questions about installing or using the device contact your 3D Imaging Simulations Corp representative or your local dealer 3D Imaging Simulations Corp Bldg 1 48 Yuseong daero 1184 beon gil Yuseong gu Daejeon 34109 Korea Tel 82 42 931 2100 Fax 82 42 931 2299 www 3DISC com ...

Page 43: ...he completed form signed by customer to Fax 82 42 931 2299 E mail support 3DISC com Date of Installation Customer Information Hospital Institute Name Address Tel Fax E mail Installer Information Company Name Address Tel Fax E mail System Information Model FireCR Dental Reader System S N Installer s Signature Date Customer s Signature Date ...

Reviews: