Assembly 3Dfeedy » Connect Extruder Drive Motor to Cover of Drive Unit
Version 1.0
15 von 25
2.
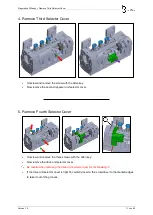
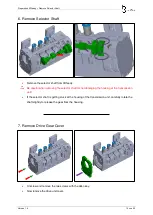
Connect Extruder Drive Motor to Cover of Drive Unit
•
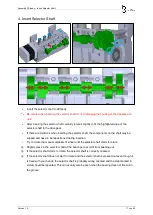
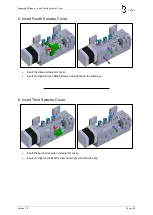
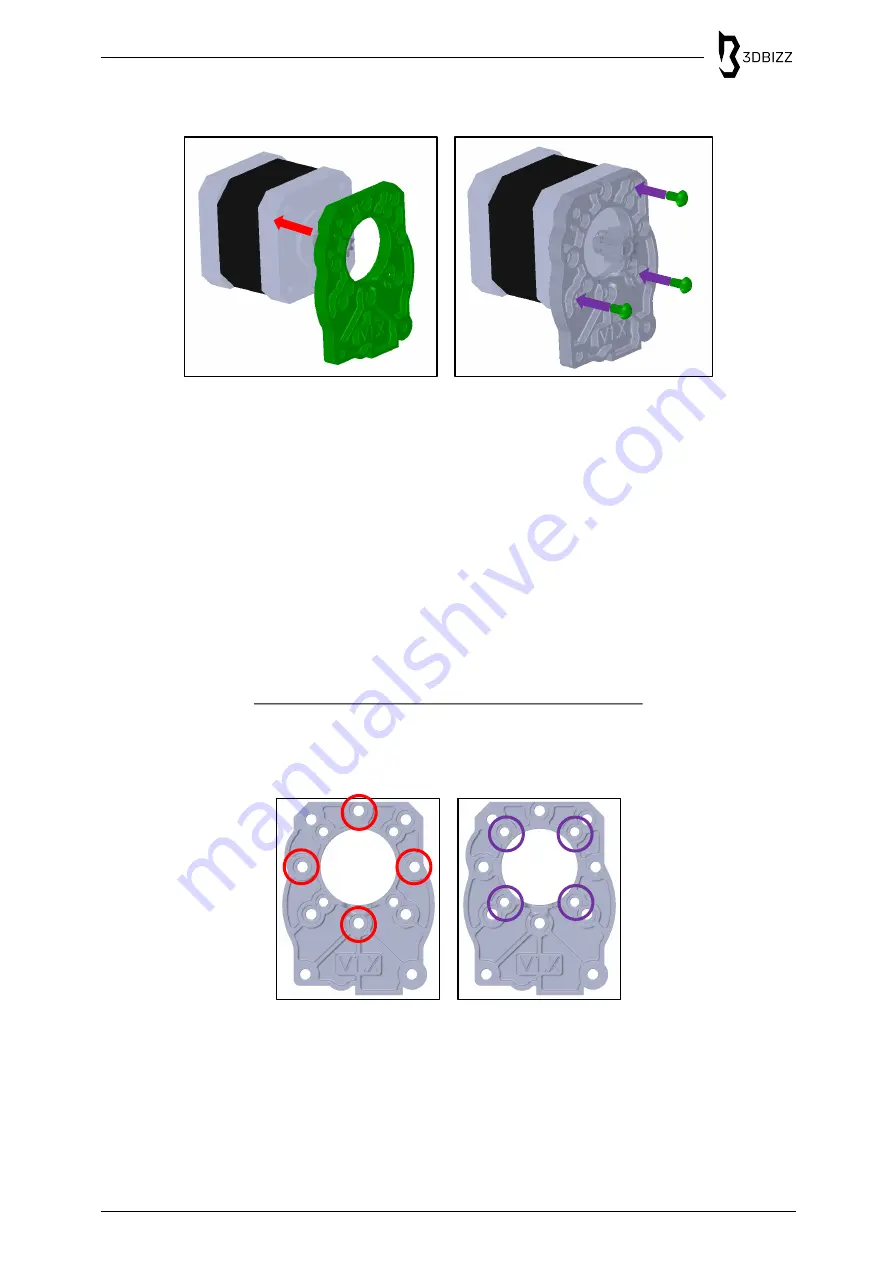
Put the drive unit cover on the extruder drive motor.
i
If the extruder drive motor is of the size NEMA 14 or NEMA 11 go to step 2.1 and take a closer
look on how to install these extruder drive motors.
i
If the extruder drive motor is of a different size than NEMA 11, NEMA 14, NEMA 17, probably a
new drive unit cover has to be prepared in advance.
i
If the motor shaft is too long use spacer between extruder drive motor and drive unit cover. This
will be shown in detail in the instruction “3Dfeedy Spacer Instruction Manual”.
•
For NEMA 17 insert and tighten three M3x6 screws hand-tight with the Allen key to fix the
extruder drive motor to the drive unit cover.
2.1.
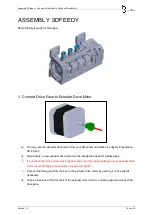
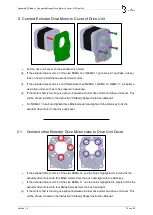
Connect other Extruder Drive Motor sizes to Drive Unit Cover
•
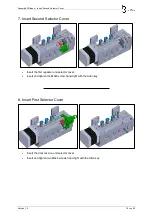
If the extruder drive motor is of the size NEMA 14, use the holes highlighted in red and fix the
extruder drive motor with four M3x6 screws from the box hand-tight with the Allen key.
•
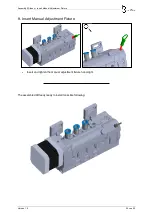
If the extruder drive motor is of the size NEMA 11, use the holes highlighted in purple and fix the
extruder drive motor with four M2.5x6 screws from the box hand-tight.
i
If the motor shaft is too long use spacer between extruder drive motor and drive unit cover. This
will be shown in detail in the instruction “3Dfeedy Spacer Instruction Manual”.


