Figure 4 Standalone
®
Setup
Please see the Figure 4 Standalone User Guide, found on the support.3dsystems.com/figure4standalone, for safe
-
ty information and comprehensive operating instructions.
Save all foam and packing material for future use. Shipping without the original packing material may
cause damage to the printer.
CAUTION: You must secure
the printer to the pedestal
before use. Failure to do so
could cause the printer to tip
over in certain situations.
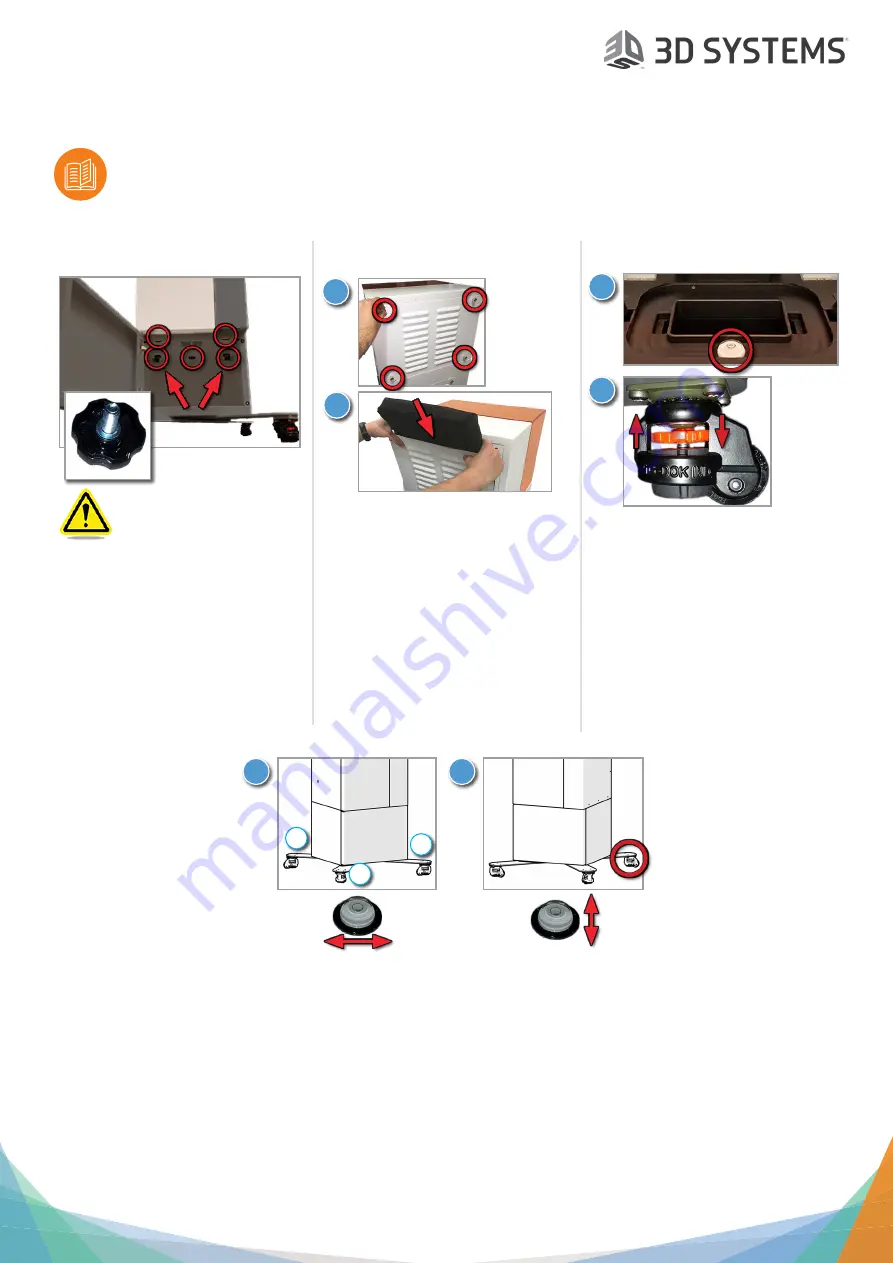
1. Open the pedestal door.
2.
Install all five thumb screws on
inside top of pedestal. Ensure they
are screwed in snugly.
3. Remove all remaining blue tape
from printer.
4. Secure Printer to Pedestal
6. Level Printer on Pedestal
6. Level Printer on Pedestal (continued)
1. Place the bubble level (included
with printer shipment) on printer
chassis.
2. The pedestal has four casters
with leveling feet. To adjust each
leveling foot:
a. Turn the orange thumb wheel
to the right to lower it.
b. Turn the orange thumb wheel
to the left to raise it.
3. You will now adjust the leveling feet.
a. Keep
back-left
leveling foot off the ground.
b. Lower
front-right
leveling foot until it touches the ground.
c. Lower
front-left
leveling foot until it touches the ground. Adjust foot up or down until bubble in level is roughly
centered in the circle left-to-right.
4. Lower the
back-right
leveling foot until it touches the ground. Adjust foot up or down until the bubble in the level is
roughly centered in the circle back-to-front.
5. Verify that the left-to-right level has not changed. Continue adjusting the
front-left
and/or
back-right
feet until bubble
is roughly centered in both directions.
6. Lower
back-left
foot until it touches the ground. Take care not to lower it too much, so as to throw the level off.
7. Push lightly on each corner of the machine to ensure it does not rock in any direction.
1.
Remove thumb screws from filter
bracket. Remove filter bracket.
2.
Slide carbon filter into place
3.
Reinstall bracket with filter and
reinstall thumbscrews.
5. Install Carbon Filter
1
2
1
2
3
a
b
c
4