Switch 4200G—Front View Detail
17
1000BASE-X SFP Ports
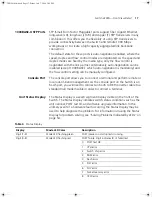
SFP (Small Form Factor Pluggable) ports support fiber Gigabit Ethernet
long-wave (LX), long-haul (LH70) and copper (T) SFP Transceivers in any
combination. This offers you the flexibility of using SFP transceivers to
provide connectivity between the Switch and remote 1000 Mbps
workgroups or to create a high capacity aggregated link backbone
connection.
The default state for these ports is auto-negotiation enabled, where the
speed, duplex and flow control modes are negotiated. As the speed and
duplex modes are fixed by the media type, only the flow control is
negotiated with the link partner. Alternatively, auto-negotiation can be
disabled (except 1000BASE-T which auto-negotiation is mandatory) and
the flow control setting can be manually configured.
Console Port
The console port allows you to connect a terminal and perform remote or
local out-of-band management. As the console port on the Switch is an
RJ-45 port, you will need to connect an RJ-45 to DB9 converter cable to a
standard null modem cable in order to connect a terminal.
Unit Status Display
The Status Display is a seven segment display visible on the front of the
Switch. The Status Display indicates switch status conditions such as the
unit number, POST test ID, and software upgrade information. In the
unlikely event of a hardware fault occurring, the Status Display may be
used to help diagnose the problem. For information on using the Status
Display for problem solving, see “Solving Problems Indicated by LEDs” on
page 54.
Table 4
Status Display
Display
Mode LED Color
Description
Digit (1–9)
Mode LED flashing green
POST (power-on startup tests) running.
Digit (0–8)
Mode LED flashing red
POST failure. Digit indicates ID of failed test.
0
POST test OK
1
CPU error
2
Switch chip error
3
RAM error
4
Flash error
5
Port error
6
PHY error
7
Packet memory error
8
CPLD error
10014914AA.book Page 17 Friday, July 7, 2006 2:08 PM
Summary of Contents for 4200G PWR
Page 4: ...10014914AA book Page 4 Friday July 7 2006 2 08 PM ...
Page 30: ...30 CHAPTER 2 INSTALLING THE SWITCH 10014914AA book Page 30 Friday July 7 2006 2 08 PM ...
Page 74: ...74 CHAPTER 5 UPGRADING SOFTWARE 10014914AA book Page 74 Friday July 7 2006 2 08 PM ...
Page 92: ...92 APPENDIX B PIN OUTS 10014914AA book Page 92 Friday July 7 2006 2 08 PM ...
Page 96: ...96 APPENDIX C TECHNICAL SPECIFICATIONS 10014914AA book Page 96 Friday July 7 2006 2 08 PM ...
Page 104: ...10014914AA book Page 104 Friday July 7 2006 2 08 PM ...


