background image

|  Vinyl Blinds

1

GETTING STARTED

Steel Tape Measure

Power Drill and 

Drill Bits

Awl (or tool for starting 

a screw hole)

Level

Pencil

Flathead & Phillips

Screwdriver

Included in your order is all the hardware necessary for a 

normal installation. Depending on the mounting surface, 

fasteners other than the screws provided may be required. 

Wall board and plaster require the use of anchors such as 

expansion or toggle bolts. Bricks, tile and stone need special 

plugs and drill bits. Wood should always be pre-drilled to 

avoid splitting. 
Professional installation is also available in most areas, 

call 800-800-3329.

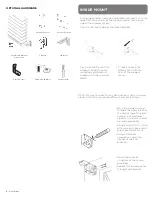
A few simple tools are required:

VINYL BLINDS

STANDARD HARDWARE

End Brackets 

(Open Position LH & RH)

Screws

Center Support 

Bracket(s)

Regular Valance Clips

Button Valance Clips

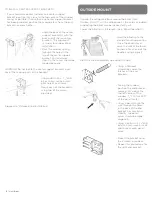
Outside Mount  

Slat Valance

Inside Mount  

Slat Valance

Summary of Contents for VINYL BLINDS

Page 1: ...ed may be required Wall board and plaster require the use of anchors such as expansion or toggle bolts Bricks tile and stone need special plugs and drill bits Wood should always be pre drilled to avoid splitting Professional installation is also available in most areas call 800 800 3329 A few simple tools are required VINYL BLINDS STANDARD HARDWARE End Brackets Open Position LH RH Screws Center Su...

Page 2: ...OTE Be sure to check for any obstructions such as window cranks or which may require different bracket locations Mark the window casing through the holes in either the side or top of the end bracket For maximum stability the marks should be made diagonally Using a drill with a 1 16 drill bit or an awl make a small pilot hole at each mark Using a flathead screwdriver open the latches of the end bra...

Page 3: ...f the screws provided Proceed to Valance Blind Installation OUTSIDE MOUNT Unwrap the cellophane from around the blind stack Caution DO NOT cut the cellophane as the cords or ladders supporting the blind may be inadvertently cut Lower the blind to its full length See Blind Operation 1 8 Hold the blind up to the desired mounting position Once the blind is level mark the wall at the lower corners of ...

Page 4: ...rews provided Repeat this procedure for any remaining center support bracket s If you have ordered a blind with a valance snap the regular valance clips to the front of the headrail The regular valance clips should be spaced equidistant from the end brackets and each other to allow proper support for the entire valance Also for an outside mounted blind attach the button valance clips to the side o...

Page 5: ...est of the two slats This slat will be installed on the lower section of the valance clips OUTSIDE MOUNT NOTE With your blind you have received a two piece valance with valance returns You have also received enough valance clips for your size blind As you can see one of the valance slats is shorter than the other Before installing the valance make sure that all of the Regular Valance Clips have be...

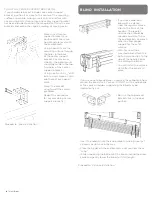
Page 6: ...ance must be pre drilled Using a pencil mark pilot holes 6 in from each end of the valance and 3 4 in from the back of the valance If additional brackets were sent with your valance mark additional pilot holes evenly spaced over the remaining width of the valance Drill holes at the pencil marks using a 1 16 drill bit Once extension brackets are installed position the valance over the window and ro...

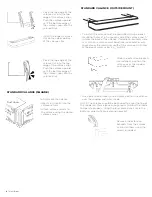
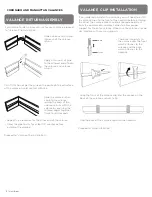
Page 7: ... glue to dry for at least 10 minutes before installing the valance Proceed to Valance Clip Installation VALANCE CLIP INSTALLATION If you ordered a blind with a valance you will need to install the valance clips to the front of the headrail before installing the blind The valance clips should be spaced equidistant from the end brackets and each other to allow proper support for the entire valance M...

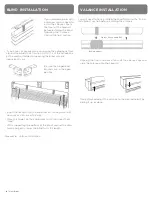
Page 8: ... position Insert the headrail into the end brackets making sure that no cords or slats are in the way Close the hinges on the end brackets until you hear them snap While supporting the bottom of the blind unwind the draw cords and gently lower the blind to its full length You will need to have installed the blind following the Blind Installation section before installing the valance VALANCE INSTAL...

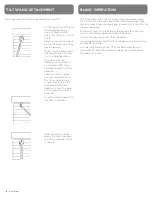
Page 9: ...k into the hole in the shaft Slide the plastic sleeve down the shaft and over the tilt wand hook until it is secure TILT WAND ATTACHMENT Not applicable for blinds ordered with a cord tilt BLIND OPERATION To tilt the slats twist the tilt wand If you ordered a cord tilt YOU MUST take one cord in each hand applying slight tension to each cord and pull gently down to tilt the slats to the desired angl...

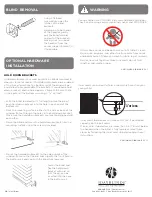
Page 10: ... forward and out of the brackets making sure to unhook the headrail from the center support bracket s if applicable WARNING Mount the hold down bracket to the side or back of the window frame so that the pin lines up with the front hole in the bottom rail end cap with the blind fully lowered Lower the blind and flex the hold down bracket outward so that the pin can be inserted into the hole in the...

Reviews: