247Security Inc. | 4400 North Point Parkway, Suite # 158, Alpharetta, GA 30022, USA | 1-866-693-7492 | www.247securityinc.com
mDVR304
USERS MANUAL
42
7
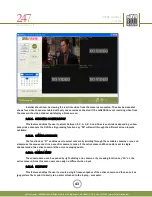
Start Time
Sets the start time automatically based on the current cursor timeline
position
8
End Time
Sets the start time automatically based on the current cursor timeline
position
9
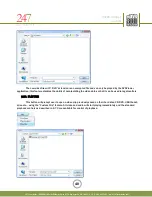
Make Clip
Creates a custom video clip starting from the start time and end time
entered
10
Start Time
Let’s user manually set the start time
11
End Time
Let’s user manually set the end time
12
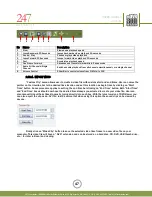
Calendar
Displays current month calendar of video playback
13
Date & Time
Displays current date & time of video playback
14
Previous
Goes back one hour or day as set below
15
Slider Bar Time Range
Switches between One Day View, One Hour View or 15 Minute View during
playback
16
Next
Advances one hour or day as set above
17
Slow
Slows down playback speed
18
Jump Backward 20
Seconds
Jumps backwards video playback 20 seconds
19
Pause / Play
Pauses or plays video playback
20
Jump Forward 20
Seconds
Jumps forward video playback 20 seconds
21
Fast
Accelerates playback speed
22
One Frame Forward
Advances one frame forward while in Pause mode during playback
23
Start / Stop MiniTRACK
Starts or stops the connection to the MiniTRACK server. An Internet
connection is needed for this connection. To use this feature you must
purchase the Video-Track option
24
Audio All
Channels/Single Channel
Switches audio playback from all channels simultaneously or a single
channel
25
Volume Control
Slider Bar to control volume from 0 (Mute) to 100
6.11.
LIVE VIEW
The feature is mostly used when setting up the mDVR304 so that the installer can properly aim the
cameras in the vehicle. Once the DVRViewer application is running, click on the play button and select “Live View”.
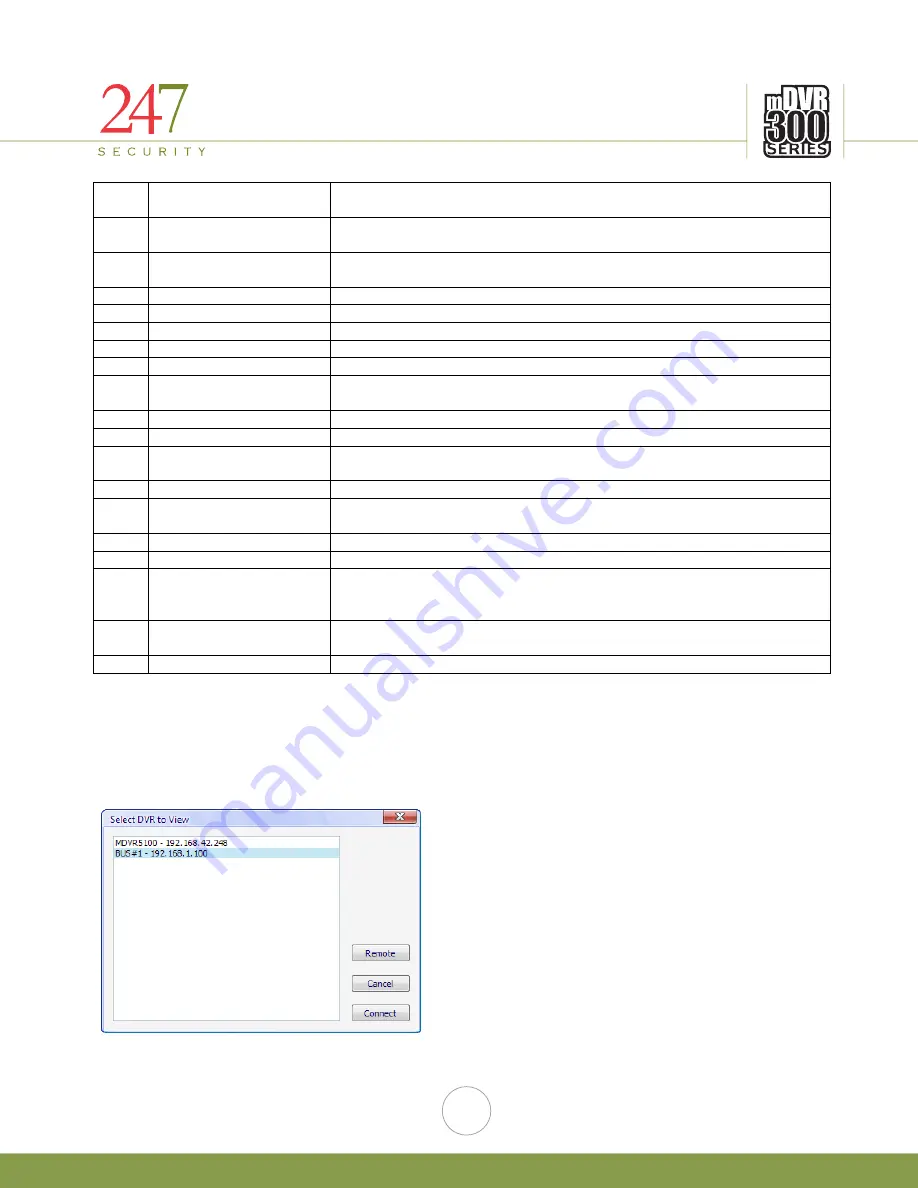
You will get the following window:
Select the DVR you want to connect to so that it’s highlighted and then click on “Connect” button.


