


LCD KVM Console User Manual
52
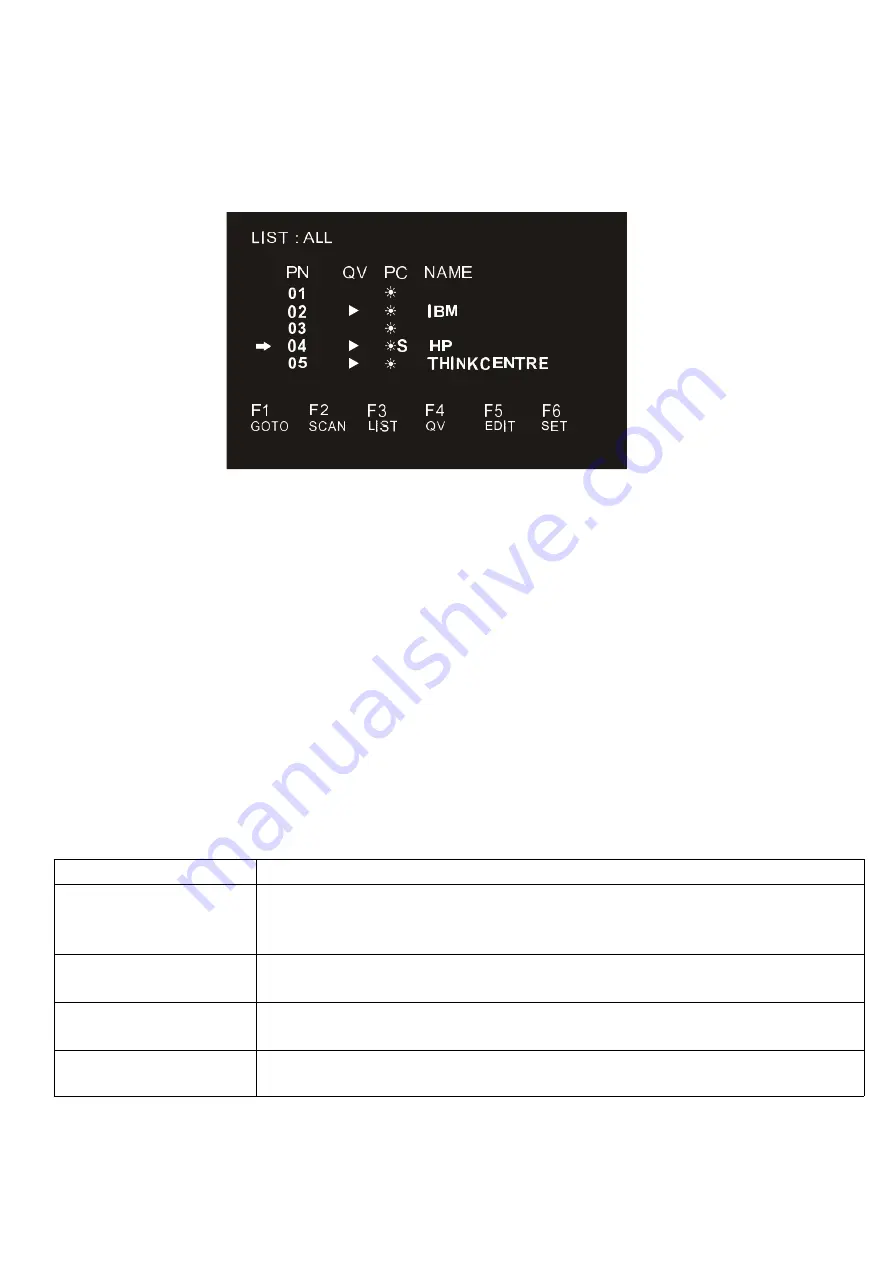
OSD Main Menu
Active OSD, following picture will be shown on the screen:
【
F1
】
---
【
F6
】
at the bottom of the screen is the function setting of OSD menu, and corresponding
operation and setting of corresponding function by keyboard.
After entering the OSD main screen, the port number in the center of the screen is the port number of
the selected PC. To move up and down through the list one line at a time, use the
【
↑
】【
↓
】
Arrow Keys,
press
【
Enter
】
to select the switch port.
Please press
【
Esc
】
to exit the OSD menu interface
To move up or down a row in the list, use the
【
↑
】【
↓
】
arrow keys. If the number of rows in the list is
larger than the number that the screen can display, the screen scrolls.
When the OSD menu is closed, a small blue window will appear on the screen showing the port number
that is currently switched to.
OSD Main Screen Headings
Heading
Explanation
PN
This column lists the port numbers for all the CPU ports on the installation. The
simplest method to access a particular computer is to move the highlight bar to it,
then press [Enter].
QV
If a port has been selected for Quick View scanning, an arrowhead symbol
displays in this column to indicate so.
PC
The computers that are powered on and are on line have an arrowhead symbol in
this column to indicate so.
NAME
If a port has been given a name, its name appears in this column.
Summary of Contents for AI-7100ULD
Page 22: ...LCD KVM Console User Manual 22 Dual Rail Slide View Dual rail overall rear view ...
Page 24: ...LCD KVM Console User Manual 24 Single rail multi ports KVM Console dimension ...
Page 25: ...LCD KVM Console User Manual 25 Dual rail LCD KVM Console dimension ...
Page 30: ...LCD KVM Console User Manual 30 Mounting and fixing in the bracket tail ...
Page 40: ...LCD KVM Console User Manual 40 Installation of Single Port LCD KVM Switch ...
Page 45: ...LCD KVM Console User Manual 45 VGALCD KVM Switch Cascade CAT5LCD KVM Switch Cascade ...


