


VES-1000 Series Ethernet Switch
2-2
Hardware Installation
•
Make sure the position of the VES-1008 does not make the rack unstable or top-heavy. Take all
necessary precautions to anchor the rack securely before installing the unit.
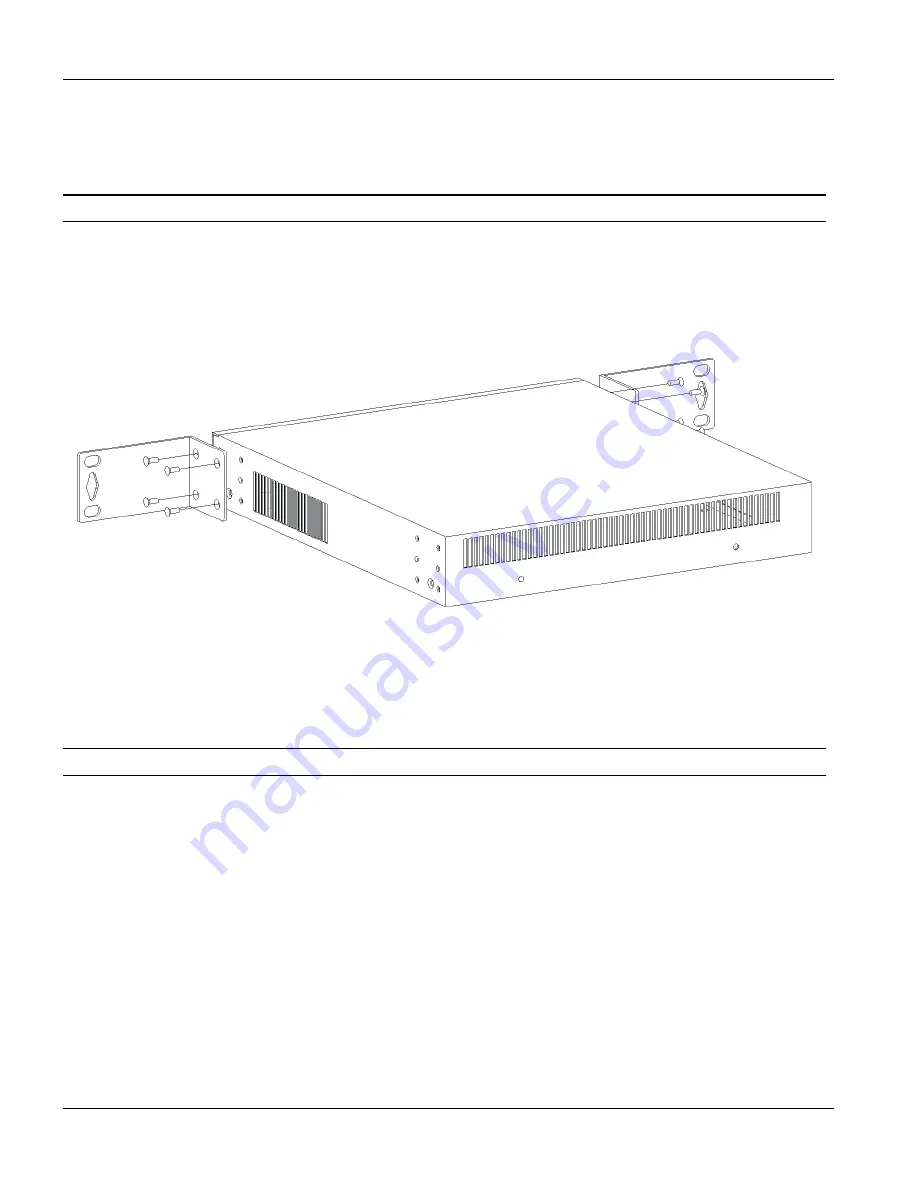
Step 1.
Position a mounting bracket on one side of the VES-1008, lining up the four screw holes on the bracket
with the screw holes on the side of the unit (Figure 2-1).
Failure to use the proper screws may damage the unit.
Step 2.
Using a #2 Philips screwdriver, install the M3 flat head screws that came with the brackets through the
mounting bracket holes into the VES-1008.
Step 3.
Repeat Step 1 and Step 2 to install the second mounting bracket on the other side of the unit.
Figure 2-1 Attaching the Mounting Brackets to the VES-1008
You may now mount the VES-1008 in a rack.
Step 1.
Position a mounting bracket (that is already attached to the VES-1008) on one side of the rack, lining up
the two screw holes on the bracket with the screw holes on the side of the rack (Figure 2-2).
Failure to use the proper screws may damage the unit.
Step 2.
Using a #2 Philips screwdriver, install the M5 flat head screws through the mounting bracket holes into
the rack.
Step 3.
Repeat Step 1 and Step 2 to attach the second mounting bracket on the other side of the rack.
Содержание VES-1008
Страница 1: ...VES 1000 Series VDSL Ethernet Switches May 2002 Version 3 40 Hardware Installation Guide...
Страница 10: ......
Страница 20: ...VES 1000 Series Ethernet Switch 2 6 Hardware Installation Figure 2 5 Mounting the VES 1012 in a Rack...
Страница 30: ......
Страница 36: ......
Страница 44: ......
Страница 50: ...VES 1000 Series Ethernet Switch F Appendix B PIN Assignments...