background image

FRANÇAIS

69

4

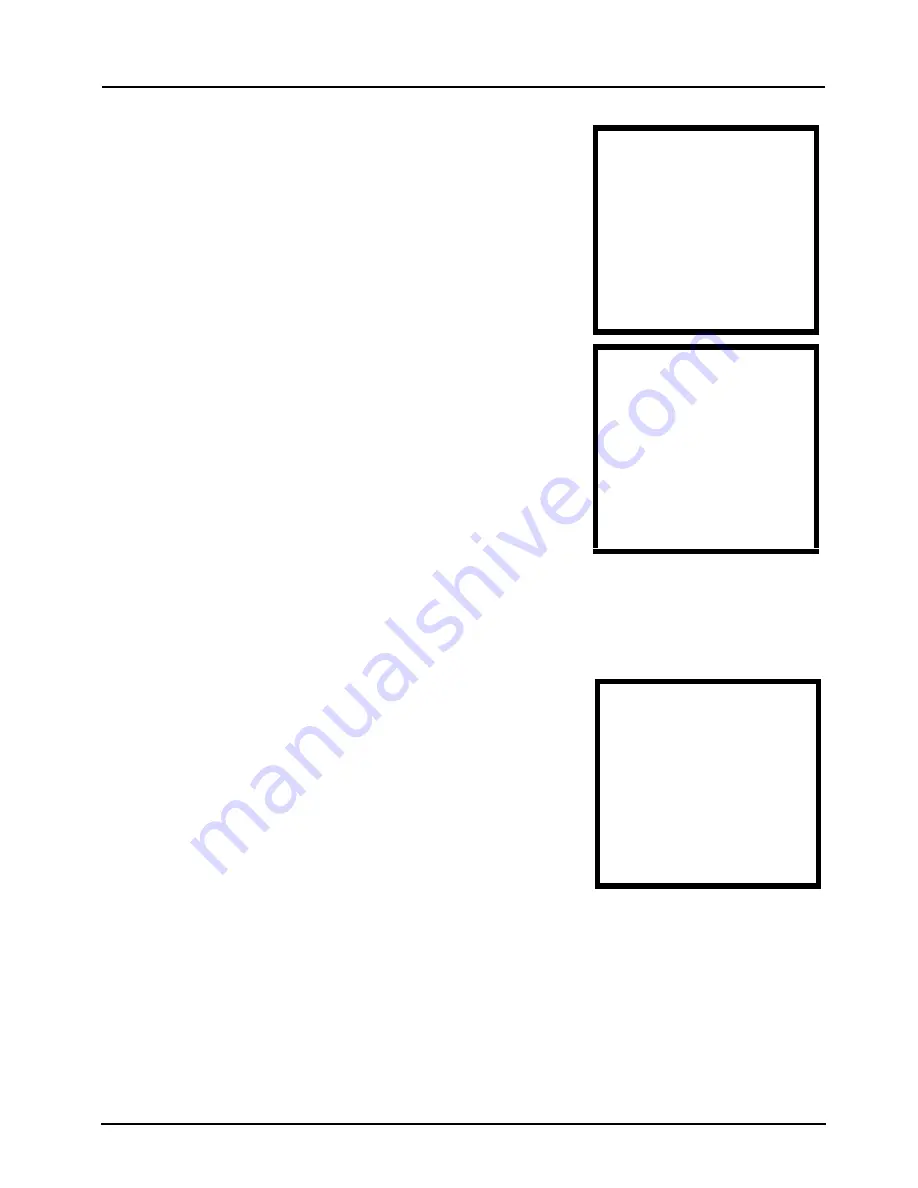
Le V630 balaye et donne la liste des 
AP dans la zone. Sélectionner l'AP 
auquel vous voulez vous connecter. 

5

L'AP dans cet exemple utilise la 
sécurité (WPA-PSK), entrez la clé 
(mot de passe) et sélectionnez 

Done

 (Terminé).

• Vous devrez peut-être 

appuyer plusieurs fois sur une 
touche pour entrer le car-
actère désiré.

• Appuyez sur 

#

 pour utiliser les lettres minuscules, les 

lettres majuscules, les chiffres ou les symboles. 

6

Pour utiliser une adresse IP statique 
ou PPPoE, sélectionnez 

IP Setting


(Paramètre IP) et sélectionnez 
l'option appropriée. 
Autrement, appuyez sur la touche 

Power/End

 (Marche/Fin) pour 

retourner à l'écran principal.

Avec un seul compte SIP, chaque profil WLAN que vous avez 
créé l'utilise. Si vous créez plusieurs profils SIP, éditez les 
paramètres de liaison SIP d'un profil WLAN pour définir quel 
profil SIP est utilisé par le profil WLAN.

------WLAN Scan-------

WLAN Example

RSSI: 64

Chan: 6

Select

 Back

-------Enter Key--------

Done

abc

 Clear

------Add to Profile:-----

1 SSID

2 Security set..

3. IP Setting

4. SIP Binding

Select

 Back

Содержание V-630

Страница 1: ...Copyright 2008 All rights reserved V630 VoIP Wi Fi Phone Quick Start Guide Version 3 60 6 2008 Edition 1 CONTENTS ENGLISH 3 DEUTSCH 19 ESPAÑOL 39 FRANÇAIS 57 ITALIANO 75 РУССКИЙ 93 简体中文 113 繁體中文 129 ...

Страница 2: ...V630 Quick Start Guide 2 ...

Страница 3: ...s and a voice account already set up This Quick Start Guide covers the following See the User s Guide for more information on all features Physical Features See page 4 Installing and Charging the Battery See page 5 The LCD Screen See page 7 Initial Configuration See page 9 Connect to a Wireless Network See page 13 Basic Phone Operation See page 15 ENGLISH ...

Страница 4: ... navigate the phone s menus Left key Press this to open the on screen menus and select options Right key Press this to return to the previous menu It is also a shortcut to the phone book LCD screen Alphanumeric Left key Right key Power End Talk key USB recharge port Headset jack key keypad Up Down key ...

Страница 5: ... use the V630 Talk key Press this to make and receive calls Up Down keys In the main screen these are quick access buttons By default Up opens the information menu and Down opens the phone settings profile setup See the User s Guide to change their functions In the menus these keys move the cursor Power End key Press this to finish or reject calls Hold it down for a few seconds to turn the V630 on...

Страница 6: ... V630 s base and lift it off 2 Remove any packaging from the included battery Hold the battery with the plastic tab facing up Insert the battery so the end with the contacts the metal areas touches the V630 s contacts located near the base Press the battery down 3 Replace the battery cover ...

Страница 7: ...e port 5 Connect the charger s plug to a power socket The backlight turns on If the V630 is turned on the level indicated in the battery icon s meter cycles 4 The LCD Screen Press the red End Power key for a few seconds to turn on the V630 After the welcome display the V630 prompts you to enter the time and date V If the screen does not come on ensure that the battery is charged See Section 3 USB ...

Страница 8: ... The battery meter cycles during recharging No WLAN Service The status of the wireless LAN connection or SIP server registration displays here Time Date The time and date in month day year format display in the middle of the screen Menu Use the Left key to perform the function shown here In the main screen press the Left key to enter the V630 s main menu Name Use the Right key to perform the funct...

Страница 9: ... IEEE 802 11b or IEEE 802 11g connection See Section 6 for more information 5 1 Entering Your VoIP Account Do the following to set the V630 to use your VoIP account 1 From the V630 s main screen press the Left key Menu to enter the menus 2 Use the Down key to go to 4 Network and then the Left key to select it 3 Select 3 SIP Profiles Main Menu 1 Call log 2 Profiles 3 Setup 4 Network Select Back Net...

Страница 10: ...pper case letters num bers or symbols 6 Select 2 Phone Number 7 Enter your SIP account number For example if you have a SIP account like 1234567 voip provider com your SIP account number is 1234567 SIP Profiles 1 Profiles List 2 Add to Profile Select Back New Profile Name Done abc Clear Add to Profile 1 Display Name 2 Phone Number 3 SIP Server 4 SIP Proxy Select Back Phone Number 1234567 Done Clea...

Страница 11: ...ar server s address 11 If the VoIP service provider gave you a SIP port number other than 5060 select 2 SIP Port and go to step 12 Otherwise skip to step 13 Add to Profile 1 Display Name 2 Phone Number 3 SIP Server 4 SIP Proxy Select Back SIP Server Setup 1 SIP Address 2 SIP Port Select Back SIP Address 111 222 333 444 Done Clear SIP Server Setup 1 SIP Server Address 2 SIP Port Select Back ...

Страница 12: ...odec order settings unless the VoIP service provider provided settings for them or you have a specific reason to do so Press the Power End key to return to the main screen Congratulations You have configured the VoIP settings Continue with Section 6 to set up the wireless connection SIP Port 5060 Done Clear Add to Profile 1 Display Name 2 Phone Number 3 SIP Server 4 SIP Proxy Select Back Proxy Set...

Страница 13: ...e menus 2 Use the Down key to go to 4 Network and then the Left key to select it 3 Select 1 Site Scan 4 The V630 scans and then lists the APs in the area Select the AP to which you want to connect Main Menu 1 Call log 2 Profiles 3 Setup 4 Network Select Back Network 1 Site Scan 2 WLAN Profiles 3 SIP Profiles 4 Ping Test Select Back WLAN Scan WLAN Example RSSI 64 Chan 6 Select Back ...

Страница 14: ...single SIP account every WLAN profile you create uses it If you create multiple SIP profiles edit a WLAN profile SIP binding settings to set which SIP profile the WLAN profile uses The signal strength icon displays after the V630 connects to the AP Next the V630 attempts to register with the SIP server ZyXEL V630 displays in the main screen after successful SIP registration see the User s Guide fo...

Страница 15: ...persists contact your VoIP service provider MAKING A CALL 1 From the main screen enter the number you want to call or press the Right key to open the V630 s phone book See your User s Guide for how to use the phone book 2 Press the green Talk key to start the call USING THE SPEAKER PHONE Press the Right key during a call to activate the speaker phone feature RECEIVING A CALL Press the green Talk k...

Страница 16: ...on to open the call options and then select New call 2 Enter another phone number and press the green Talk key 3 After the third party answers press the Left key Call Option to open the call options Select conference TRANSFERRING A CALL 1 During the call press the Left key Call Option to open the call options Select Blind Transfer 2 Dial the number to which you want to transfer the call 3 Wait unt...

Страница 17: ... SIP server 1 Section 5 covered creating a SIP profile for using a SIP server Create a different SIP profile for P2P calls The SIP profile needs a phone number for the V630 but no SIP server settings From the main screen select Menu Network SIP Profiles Add to Profile 2 You must use a static IP address Create a WLAN profile that uses a static IP address From the main screen select Menu Network WLA...

Страница 18: ...P2P mode and enter the callee s IP address and SIP port number 5060 is the default Select what group the callee should belong to if any Press the Left key to start the call PEER TO PEER CALLS P2P Viewing a Product s Certification s 1 Go to www zyxel com 2 Select your product from the drop down list box on the ZyXEL home page to go to that product s page 3 Select the certification you wish to view ...

Страница 19: ...o Diese Kurzanleitung ist in die folgenden Abschnitte aufgeteilt Weitere Informationen zu allen Funktionen finden Sie im Benutzerhandbuch Physikalische Leistungsmerkmale Siehe Seite 20 Einsetzen und Aufladen des Akkus Siehe Seite 22 Der LCD Monitor Siehe Seite 24 Erstkonfiguration Siehe Seite 26 Anschließen an ein Drahtlosnetzwerk Siehe Seite 30 Telefongrundlagen Siehe Seite 33 DEUTSCH ...

Страница 20: ...n anzeigen lassen und in den Menüs des Telefons navigieren Nach links Taste Drücken Sie auf diese Taste um die Bildschirmmenüs aufzurufen und Optionen auszuwählen LCD Monitor Alphanumerisch Nach links Taste Nach rechts Ein Aus Ende Sprechen Taste USB Ladeanschluss Kopfhöreranschluss Taste Tastatur Nach oben unten Taste Taste ...

Страница 21: ...nd die Down Nach unten Taste das Profil Einstellmenü für die Telefoneinstellungen Eine Beschreibung zum Ändern der Tastenfunktionen finden Sie im Benutzerhandbuch In den Menüs können Sie mit diesen Tasten den Cursor verschieben Ein Aus Ende Taste Drücken Sie auf diese Taste um Anrufe abzuweisen oder zu beenden Drücken Sie einige Sekunden lang auf diese Taste um das V630 ein oder auszuschalten Alph...

Страница 22: ...das USB Ladekabel nicht angeschlossen ist Bevor Sie den V630 das erste Mal benutzen muss der Akku 10 Stunden lang aufgeladen werden 1 Drücken Sie auf den Akkufachriegel des V630 schieben Sie die Abdeckung zur Basis des V630 und heben Sie sie dann ab 2 Entfernen Sie das gesamte Verpackungsmaterial des enthaltenen Akkus Halten Sie den Akku so dass das Kunststoffetikett nach oben zeigt Legen Sie den ...

Страница 23: ...deckel wieder auf 1 WARNUNG Verwenden Sie zum Aufladen nur das mitgelieferte Ladegerät oder ein USB Kabel nicht im Lieferumfang enthalten das an den USB Anschluss eines Computers angeschlossen ist Mit einem anderen Ladegerät kann das V630 oder sein Akku beschädigt werden 4 Schließen Sie das Kabel des Ladegeräts an den Anschluss USB Recharge an USB Ladeanschluss ...

Страница 24: ...ower Ein Aus Ende Taste um den V630 einzuschalten Nachdem das Willkommensfenster eingeblendet wurde werden Sie vom V630 aufgefordert das Datum und die Uhrzeit einzugeben V Wenn das Fenster nicht angezeigt wird stellen Sie sicher dass der Akku aufgeladen ist Siehe Abschnitt 3 Als nächstes erscheint das Hauptfenster auf dem LCD Monitor Die Symbole am oberen Rand des LCD Monitors geben Auskunft über ...

Страница 25: ... Ladestand des Akkus angezeigt Während des Ladevorgangs zeigt die Ladestandsanzeige wechselnde Balken Kein WLAN Dienst Hier wird der Status der Wireless LAN Verbindung die SIP Server Registrierung angezeigt Uhrzeit Datum Die Uhrzeit und das Datum im Format Monat Tag Jahr werden in der Mitte des Bildschirms angezeigt Menü Drücken Sie auf die Left Nach links Taste um die hier angezeigte Funktion aus...

Страница 26: ...2 11b oder IEEE 802 11g Weitere Informationen finden Sie in Abschnitt 6 5 1 Einrichten des VoIP Kontos Um den V630 für das VoIP Konto einzurichten müssen Sie folgendes tun 1 Drücken Sie im Hauptfenster des V630 auf die Nach links Taste um die Menüs aufzurufen Bezeichn ung Drücken Sie auf die Right Nach rechts Taste um die hier angezeigte Funktion auszuführen Drücken Sie im Hauptfenster auf die Rig...

Страница 27: ...n für das Profil ein und wählen Sie Done Fertig Um das gewünschte Zeichen einzugeben müssen Sie u U mehrmals auf eine bestimmte Taste drücken Drücken Sie auf um Klein buchstaben Großbuchstaben Zahlen oder Symbole zu verwenden Main Menu 1 Call log 2 Profiles 3 Setup 4 Network Select Back Network 1 Site Scan 2 WLAN Profiles 3 SIP Profiles 4 Ping Test Select Back SIP Profiles 1 Profiles List 2 Add to...

Страница 28: ...ummer Ihres SIP Kontos 1234567 8 Wählen Sie 3 SIP Server SIP Server 9 Wählen Sie 1 SIP Address SIP Adresse Add to Profile 1 Display Name 2 Phone Number 3 SIP Server 4 SIP Proxy Select Back Phone Number 1234567 Done Clear Add to Profile 1 Display Name 2 Phone Number 3 SIP Server 4 SIP Proxy Select Back SIP Server Setup 1 SIP Address 2 SIP Port Select Back ...

Страница 29: ...stellt hat Standard Port ist 5060 wählen Sie 2 SIP Port SIP Port und fahren Sie weiter mit Schritt 12 Anderenfalls gehen Sie weiter zu Schritt 13 12 Geben Sie die SIP Port Nummer des VoIP Dienstanbieters ein und wählen Sie Done Fertig 13 Wählen Sie 4 SIP Proxy SIP Proxy SIP Address 111 222 333 444 Done Clear SIP Server Setup 1 SIP Server Address 2 SIP Port Select Back SIP Port 5060 Done Clear Add ...

Страница 30: ...on Ihrem VoIP Dienstanbieter diese Einstellungen zur Verfügung gestellt hat Drücken Sie auf die Power End Ein Aus Ende Taste um zum Hauptfenster zurückzukehren Herzlichen Glückwunsch Sie haben die VoIP Einstellungen fertig konfiguriert Fahren Sie bei Abschnitt 6 fort um die Drahtlosverbindung einzurichten 6 Anschließen an ein Drahtlosnetzwerk Führen Sie die folgenden Schritte aus um den V630 mit d...

Страница 31: ...chsucht zunächst den Bereich nach APs und listet die gefundenen dann auf Wählen Sie den AP aus zu dem die Verbindung hergestellt werden soll 5 In diesem Beispiel verwendet der AP eine Sicherheitseinstellung WPA PSK Geben Sie das Kennwort ein und drücken Sie auf Done Fertig Main Menu 1 Call log 2 Profiles 3 Setup 4 Network Select Back Network 1 Site Scan 2 WLAN Profiles 3 SIP Profiles 4 Ping Test S...

Страница 32: ...nur ein SIP Konto vorhanden ist Wenn Sie mehrere SIP Profile erstellen legen Sie mit dem WLAN Profil der SIP Bindungseinstellungen fest welches SIP Profil das WLAN Profil verwendet Das Symbol für die Signalstärke wird angezeigt nachdem das V630 die Verbindung zum AP hergestellt hat Als nächstes versucht das V630 sich beim SIP Server anzumelden Nach einer erfolgreichen SIP Registrierung erscheint a...

Страница 33: ...en Sie sich an Ihren VoIP Dienstanbieter TÄTIGEN EINES ANRUFS 1 Geben Sie im Hauptfenster die Nummer ein die Sie anrufen möchten oder drücken Sie auf die Right Nach rechts Taste um das Telefonbuch des V630 aufzurufen Eine Beschreibung zum Verwenden des Telefonbuchs finden Sie im Benutzerhandbuch 2 Drücken Sie auf die grüne Talk Sprechen Taste um den Anruf zu tätigen VERWENDEN DER LAUTSPRECHFUNKTIO...

Страница 34: ... die Anrufoptionen aufzurufen Wählen Sie Hold Unhold Halten Freigeben um den Anruf zu halten oder freizugeben TÄTIGEN EINER DREIERKONFERENZ 1 Drücken Sie während eines Anrufs auf die Left Nach links Taste Anrufoption um die Anrufoptionen aufzurufen Wählen Sie dann New call Neuer Anruf 2 Geben Sie eine weitere Telefonnummer ein und drücken Sie auf die grüne Sprechen Taste 3 Wenn die dritte Person a...

Страница 35: ...g zu beenden SPERREN UND ENTSPERREN DER TASTATUR Sperren Sie die Tastatur damit Sie nicht versehentlich Anrufe tätigen Drücken Sie im Hauptfenster auf die Left Nach links Taste und auf um das V630 zu sperren oder zu entsperren Sie können auch einstellen dass die Tastatur automatisch gesperrt wird wenn der V630 über einen bestimmten Zeitraum nicht benutzt wird Eine Anleitung dazu finden Sie im Benu...

Страница 36: ...figurieren Sie die IP Adresse die Subnetz Maske die Gateway Adresse und die DNS Serveradresse Wählen Sie mit der SIP Bindungsoption das SIP Profil aus das Sie im vorhergehenden Schritt erstellt haben Ihre Telefonnummer und P2P werden im Hauptfenster angezeigt 3 Drücken Sie im Hauptfenster auf die Right Nach rechts Taste um das Telefonbuch zu öffnen Drücken Sie in der Kontakteliste auf Option Add H...

Страница 37: ...oduktzertifizierung en 1 Zu www zyxel com 2 Wählen Sie aus der Drop down Liste auf der ZyXEL Homepage Ihr Produkt aus um zur entsprechenden Produktseite zu gelangen 3 Wählen Sie aus welche Zertifizierung Sie auf dieser Seite ansehen möchten ...

Страница 38: ...DEUTSCH 38 ...

Страница 39: ...a Esta Guía de inicio rápido cubre lo siguiente Consulte la Guía del usuario para más información sobre todas las características Características físicas Consultar página 40 Instalar y cargar la batería Consultar página 41 La pantalla LCD Consultar página 43 Configuración inicial Consultar página 45 Conectar a una red inalámbrica Consultar página 49 Operaciones básicas del teléfono Consultar págin...

Страница 40: ...eléfono Tecla izquierda Presiónela para abrir los menús en pantalla y seleccionar opciones Tecla derecha Presionar para regresar al menú anterior También es un acceso directo a la agenda Pantalla LCD Teclado Tecla izquierda Tecla derecha Tecla Tecla llamar Puerto USB Carga Conexión de encendido Tecla arriba abajo colgar alfanumérico auriculares ...

Страница 41: ...a abajo En la pantalla principal son botones de acceso rápido Por defecto Up Arriba abre el menú de información y Down Abajo abre la configuración del perfil del teléfono Consulte la Guía del usuario para cambiar sus funciones En los menús estas teclas mueven el cursor Tecla encendido colgar Presionar para finalizar o rechazar llamadas Mantener presionada durante unos segundos para encender o apag...

Страница 42: ...la tapa hacia la base del V630 y levántela 2 Quite el embalaje de la batería incluida Sostenga la batería con la pestaña de plástico mirando hacia arriba Inserte la batería para que el extremo con los contactos las zonas metálicas toque los contactos del V630 situados cerca de la base Presione la batería hacia abajo 3 Vuelva a colocar la tapa de la batería ...

Страница 43: ...or en el puerto USB carga 5 Conecte el enchufe del cargador en una toma de corriente La retroiluminación se encenderá Si se enciende el V630 el nivel indicado en el icono de la batería irá mostrando el progreso 4 La pantalla LCD Presione la tecla End Power Encendio Colgar durante unos segundos para encender el V630 Tras la pantalla de bienvenida el V630 le pedirá que introduzca la hora y la fecha ...

Страница 44: ...to muestra la fuerza de la señal de la LAN inalámbrica El teclado está bloqueado Presione la tecla Left Izquierda y para desbloquearlo Esto muestra si el timbre está activado o desactivado La vibración está activada Esto muestra la corriente restante en la batería El icono de batería muestra el progreso durante la carga No hay servicio WLAN El estado de la conexión de LAN inalámbrica o registro de...

Страница 45: ...más información 5 1 Entrar en su cuenta VoIP Realice lo siguiente para que el V630 utilice su cuenta VoIP Hora Fecha La hora y la fecha en formato mes día año aparece en la parte central de la pantalla Menú Utilice la tecla Left Izquierda para ejecutar la función mostrada para ese botón En la pantalla principal presione la tecla Left Izquierda para entrar en el menú principal del V630 Nombre Utili...

Страница 46: ...es 3 Perfiles SIP 4 Seleccione 2 Add to Profile 2 Añadir a perfil 5 Escriba un nombre para identificar al perfil y seleccione Done Listo Puede que necesite presionar una tecla varias veces para escribir el carácter deseado Main Menu 1 Call log 2 Profiles 3 Setup 4 Network Select Back Network 1 Site Scan 2 WLAN Profiles 3 SIP Profiles 4 Ping Test Select Back SIP Profiles 1 Profiles List 2 Add to Pr...

Страница 47: ...P como 1234567 voip provider com su número de cuenta SIP es 1234567 8 Seleccione 3 SIP Server 3 Servidor SIP 9 Seleccione 1 SIP Address 1 Dirección SIP Add to Profile 1 Display Name 2 Phone Number 3 SIP Server 4 SIP Proxy Select Back Phone Number 1234567 Done Clear Add to Profile 1 Display Name 2 Phone Number 3 SIP Server 4 SIP Proxy Select Back SIP Server Setup 1 SIP Address 2 SIP Port Select Bac...

Страница 48: ...uerto SIP distinto a 5060 seleccione 2 SIP Port 2 Puerto SIP y vaya al paso 12 De lo contrario vaya al paso 13 12 Escriba el número del puerto SIP del proveedor de servicios VoIP y seleccione Done Listo 13 Seleccione 4 SIP Proxy 4 Proxy SIP SIP Address 111 222 333 444 Done Clear SIP Server Setup 1 SIP Server Address 2 SIP Port Select Back SIP Port 5060 Done Clear Add to Profile 1 Display Name 2 Ph...

Страница 49: ...si tiene una razón específica para hacerlo Presione la tecla Power End Encendido Colgar para volver a la pantalla principal Enhorabuena Ha finalizado la configuración VoIP Continúe con la sección 6 para configurar la conexión inalámbrica 6 Conectar a una red inalámbrica Haga lo siguiente para configurar el V630 para conectarlo a una red inalámbrica 1 En la pantalla principal del V630 presione la t...

Страница 50: ...PA de este ejemplo utiliza seguridad WPA PSK escriba la clave contraseña y seleccione Done Listo Puede que necesite presionar una tecla varias veces para escribir el carácter deseado Presione para utilizar letras minúsculas mayúsculas números o símbolos Main Menu 1 Call log 2 Profiles 3 Setup 4 Network Select Back Network 1 Site Scan 2 WLAN Profiles 3 SIP Profiles 4 Ping Test Select Back WLAN Scan...

Страница 51: ... de que el V630 se conecte al PA A continuación el V630 intentará registrarse en el servidor SIP ZyXEL V630 aparecerá en la pantalla principal tras un registro SIP con éxito ver la Guía del usuario sobre cómo modificar el nombre para mostrar del perfil SIP Ahora puede comenzar a realizar llamadas Consulte la Sección 7 para más detalles 7 Operaciones básicas del teléfono REALIZAR UNA LLAMADA 1 En l...

Страница 52: ...tacte con su proveedor de servicios VoIP 2 Presione la tecla verde Talk Llamar para iniciar la llamada UTILIZAR EL ALTAVOZ DEL TELÉFONO Presione la tecla Right Derecha durante una llamada para activar el altavoz del teléfono RECIBIR UNA LLAMADA Presione la tecla verde Talk Llamar para responder a una llamada entrante FINALIZAR UNA LLAMADA Presione la tecla roja Power End Encendido Colgar para fina...

Страница 53: ... Opciones de llamada para abrir las opciones de llamada y luego seleccione New call Nueva llamada 2 Escriba otro número de teléfono y presione la tecla Talk Llamar 3 Cuando la tercera persona responda presione la tecla Left Izquierda Call Option Opciones de llamada para abrir las opciones de llamada Seleccione conference Conferencia TRANSFERIR UNA LLAMADA 1 Durante una llamada presione la tecla Le...

Страница 54: ...V630 durante un período determinado Consulte la Guía del usuario para saber cómo hacer esto LLAMADAS PEER TO PEER P2P Haga lo siguiente para llamar directamente al número de teléfono SIP de alguien y la dirección IP sin ir a través de un servidor SIP 1 La sección 5 cubre la creación de un perfil SIP para usar un servidor SIP Crear un perfil SIP distinto para llamadas P2P El perfil SIP necesita un ...

Страница 55: ...ado en el paso anterior Su número de teléfono y P2P aparecerán en la pantalla principal 3 En la pantalla principal presione la tecla Right Derecha para abrir la agenda En la lista de contactos presione Option Opciones Add Añadir Crear una entrada en la agenda para un usuario Escriba el nombre del usuario y el número de teléfono SIP Luego seleccione el modo P2P y escribe la dirección IP del usuario...

Страница 56: ...ificados de un producto 1 Vaya a www zyxel com 2 Seleccione su producto de la lista desplegable en la página inicial de ZyXEL para ir a la página de ese producto 3 Seleccione el certificado que desee visualizar en esta página ...

Страница 57: ...s à Internet et un compte vocal déjà activé Ce guide de mise en route rapide couvre ce qui suit Voir le Guide de l utilisateur pour plus d informations sur toutes les fonctionnalités Caractéristiques physiques Voir Page 58 Installer et recharger la batterie Voir Page 60 L écran LCD Voir Page 62 Configuration initiale Voir Page 63 Connexion à un réseau sans fil Voir Page 68 FRANÇAIS ...

Страница 58: ...ez cet écran pour afficher les informations et naviguer dans les menus du téléphone Touche Gauche Appuyez ici pour ouvrir les menus d écran et sélectionner les options Ecran LCD Alphanumérique Touche Gauche Touche Droite Touche Touche Parler USB port de rechargement Prise casque pavé numérique Touche Haut Bas Marche Fin ...

Страница 59: ...amètres du téléphone Voir le guide de l utilisateur pour modifier leurs fonctions Dans les menus ces touches déplacent le curseur Touche Marche Fin Appuyez ici pour terminer ou rejeter des appels Maintenez la enfoncée pendant quelques secondes pour allumer ou éteindre le V630 Clavier alphanumérique Utilisez ces touches pour entrer les chiffres lettres et symboles Prise casque Connectez un casque n...

Страница 60: ...ent quand le V630 est éteint et que le chargeur câble USB est débranché Chargez la batterie pendant 10 heures avant la première util isation du V630 1 Appuyez sur le bouton sur leV630 couvercle de la batterie du et faites coulisser le couvercle vers la base du V630 et enlevez le en soulevant 2 Retirez tout emballage de la batterie fournie Maintenez la batterie avec la languette en plastique dirigé...

Страница 61: ...n port USB d ordinateur Un chargeur différent pourrait endommager le V630 ou sa batterie 4 Connectez le câble du chargeur dans le port USB Rechargement 5 Branchez la fiche du chargeur à une prise de courant Le rétroéclairage s allume Si le V630 s allume le niveau indiqué dans la jauge de l icône de batterie s anime USB port de rechargement ...

Страница 62: ...rifiez que la batterie est chargée Voir la section 3 L écran principal LCD affiche suivant Les icônes situés au sommet de l écran LCD affichent les informations d état ICÔNE DESCRIPTION Cela indique la force du signal LAN sans fil Le clavier est verrouillé Appuyez sur la touche Left Gauche et pour le déverrouiller Cela indique si la sonnerie est activée ou non Le vibreur est activé No WLAN Service...

Страница 63: ...e pendant le rechargement Pas de service WLAN L état de la connexion LAN sans fil ou l enregistrement du serveur SIP s affiche ici Heure Date L heure et la date au format mois jour année s affiche au milieu de l écran Menu Utilisez la touche Left Gauche pour effectuer la fonction indiquée ici Dans l écran principal appuyez sur la touche Left Gauche pour entrer dans le menu principal du V630 Nom Ut...

Страница 64: ...ser votre compte VoIP 1 Dans l écran principal du V630 appuyez sur la touche Left Gauche Menu pour entrer dans les menus 2 Utilisez la touche Down Bas pour aller à 4 Network et ensuite sur la touche Left Gauche pour le sélectionner 3 Sélectionnez 3 Profils SIP Main Menu 1 Call log 2 Profiles 3 Setup 4 Network Select Back Network 1 Site Scan 2 WLAN Profiles 3 SIP Profiles 4 Ping Test Select Back ...

Страница 65: ...s les lettres majuscules les chiffres ou les symboles 6 Sélectionner 2 Phone Number 2 Numéro de téléphone 7 Saisissez le numéro de votre compte SIP Par exemple si vous avez un compte SIP comme 1234567 voip provider com votre numéro de compte SIP est 1234567 SIP Profiles 1 Profiles List 2 Add to Profile Select Back New Profile Name Done abc Clear Add to Profile 1 Display Name 2 Phone Number 3 SIP S...

Страница 66: ...sse du serveur du registraire 11 Si le fournisseur de service VoIP vous a donné un numéro de port SIP autre que 5060 sélectionnez 2 SIP Port 2 Port SIP et allez à l étape 12 Autrement sautez à l étape 13 Add to Profile 1 Display Name 2 Phone Number 3 SIP Server 4 SIP Proxy Select Back SIP Server Setup 1 SIP Address 2 SIP Port Select Back SIP Address 111 222 333 444 Done Clear SIP Server Setup 1 SI...

Страница 67: ... que 5060 saisissez la 15 Ne modifiez pas les paramètres de parcours NAT expiration ou d ordre de codec à moins que le fournisseur de service VoIP fournisse des paramètres pour ceux ci et que vous ayez une raison précise de le faire Appuyer sur la touche Power End Marche Fin pour retourner à l écran principal SIP Port 5060 Done Clear Add to Profile 1 Display Name 2 Phone Number 3 SIP Server 4 SIP ...

Страница 68: ...nnecter au réseau sans fil 1 Dans l écran principal du V630 appuyez sur la touche Left Gauche Menu pour entrer dans les menus 2 Utilisez la touche Down Bas pour aller à 4 Network et ensuite sur la touche Left Gauche pour le sélectionner 3 Sélectionnez 1 Site Scan 1 Balayage du site Main Menu 1 Call log 2 Profiles 3 Setup 4 Network Select Back Network 1 Site Scan 2 WLAN Profiles 3 SIP Profiles 4 Pi...

Страница 69: ...res ou les symboles 6 Pour utiliser une adresse IP statique ou PPPoE sélectionnez IP Setting Paramètre IP et sélectionnez l option appropriée Autrement appuyez sur la touche Power End Marche Fin pour retourner à l écran principal Avec un seul compte SIP chaque profil WLAN que vous avez créé l utilise Si vous créez plusieurs profils SIP éditez les paramètres de liaison SIP d un profil WLAN pour déf...

Страница 70: ...anière de modifier le nom de l affichage du profil SIP Vous pouvez maintenant commencer à effectuer des appels Voir la Section 7 pour plus de détails 7 Utilisation de base du téléphone EFFECTUER UN APPEL 1 Dans le menu principal entrez le numéro que vous voulez appeler ou appuyez sur la touche Right Droite pour ouvrir l annuaire du V630 Voir votre guide de l utilisateur pour savoir comment utilise...

Страница 71: ...d appeler un numéro de téléphone différent Si le problème persiste contactez votre fournisseur de service VoIP UTILISER LE HAUT PARLEUR Appuyez avec la touche Right Droite pendant un appel pour activer la fonctionnalité haut parleur RECEVOIR UN APPEL Appuyez sur la touche Talk Parler pour répondre à un appel entrant TERMINER UN APPEL Appuyez sur la touche Power End Marche Fin pour terminer un appe...

Страница 72: ...s sélectionnez New call Nouvel appel 2 Entrez un autre numéro de téléphone et appuyez sur la touche Talk Parler verte 3 Une fois que la tierce personne répond appuyez sur la touche Left Gauche Option d appel pour ouvrir les options d appel Sélectionnez conference conférence TRANSFÉRER UN APPEL 1 Pendant l appel appuyez sur la touche Left Gauche Option d appel pour ouvrir les options d appel Sélect...

Страница 73: ...ur SIP 1 La section 5 a couvert la création d un profil SIP pour utiliser un serveur SIP Créer un profil SIP différent pour les appels P2P Le profil SIP nécessite un numéro de téléphone pour le V630 mais pas de paramètres de serveur SIP Dans l écran principal sélectionnez Menu Réseau Profils SIP Ajouter au profil 2 Vous devez utiliser une adresse IP statique Créez un profil WLAN utilisant une adre...

Страница 74: ...adresse IP de l appelé et le numéro de port SIP 5060 et la valeur par défaut Sélectionnez le groupe auquel doit appartenir l appelé le cas échéant Appuyez sur la touche Left Gauche pour effectuer l appel APPELS POSTE À POSTE P2P Afficher la les certification s d un produit 1 Allez à www zyxel com 2 Sélectionnez votre produit dans la liste déroulante dans la page d accueil du ZyXEL pour aller à la ...

Страница 75: ...gurato In questa Guida rapida vengono trattati gli argomenti seguenti Vedere la Guida dell utente per maggiori informazioni su tutte le funzioni Caratteristiche fisiche Vedere pagina 76 Installazione e ricarica della batteria Vedere pagina 77 Schermo LCD Vedere pagina 79 Configurazione iniziale Vedere pagina 81 Connessione a una rete senza fili Vedere pagina 86 Funzionamento di base del telefono V...

Страница 76: ...iare Tasti Sinistro Premere questo tasto per aprire i menu a schermo e selezionare le opzioni Tasto Destro Consente di tornare al menu precedente Rappresenta anche un collegamento alla rubrica telefonica Schermo LCD Alfanumerico Tasti Sinistro Tasto Destro Alimentazione Tasto Parla Porta USB ricarica Jack auricolare tasto tastiera Tasto Su Giù ...

Страница 77: ... delle informazioni mentre Down Giù apre il profilo di impostazione per configurare il telefono Vedere la Guida dell utente per le modifiche alle funzioni All interno dei menu questi tasti consentono di spostare il cursore Tasto Alimentazione Fine Consente di terminare o rifiutare una telefonata Tenere premuto questo tasto per qualche secondo per accendere spegnere il V630 Tastiera alfanumerica Ut...

Страница 78: ... coperchio della batteria del V630 e far scorrere il coperchio verso la base del V630 quindi tirarlo via 2 Rimuovere tutto il materiale di imballaggio dalla batteria fornita a corredo Tenere la batteria con la linguetta di plastica rivolta verso l alto Inserire la batteria in modo che l estremità contenente i contatti le aree metalliche tocchino i contatti del V630 che si trovano in prossimità del...

Страница 79: ...porta USB ricarica 5 Collegare la spina del caricatore a una presa di corrente La retroilluminazione si accende Se il V630 è acceso il livello indicato nell icona della batteria visualizza ciclicamente l indicatore 4 Schermo LCD Tenere premuto per qualche secondo il tasto End Power Fine Alimentazione rosso per accedere il V630 Dopo la visualizzazione della schermata di benvenuto il V630 richiede d...

Страница 80: ...o LCD visualizzano le informazioni di stato ICONA DESCRIZIONE Mostra l intensità del segnale LAN wireless La tastiera è bloccata Premere il tasto Left Sinistra e per sbloccarla Questa icona indica se la suoneria è attivata o disattivata La vibrazione è attivata Mostra l energia rimanente nella batteria L indicatore della batteria visualizza ciclicamente l indicazione di ricarica No WLAN Service 2 ...

Страница 81: ...mazioni Nessun servizio WLAN disponibile Qui viene mostrato lo stato della connessione LAN wireless o la registrazione al server SIP Ora Data Al centro dello shermo vengono visualizzati l ora e la data in formato mese giorno anno Menu Utilizzare il tasto Left Sinistra per eseguire la funzione qui mostrata Nella schermata principale premere il tasto Left Sinistra per aprire il menu principale del V...

Страница 82: ...menu 2 Utilizzare il tasto Down Giù per passare a 4 Network Rete e quindi premere il tasto Left Sinistra per selezionare la voce 3 Selezionare 3 SIP Profiles 3 Profili SIP 4 Selezionare 2 Add to Profile 2 Aggiungi a profilo Main Menu 1 Call log 2 Profiles 3 Setup 4 Network Select Back Network 1 Site Scan 2 WLAN Profiles 3 SIP Profiles 4 Ping Test Select Back SIP Profiles 1 Profiles List 2 Add to P...

Страница 83: ...ezionare 2 Phone Number 2 Numero di telefono 7 Inserire il numero dell account SIP Se ad esempio il proprio account SIP è simile a 1234567 voip provider com il numero dell account SIP sarà 1234567 8 Selezionare 3 SIP Server 3 Server SIP New Profile Name Done abc Clear Add to Profile 1 Display Name 2 Phone Number 3 SIP Server 4 SIP Proxy Select Back Phone Number 1234567 Done Clear Add to Profile 1 ...

Страница 84: ...itore di servizi VoIP ha fornito un numero di porta SIP diverso da 5060 selezionare 2 SIP Port 2 Porta SIP e saltare al passo 12 In caso contrario saltare al passo 13 12 Immettere il numero di porta SIP specificato dal fornitore di servizi VoIP e selezionare Done Fine SIP Server Setup 1 SIP Address 2 SIP Port Select Back SIP Address 111 222 333 444 Done Clear SIP Server Setup 1 SIP Server Address ...

Страница 85: ...eno che il fornitore di servizi VoIP non ha fornito impostazioni diverse oppure non vi sia una ragione valida per farlo Premere il tasto Power End Alimentazione Fine per tornare alla schermata principale A questo punto le impostazioni VoIP sono quindi configurate Continuare dalla sezione 6 per configurare la connessione wireless Add to Profile 1 Display Name 2 Phone Number 3 SIP Server 4 SIP Proxy...

Страница 86: ...are il tasto Down Giù per passare a 4 Network Rete e quindi premere il tasto Left Sinistra per selezionare la voce 3 Selezionare 1 Site Scan 1 Analisi sito 4 Il V630 analizza ed elenca gli AP presenti nell area Selezionare l AP a cui si desidera connettersi Main Menu 1 Call log 2 Profiles 3 Setup 4 Network Select Back Network 1 Site Scan 2 WLAN Profiles 3 SIP Profiles 4 Ping Test Select Back WLAN ...

Страница 87: ...l tasto Power End Alimentazione Fine per tornare alla schermata principale Con un singolo account SIP qualsiasi profilo WLAN lo utilizzerà Se si creano più profili SIP modificare le impostazioni di binding collegamento SIP del profilo WLAN per impostare quale profilo SIP dovrà utilizzare uno specifico profilo WLAN L icona di intensità del segnale viene visualizzata dopo che il V630 si è connesso a...

Страница 88: ...ia presente e controllare le impostazioni dell account VoIP Provare a utilizzare un account VoIP differente e o provare a chiare un altro numero di telefono Se il problema persiste rivolgersi al fornitore di servizi VoIP FARE UNA TELEFONATA 1 Dalla schermata principale immettere il numero da chiamare o premere il tasto Right Destra per aprire la rubrica del V630 Vedere la Guida dell utente per inf...

Страница 89: ...entazione Fine per terminare una telefonata CHIAMATA IN ATTESA Durante una telefonata premere il tasto Left Sinistra Opzioni telefonata per aprire le opzioni della telefonata Selezionare Hold Unhold Trattieni Ritorna per mettere la chiamata in attesa o per riprenderla CHIAMATA A 3 1 Durante una telefonata premere il tasto Left Sinistra Opzioni telefonata per aprire le opzioni della telefonata e se...

Страница 90: ...o premere il tasto Power End Alimentazione Fine per terminare il trasferimento di chiamata BLOCCO E SBLOCCO DELLA TASTIERA Bloccare la tastiera per evitare l esecuzione accidentale di telefonate Dalla schermata principale premere il tasto Left Sinistra e per bloccare sbloccare il V630 È inoltre possibile fare in modo che il blocco tastiera si attivi automaticamente se non si utilizzo il V630 per u...

Страница 91: ...t l indirizzo del gateway e l indirizzo del server DNS Utilizzare l opzione di binding collegamento SIP per selezionare il profilo SIP creato nel passo precedente Il numero di telefono e il P2P vengono visualizzati nella schermata principale 3 Nella schermata principale premere il tasto Right Destra per aprire la rubrica Nell elenco dei contatti premere Opzioni Aggiungi Creare una voce della rubri...

Страница 92: ... prodotto 1 Visitare il sito www zyxel com 2 Selezionare il prodotto dall elenco di riepilogo a discesa nella Home Page di ZyXEL per passare alla pagina del prodotto in questione 3 Selezionare da questa pagina la certificazione che si desidera visualizzare ...

Страница 93: ... настроен Интернет и учетная запись телефонии Это Краткое руководство содержит приведенные ниже разделы Смотрите инструкцию пользователя для получения подробной информации о всех возможностях Основные элементы Смотрите страницу 94 Установка и зарядка аккумулятора Смотрите страницу 96 ЖК дисплей Смотрите страницу 98 Начальная конфигурация Смотрите страницу 99 РУССКИЙ ...

Страница 94: ...оном Смотрите страницу 106 2 Основные элементы НАЗВАНИЕ ОПИСАНИЕ ЖК дисплей На этом дисплее отображается информация и меню телефона ЖК дисплей Буквенно цифровая Левая клавиша Клавиша вызова Порт USB зарядки Разъем наушников клавиатура Клавиша вверх вниз Клавиша питания Сброса Правая клавиша ...

Страница 95: ...а кнопка Down Вниз открывает меню настройки профиля телефона Порядок изменения функций этих клавиш описан в Руководстве по эксплуатации В меню эти клавиши перемещают курсор Клавиша Питания Сброса Используется для окончания разговора и отклонения звонков Для выключения V630 нажмите и удерживайте эту клавишу в течение нескольких секунд Буквенно цифровая клавиатура Используется для ввода цифр букв и ...

Страница 96: ...ь крышку аккумуляторного отсека можно только когда V630 выключен и кабель зарядного устройства USB вынут из разъема Перед первым использованием V630 зарядите аккумулятор в течение 10 часов 1 Нажмите кнопку на крышке аккумуляторного отсека V630 сдвиньте в сторону основания V630 и поднимите 2 Снимите с аккумулятора упаковочные материалы Возьмите аккумулятор направив пластиковый выступ вверх Вставьте...

Страница 97: ...дящее в комплект поставки зарядное устройство или USB кабель поставляется отдельно Зарядное устройство другого типа может повредить V630 или его аккумулятор 4 Подключите кабель зарядного устройства к портуUSB Recharge USB зарядка 5 Вставьте вилку зарядного устройства в сетевую розетку Включится подсветка Если V630 включен то Порт USB зарядки ...

Страница 98: ...риветствия V630 попросит вас ввести время и дату V Если экран не появляется то проверьте заряд аккумулятора Смотрите раздел 3 Вид главного ЖК экрана показан рядом Значки вверху ЖК дисплея отображают информацию о статусе ЗНАЧОК ОПИСАНИЕ Отображает мощность сигнала сети WLAN Клавиатура заблокирована Нажмите клавишу Left Влево и клавишу для разблокировки No WLAN Service 2 44 10 18 2007 Menu Name ...

Страница 99: ...ся заряд батареи При зарядке указатель пульсирует No WLAN service Здесь отображается состояние подключения к сети WLAN или регистрация на сервере SIP Время Дата Время и дата в формате месяц день год отображаются в середине экрана Menu Для выполнения описанных здесь функций используется клавиша Left Влево На главном экране нажмите на клавишу Left Влево для входа в главное меню V630 Name Для выполне...

Страница 100: ...писи VoIP выполните следующие действия 1 На главном экране V630 нажмите на клавишу Left Влево Menu Меню для входа в меню 2 При помощи клавиши Down Вниз перейдите к пункту 4 Network 4 Сеть а затем нажмите на клавишу Left Влево чтобы выбрать этот пункт 3 Выберите 3 SIP Profiles 3 Профили SIP Main Menu 1 Call log 2 Profiles 3 Setup 4 Network Select Back Network 1 Site Scan 2 WLAN Profiles 3 SIP Profi...

Страница 101: ...укв в нижнем и верхнем регистре цифр или символов 6 Выберите 2 Phone Number 2 Номер телефона 7 Введите номер вашей учетной записи SIP Например если у вас учетная запись SIP типа 1234567 voip provider com номер учетной записи SIP 1234567 SIP Profiles 1 Profiles List 2 Add to Profile Select Back New Profile Name Done abc Clear Add to Profile 1 Display Name 2 Phone Number 3 SIP Server 4 SIP Proxy Sel...

Страница 102: ...ованный адрес сервера 11 Если провайдер услуг VoIP предоставил вам номер порта SIP отличный от 5060 то выберите 2 SIP Port 2 SIP порт и перейдите к пункту 12 В противном случае переходите к пункту 13 Add to Profile 1 Display Name 2 Phone Number 3 SIP Server 4 SIP Proxy Select Back SIP Server Setup 1 SIP Address 2 SIP Port Select Back SIP Address 111 222 333 444 Done Clear SIP Server Setup 1 SIP Se...

Страница 103: ...ный от 5060 то введите эту информацию 15 Не изменяйте NAT traversal срок действия или настройки кодека если провайдер VoIP не предоставил вам эти параметры или у вас нет на это веских причин Нажмите клавишу Power End Питание Сброс для возврата к главному экрану SIP Port 5060 Done Clear Add to Profile 1 Display Name 2 Phone Number 3 SIP Server 4 SIP Proxy Select Back Proxy Setup 1 Proxy Address 2 P...

Страница 104: ...ети выполните следующие действия 1 На главном дисплее V630 нажмите на клавишу Left Влево Menu Меню для входа в меню 2 При помощи клавиши Down Вниз перейдите к пункту 4 Network 4 Сеть а затем нажмите на клавишу Left Влево чтобы выбрать этот пункт 3 Выберите 1 Site Scan 1 Поиск сети Main Menu 1 Call log 2 Profiles 3 Setup 4 Network Select Back Network 1 Site Scan 2 WLAN Profiles 3 SIP Profiles 4 Pin...

Страница 105: ...я несколько нажатий на клавишу Нажмите клавишу для переключения между вводом букв в нижнем и верхнем регистре цифр или символов 6 Для использования статического адреса IP или PPPoE выберите пункт IP Setting Настройки IP и соответствующую опцию В противном случае нажмите клавишу Power End Питание Сброс для возврата к главному дисплею WLAN Scan WLAN Example RSSI 64 Chan 6 Select Back Enter Key Done ...

Страница 106: ...IP сервере После успешной регистрации SIP на главном экране появится сообщение ZyXEL V630 См Руководство пользователя где описан порядок изменения имени профиля SIP на дисплее Теперь вы можете делать звонки Смотрите Раздел 7 для получения дополнительной информации 7 Основные операции с телефоном ВЫПОЛНЕНИЕ ЗВОНКА 1 Введите требуемый номер на главном экране или нажмите на клавишу Right Правую чтобы...

Страница 107: ...ли позвоните по другому номеру Если проблема не исчезает то свяжитесь с провайдером услуг VoIP ИСПОЛЬЗОВАНИЕ ГРОМКОЙ СВЯЗИ Нажмите на клавишу Right Правую во время звонка для активации громкой связи ОТВЕТ НА ЗВОНОК Нажмите зеленую клавишу Talk Разговор для ответа на входящий звонок ЗАВЕРШЕНИЕ ЗВОНКА Нажмите на красную клавишу Power End Питание Сброс для завершения звонка ...

Страница 108: ...ии звонка чтобы открыть список опций звонка и выберите New call Новый звонок 2 Введите другой телефонный номер и нажмите зеленую клавишу Talk Разговор 3 После ответа третьей стороны нажмите на клавишу Left Левую Call Option Опции звонка чтобы открыть список опций звонка Выберите conference конференция ПЕРЕАДРЕСАЦИЯ ЗВОНКА 1 Во время звонка нажмите на клавишу Left Левую Call Option Опции звонка что...

Страница 109: ... вы не используете V630 в течение определенного промежутка времени Смотрите Руководство пользователя где описана эта функция ОДНОРАНГОВЫЕ ЗВОНКИ P2P Для прямого звонка на другой SIP номер и IP адрес без подключения к SIP серверу выполните следующее 1 Раздел 5 описывает создание профиля SIP для использования SIP сервера Создайте другой профиль SIP для звонков P2P Для профиля SIP требуется телефонны...

Страница 110: ...уйте опцию SIP Profile Binding На главном экране будет отображаться ваш телефонный номер и P2P 3 На главном экране нажмите на клавишу Right Правую чтобы открыть телефонную книгу В списке контактов нажмите Option Add Опции Добавить Создайте запись в телефонной книге для звонка Введите для вызываемого номера имя и телефонный номер SIP Затем выберите режим P2P и введите IP адрес вызываемого абонента ...

Страница 111: ...ертификата ов продукта ов 1 Посетите сайт www zyxel com или www zyxel ru 2 Выберите ваш продукт из выпадающего списка на домашней странице ZyXEL и перейдите на его страницу 3 Выберите сертификат который вы хотите просмотреть ...

Страница 112: ...РУССКИЙ 112 ...

Страница 113: ...中文 113 1 概述 V630 可让您使用无线网络连接通过互联网拨出和接听电话呼 叫 能访问互联网并且已设置语音帐户 本快速开始指南涵盖以下内容 有关所有功能的更多信息 请 参阅用户指南 实际功能 请参阅第 114 页 电池安装和充电 请参阅第 115 页 LCD 屏幕 请参阅第 117 页 初始配置 请参阅第 118 页 连接无线网络 请参阅第 122 页 基本电话操作 请参阅第 124 页 简体中文 ...

Страница 114: ...简体中文 114 2 实际功能 名称 说明 LCD 屏幕 使用此屏幕显示信息并浏览电话菜单 左键 按下此键打开屏幕菜单并选择选项 右键 按下此键返回前一菜单 同时也是电话簿快捷 键 通话键 按下此键拨出和接听呼叫 LCD 屏幕 字母数字 左键 右键 关机 挂机 通话键 USB 充电端口 耳机插孔 键 键盘 上 下键 ...

Страница 115: ...告 触电危险 电池或电池盖仅可在 V630 关机并且充电器 USB 线拔下时移除 首次使用 V630 前 电池需充电 10 小时 上 下键 主屏幕中 这些键是快速访问按钮 默认情况 下 Up 上 打开信息菜单 Down 下 打 开电话设置配置文件设置 要更改功能 请参 阅用户指南 菜单中 这些键可移动光标 关机 挂机键 按下此键结束或拒绝呼叫 按住此键数秒钟可 开启或关闭 V630 字母数字键盘 使用这些键输入数字 字母和符号 耳机插孔 将耳机 未提供 连接到此插孔 USB 充电端 口 将电话电源适配器连接到此端口为电池充电 名称 说明 ...

Страница 116: ...简体中文 116 1 按下 V630 电池盖上的按钮 将盖子滑向 V630 底座并掀开 2 除去附带电池上的所有包装 手持电池 令塑料标签朝上 插入电池 使触点 金属区 V630 一端接触底座附近的触 点 按下电池 3 重新装上电池盖 1 警告 请仅使用附带的充电器或带电脑 USB 端口的 USB 线 未提供 其他充电器可 能损坏 V630 或电池 ...

Страница 117: ...口 5 将充电器插头连接到电源插座 背光亮起 如果 V630 开 启 电池图标量表内所指示的等级不断循环 4 LCD 屏幕 按住 End Power 关机 挂机 键数秒钟 开启 V630 显示开 机画面后 V630 提示您输入时间和日期 V 如果屏幕未亮起 请确认已给电池充电 参见第 3 节 接着显示 LCD 主屏幕 LCD 屏幕上方的 图标显示状态信息 USB 充电端口 No WLAN Service 2 44 10 18 2007 Menu Name ...

Страница 118: ...EE 802 11b 或 IEEE 802 11g 连接 有关更 多信息 请参阅第 6 节 图标 说明 这个图标显示无线 LAN 信号强度 键盘锁定 按 Left 左 键和 解锁 这个图标显示铃声是开启还是关闭 振动开启 这个图标显示剩余电池电量 电池量表在充电过 程中循环 无 WLAN 服务 无线 LAN 连接或 SIP 服务器注册状态显示于此 处 时间 日 期 时间和日期 月 日 年格式 显示于屏幕中 间 菜单 使用 Left 左 键执行此处所显示的功能 主 屏幕中 按 Left 左 键进入 V630 主菜单 名称 使用 Right 右 键执行此处所显示的功能 主 屏幕中 按 Right 右 键添加或查找电话簿内 的联系人 ...

Страница 119: ... 下 键进入 4 Network 4 网络 然后用 Left 左 键选择 3 选择 3 SIP Profiles 3 SIP 配置文 件 4 选择 2 Add to Profile 2 添加至 配 置文件 Main Menu 1 Call log 2 Profiles 3 Setup 4 Network Select Back Network 1 Site Scan 2 WLAN Profiles 3 SIP Profiles 4 Ping Test Select Back SIP Profiles 1 Profiles List 2 Add to Profile Select Back ...

Страница 120: ... 例如 如果 您的 SIP 帐户是 1234567 voip provider com SIP 帐户号码就是 1234567 8 选择 3 SIP Server 3 SIP 服务器 New Profile Name Done abc Clear Add to Profile 1 Display Name 2 Phone Number 3 SIP Server 4 SIP Proxy Select Back Phone Number 1234567 Done Clear Add to Profile 1 Display Name 2 Phone Number 3 SIP Server 4 SIP Proxy Select Back ...

Страница 121: ...址 11 如果 VoIP 服务提供商给您的 SIP 端 口号码不是 5060 请选择 2 SIP Port 2 SIP 端口 并到步骤 12 否则请跳过步骤 13 12 输入 Vo IP 服务提供商的 SIP 端口号 码并选择 Done 完成 SIP Server Setup 1 SIP Address 2 SIP Port Select Back SIP Address 111 222 333 444 Done Clear SIP Server Setup 1 SIP Server Address 2 SIP Port Select Back SIP Port 5060 Done Clear ...

Страница 122: ...他特殊原 因 按下 Power End 关机 挂断 键 返回主屏幕 祝贺您 已配置 VoIP 设置 继续第 6 节 设置无线连接 6 连接无线网络 按下列步骤配置 V630 以便连接无线网络 1 从 V630 主屏幕按下 Left 左 键 Menu 菜单 进入 菜单 Add to Profile 1 Display Name 2 Phone Number 3 SIP Server 4 SIP Proxy Select Back Proxy Setup 1 Proxy Address 2 Proxy Port 3 Proxy Username 4 Proxy Password Select Back Add to Profile 4 SIP Proxy 5 NAT traversal 6 Expire 7 Codec Order Select Back ...

Страница 123: ...接的 AP 5 此范例中的 AP 使用 WPA PSK 安全策略 请输入密钥 密码 并选择 Done 完成 可能需要按几下按键才能输入 所需字符 按 使用小写字母 大写字 母 数字或符号 Main Menu 1 Call log 2 Profiles 3 Setup 4 Network Select Back Network 1 Site Scan 2 WLAN Profiles 3 SIP Profiles 4 Ping Test Select Back WLAN Scan WLAN Example RSSI 64 Chan 6 Select Back Enter Key Done abc Clear ...

Страница 124: ...WLAN 配置文件 SIP 捆绑设置 设定 WLAN 配置文件使用哪个 SIP 配置文件 V630 连接到 AP 后会显示信号强度图标 接着 V630 尝试注 册 SIP 服务器 成功注册 SIP 后 ZyXEL V630 显示于主屏 幕内 关于如何修改 SIP 配置文件显示名称 请参阅用户指 南 现在便可以拨出呼叫 详细信息请参阅第 7 节 7 基本电话操作 拨出呼叫 1 从主屏幕输入想要呼叫的号码 或者按 Right 右 键 打开 V630 电话簿 关于如何使用电话簿 请参阅用户指 南 2 按下绿色的 Talk 通话 键开始呼叫 Add to Profile 1 SSID 2 Security set 3 IP Setting 4 SIP Binding Select Back ...

Страница 125: ...VoIP 帐户设置 尝试使用不同的 VoIP 帐户 和 或尝试呼叫不同的电话号码 如果问题仍 在 请联系 VoIP 服务提供商 使用扩音器 在呼叫中按 Right 右 键可启动扩音器功能 接收呼叫 按下绿色的 Talk 通话 键回答来电 结束呼叫 按下红色的 Power End 关机 挂机 键结束呼叫 呼叫保持 取消保持 呼叫过程中 按 Left 左 键 Call Option 呼叫选项 打开呼叫选项 选择 Hold Unhold 保持 取消保持 保 持或取消保持呼叫 ...

Страница 126: ... Left 左 键 Call Option 呼叫选 项 打开呼叫选项 选择 conference 会议 转接呼叫 1 呼叫过程中 按 Left 左 键 Call Option 呼叫选 项 打开呼叫选项 选择 Blind Transfer 盲转接 2 拨打您想要转接呼叫的号码 3 等待听到铃声 然后按 Power End 关机 挂机 键完成 呼叫转接 锁定和解锁键盘 锁定键盘防止意外呼叫 从主屏幕按下 Left 左 键和 可 锁定或解锁 V630 还可以在不使用 V630 达某一时间后自动启动 键盘锁 关于如何设定 请参阅用户指南 对等呼叫 P2P 按下列步骤直接呼叫某人的 SIP 电话号码和 IP 地址 而不用 经过 SIP 服务器 ...

Страница 127: ...N 配 置文件 从主屏幕选择 Menu Network WLAN Profiles Add to Profile 菜单 网络 WLAN 配置文件 添加至配 置文件 配置 IP 地址 子网掩码 网关地址 DNS 服务 器地址 使用 SIP 捆绑选项选择在前一步骤中创建的 SIP 配置文件 您的电话号码和 P2P 显示于主屏幕中 3 主屏幕中 按 Right 右 键打开电话簿 在联系人列表 中 按下 Option Add 选项 添加 为被叫方创建电 话簿项目 输入被叫方的姓名和 SIP 电话号码 然后选择 P2P 模式并选择被叫方的 IP 地址和 SIP 端口号码 默认 为 5060 选择被叫方所属群组 如有 按下 Left 左 键开始呼叫 对等呼叫 P2P 查看产品证书 1 先访问 www zyxel com 2 在 ZyXEL 主页的下拉列表框中选择产品 以进入产品 页面 3 在该页中选择...

Страница 128: ...简体中文 128 ...

Страница 129: ...文 129 1 概覽 V630 讓您使用無線網路連線撥打與接聽電話 您必須擁有已經設定好的網路連線及網路電話帳 號 本快速入門指引涵蓋下列主題 請參閱 使用手冊 取得更 多關於所有功能的資訊 實體功能 請參閱第 130 頁 電池安裝與充電 請參閱第 131 頁 LCD 畫面 請參閱第 133 頁 初始設定 請參閱第 134 頁 連接無線網路 請參閱第 138 頁 基本電話操作 請參閱第 140 頁 繁體中文 ...

Страница 130: ...繁體中文 130 2 實體功能 名稱 說明 LCD 畫面 使用此畫面顯示資訊並瀏覽電話選單 左對應鍵 按此鍵開啟螢幕選單並選取選項 右對應鍵 按此鍵返回上一個選單 同時也作為進入電話 簿的捷徑 通話鍵 按此鍵撥打與接聽電話 LCD 畫面 字母與數字 左對應鍵 右對應鍵 電源 結束 通話鍵 USB 充電埠 耳機插孔 鍵 按鍵 向上 向下鍵 ...

Страница 131: ... 觸電危險 取出電池或打開電池蓋之前 請先將 V630 關機或拔除充電器 接線 首次使用 V630 前 請先充電 10 小時 向上 向下鍵 在主畫面中 此兩鍵為快速存取按鍵 在預設 動作方面 Up 向上鍵 開啟資訊選單 Down 向下鍵 開啟電話設定組合的設定 請參閱 使用手冊 更改此兩鍵的功能 在選單中 此兩鍵用於移動游標 電源 結束鍵 按此鍵結束或拒絕通話 按住此鍵幾秒鐘以開 啟或關閉 V630 字母與數字按 鍵 使用按鍵輸入數字 字母及符號 耳機插孔 將耳機 未隨機附贈 插入此插孔 USB 充電埠 將電話的變壓器插入此連接埠以對電池插電 名稱 說明 ...

Страница 132: ...繁體中文 132 1 壓住 V630 的電池蓋並向 V630 的底部滑動以打開護蓋 2 移除內附電池的任何包裝物 握住電池並將貼有塑膠標籤的 那一面朝上 插入電池讓接腳端 金屬區域 接觸 V630 底 部的接腳 將電池壓下 3 裝回電池蓋 1 警告 只可使用隨附的充電器或連接電腦 USB 埠的 USB 接線 未隨機附贈 不同 的充電器可能會損壞 V630 的電池 ...

Страница 133: ... 將充電器的插頭插入電源插座 此時會開啟背光 當 V630 開機時 電池圖示內的電量格會反覆顯示 4 LCD 畫面 按住紅色 End Power 結束 電源 鍵幾秒鐘以開啟 V630 在 顯示歡迎畫面之後 V630 將要求您輸入時間與日期 V 如果畫面沒有動靜 請確認電池已充電 請參閱 第 3 節 接著顯示 LCD 主畫面 LCD 畫面上方的 符號顯示狀態資訊 USB 充電埠 No WLAN Service 2 44 10 18 2007 Menu Name ...

Страница 134: ...效帳號 無線 LAN IEEE 802 11b 或 IEEE 802 11g 連線 詳細資訊 請參閱第 6 節 符號 說明 表示無線 LAN 訊號的強弱 按鍵上鎖 按 Left 左對應 鍵與 解鎖 表示開啟或關閉鈴聲 開啟震動 表示剩餘的電力 充電時 電量格會反覆顯示 無 WLAN 服務 顯示 無線 LAN 連線或 SIP 伺服器註冊的狀態 時間 日 期 時間與日期 格式為月 日 年 顯示在畫面中 間 選單 使用 Left 左對應 鍵執行此所顯示的功能 在主畫面中 按 Left 左對應 鍵進入 V630 的 主選單 名稱 使用 Right 右對應 鍵執行此所顯示的功能 在主畫面中 按 Right 右對應 鍵在電話簿中 加入或尋找連絡人 ...

Страница 135: ... Down 向下 鍵移至 4 Network 網路 再按 Left 左對應 鍵選 取 3 選取 3 SIP Profiles SIP 設定組合 4 選取 2 Add to Profile 加入設定組 合 Main Menu 1 Call log 2 Profiles 3 Setup 4 Network Select Back Network 1 Site Scan 2 WLAN Profiles 3 SIP Profiles 4 Ping Test Select Back SIP Profiles 1 Profiles List 2 Add to Profile Select Back ...

Страница 136: ... 舉例來說 如果您的 SIP 帳號為 1234567 voip provider com 那麼您的 SIP 帳號號 碼則為 1234567 8 選取 3 SIP Server SIP 伺服器 New Profile Name Done abc Clear Add to Profile 1 Display Name 2 Phone Number 3 SIP Server 4 SIP Proxy Select Back Phone Number 1234567 Done Clear Add to Profile 1 Display Name 2 Phone Number 3 SIP Server 4 SIP Proxy Select Back ...

Страница 137: ...服器位址 11 如果您的 VoIP 服務業者所提供的 SIP 埠數不是 5060 請選取 2 SIP Port SIP 埠 並執行步驟 12 否則 請跳至步驟 13 12 輸入 VoIP 服務業者所提供的 SIP 埠 數並選取 Done 完成 SIP Server Setup 1 SIP Address 2 SIP Port Select Back SIP Address 111 222 333 444 Done Clear SIP Server Setup 1 SIP Server Address 2 SIP Port Select Back SIP Port 5060 Done Clear ...

Страница 138: ... Power End 電源 結束 鍵返回 主畫面 完成 您已經結束 VoIP 的設定 請繼續 參閱第 6 節來設定無線網路連線 6 連接無線網路 執行下列步驟來設定 V630 連接無線網路 1 在 V630 的主畫面中 按 Left 左對應 鍵 選單 進入 選單 Add to Profile 1 Display Name 2 Phone Number 3 SIP Server 4 SIP Proxy Select Back Proxy Setup 1 Proxy Address 2 Proxy Port 3 Proxy Username 4 Proxy Password Select Back Add to Profile 4 SIP Proxy 5 NAT traversal 6 Expire 7 Codec Order Select Back ...

Страница 139: ...的 AP 5 此範例中的 AP 使用 WPA PSK 安全防護 輸入密鑰 密碼 並 選取 Done 完成 您可能需要重複按相同按鍵來 選擇想要輸入的字元 按 使用小寫字母 大寫字 母 數字或符號 Main Menu 1 Call log 2 Profiles 3 Setup 4 Network Select Back Network 1 Site Scan 2 WLAN Profiles 3 SIP Profiles 4 Ping Test Select Back WLAN Scan WLAN Example RSSI 64 Chan 6 Select Back Enter Key Done abc Clear ...

Страница 140: ...合 SIP 繫結設定 以設定 WLAN 設定組合所要使用的 SIP 設定組合 當 V630 連接 AP 之後 即顯示訊號強弱符號 接著 V630 將嘗 試註冊 SIP 伺服器 當 SIP 註冊成功之後 主畫面將顯示 ZyXEL V630 請參閱 使用手冊 取得關於如何修改 SIP 設定組合顯示名稱的資訊 您現在可以開始撥打電話 詳細資 訊請參閱第 7 節 7 基本電話操作 撥打電話 1 在主畫面中 輸入您想要撥打的號碼 或按 Right 右對 應 鍵開啟 V630 的電話簿 請參閱 使用手冊 取得關 於如何使用電話簿的資訊 2 按綠色 Talk 通話 鍵開始撥話 Add to Profile 1 SSID 2 Security set 3 IP Setting 4 SIP Binding Select Back ...

Страница 141: ... 度 並查看您的 VoIP 帳號設定 試試不同的 VoIP 帳號和 或撥打不同的電話號碼 如果問 題仍然持續無法解決 請連絡您的 VoIP 服務業 者 使用擴音器 通話中 按 Right 右對應 鍵開啟擴音器功能 接聽電話 按綠色 Talk 通話 鍵接聽來電 結束通話 按紅色 Power End 電源 結束 鍵結束通話 保留 結束保留通話 通話中 按 Left 左對應 鍵 通話選項 開啟通話選項 選取 Hold Unhold 保留 結束保留 來保留或結束保留通 話 ...

Страница 142: ...ft 左對應 鍵 通話選項 開啟通話選項 選取 conference 會議 來電轉接 1 通話中 按 Left 左對應 鍵 通話選項 開啟通話選 項 選取 Blind Transfer 立即轉接 2 撥打您想要轉接的電話號碼 3 等到鈴聲響起 按 Power End 電源 結束 鍵完成電話 轉接 按鍵上鎖與解鎖 按鍵上鎖以防止誤撥電話 在主畫面中 按 Left 左對應 鍵 與 上鎖或解鎖 V630 您也可以設定當一段特定時間未使用 V630 時 自動上鎖按鍵 請參閱 使用手冊 取得關於如何 進行此設定的資訊 點對點通話 P2P 執行下列步驟不透過 SIP 伺服器而直接撥打他人的 SIP 電話號 碼或 IP 位址 ...

Страница 143: ...定組合 2 您必須使用靜態 IP 位址 建立使用靜態 IP 位址的 WLAN 設定組合 在主畫面中 選取 Menu Network WLAN Profiles Add to Profile 選單 網路 WLAN 設定組 合 加入設定組合 設定 IP 位址 子網路遮罩 閘道位 址及 DNS 伺服器位址 使用 SIP 繫結選項來選取您在上一 個步驟所建立的 SIP 設定組合 您的電話號碼與 P2P 顯 示在主畫面中 3 在主畫面中 按 Right 右對應 鍵開啟電話簿 在連絡 清單中 按 Option Add 選項 加入 建立連絡人的 電話簿項目 輸入連絡人的姓名與電話號碼 接著選取 P2P 模式並輸入連絡人的 IP 位址與 SIP 埠數 預設為 5060 選取連絡人所屬的群組 如果有的話 按 Left 左對應 鍵開始撥話 點對點通話 P2P ...

Страница 144: ...繁體中文 144 查看產品的認證資料 1 前往 www zyxel com 2 在 ZyXEL 首頁的下拉式清單方塊選取您的產品 進入 該產品的網頁 3 在此頁選取您想查看的認證資料 ...

Отзывы: