background image

5

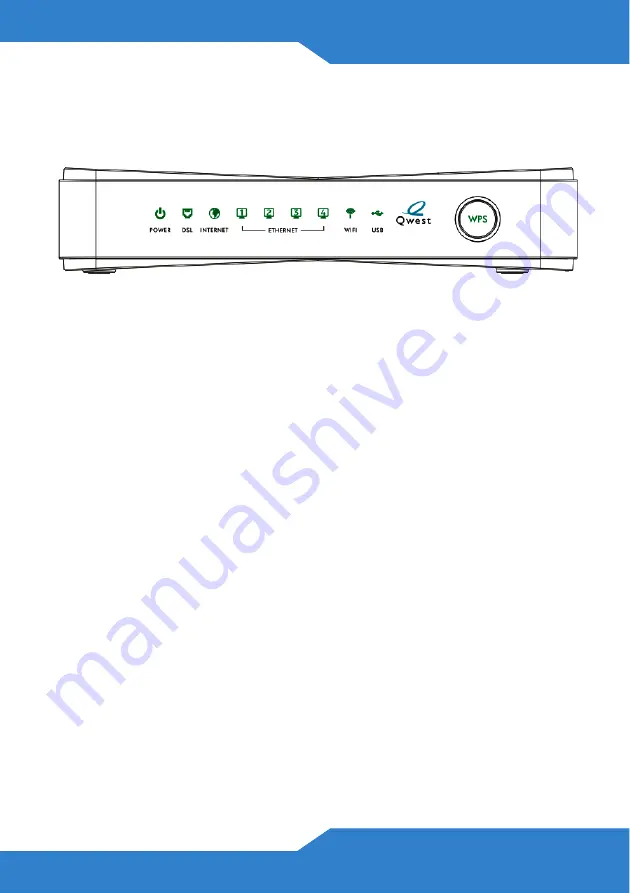
Checking the LEDs (Lights)

Look at the LEDs (lights) on the top panel of the FR1000Z.

•  The 

POWER

 light blinks during start-up and is green once the 

FR1000Z is ready.

•  The 

WAN

 light is green if the Internet connection exists and blinks 

when transmitting data. 

•  The 

INTERNET 

light is green when Internet access is available.

•  The 

ETHERNET

 light turns on if the 

ETHERNET

 port is properly 

connected. The light blinks when the FR1000Z is sending or 
receiving data through the 

ETHERNET

 port.

•  The 

WIFI

 light turns on when the wireless network is enabled.



If none of the LEDs (lights) are on, check your connections. 
Make sure that you have the power adaptor connected to the 
FR1000Z and plugged in to an appropriate power source. 
Make sure the power source is turned on. Turn the FR1000Z 
off, wait for a few seconds and turn it back on. If the LEDs 
are still off, contact your local vendor.

As of writing, the USB LED is reserved for future use.

Содержание FR1000Z

Страница 1: ...ng and peer to peer P2P You can also set up a secure wireless network connection using the WPS button Before You Begin Make sure you have the following things before you set up your FR1000Z Internet a...

Страница 2: ...rt to an Ethernet jack with Internet access 2 ETHERNET Use an Ethernet cable to connect a computer to this port for initial configuration and or Internet access 3 Use the power adaptor provided with y...

Страница 3: ...port is properly connected The light blinks when the FR1000Z is sending or receiving data through the ETHERNET port The WIFI light turns on when the wireless network is enabled If none of the LEDs li...

Страница 4: ...on If you are prompted for a user name and password enter the account information as given by your Internet service provider ISP If the INTERNET light is off but the WAN light is on go to the Initial...

Страница 5: ...your computer is set to get an IP address automatically from a DHCP server Click Quick Setup from the main screen Follow the instructions in the screen and enter the Internet access information exact...

Страница 6: ...s should be green Set Up a WPS Connection Press the WPS button on the FR1000Z s front panel for more than 5 seconds to turn the WPS function on Follow these steps to add a WPS enabled device to the wi...

Страница 7: ...bles located inside the wall when drilling holes for the screws 4 Do not insert the screws all the way into the wall Leave a small gap of about 0 5 cm between the heads of the screws and the wall 5 Ma...

Страница 8: ...ce may be required But if advance notice isn t practical the telephone company will notify the customer as soon as possible Also you will be advised of your right to file a complaint with the FCC if y...

Страница 9: ...mine how many devices can be connected to your telephone line In most areas the sum of the RENs of all devices on any one line should not exceed five 5 0 If too many devices are attached they may not...

Страница 10: ...tested and found to comply with the limits for a Class B digital device pursuant to Part 15 of the FCC Rules These limits are designed to provide reasonable protection against harmful interference in...

Страница 11: ...d operated in accordance with provided instructions and the antenna s used for this transmitter must be installed to provide a separation distance of at least 20 cm from all persons and must not be co...

Отзывы: