background image

Settin


Do not m


NO

Please d

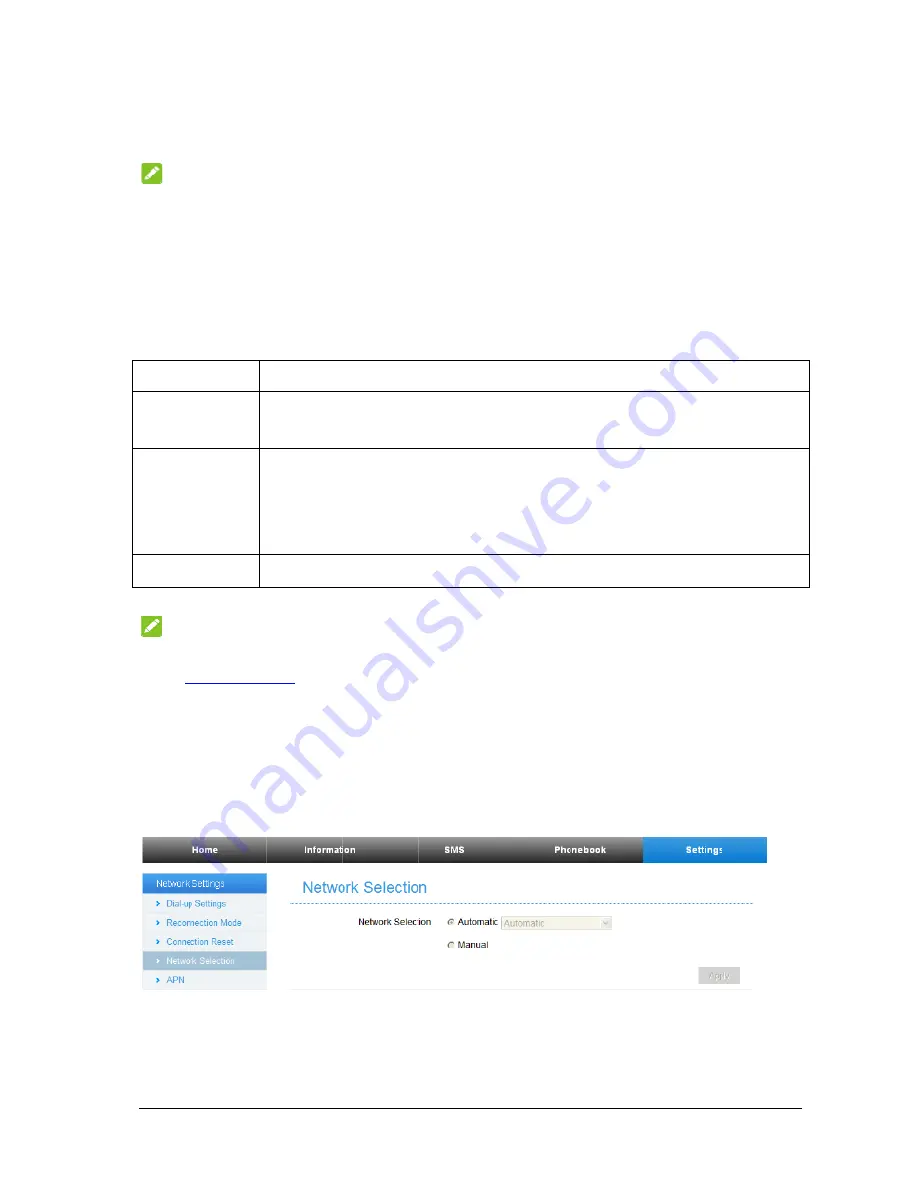
Netwo

z


D

After th

Automa

M

Auto

Ma

On D


  NO


h


z


N

From th

network 

z


A

To conn

click 

Set

ngs 

modify any

OTE:


isconnect the

ork Settin

ial-up Settin

he client is c

atic

Manu

Mode 

omatic 

anual 

Demand


OTE


 To modify

http://192.168

  You can al

etwork Sele

he Web UI, 

selection as 

PN 

nect to the In

ttings > Netw

y settings un

e router from

ings 

ngs 

connected to

ual 

or 

On D

Your device

Internet dire

1.


Log in t

2.


Select 

S

Mode > M

 Click 

Hom

The Max Idl

y the paramet

8.1.1

lso setting Re

ection 

click 

Settin

follows:


nternet you c

work Settin

nless instruc

m the network

o your devic

emand

 mod

e is connected

ectly. 

to the web G

ettings > Ne

Manual,

 and 

me

 and then c

le Time can b

ters of your 

econnection 

ngs > Netwo

can use the 

ngs > APN

.

cted by your

k before chan

ce successfu

de. The defa

d to the Inter

GUI configur

etwork Setti

then click

 A

click 

Connec

be defined b

device, log i

Mode and C

ork Setting

default Acce

r service pro

nging the set

ully, you ca

fault mode i

Operations

rnet automati

ration page.

ings > Dial-u

Apply

 to conf

ct

 to access th

y the user.

in to the web

Connection R

s > Networ

ess Point Na

ovider. 

ttings. 

an access the

Automati

ically, and y

up Settings >

firm your con

he Internet.


b GUI config

Reset to conn

rk Selection

ames (APNs

e Internet in

ic

ou can surf o

> WAN Con

nfiguration. 

guration pag

ect to the Int

n

you can 

s) in Auto/M

9

n the 

on the 

nnection 


ge by visiting

ternet. 

change your


Manual mode

9

Содержание MF253M

Страница 1: ...MF253M Let s go Getting started with your device ...

Страница 2: ...e cription Ether Stand To re WPS proce Conn Turn our Dev ernal antenna rnet connect dard RJ11 c estore factor button is u ess nector to the the router o ice a if necessary tions to com onnector fo ry default co used to star e external po on or off y mputer or Telephon onfiguration rt Wi Fi Pro ower supply e ns otected Setu y up authentic cation ...

Страница 3: ... and ano SIM card any card hol D P w P w W tr W tr W fu T T T S S d slip it into d or any othe ders Description Power is on and working normall Power is off or working abnorm Wi Fi works ransmission Wi Fi works ransmission Wi Fi works a unction is disab The phone is not The phone is rin The phone is in Signal strength i Signal strength i the card ho er nonstandar d external pow ly r external pow m...

Страница 4: ...ti f you want t ed insert you m the conne e D T T to T n T n T an T T T tr T ion of the L to use the m ur U SIM c ected phone Description There is no signa The device is tu o the mobile ne The device is network and dat The device is network The device is co nd data is being The device is reg The LAN port is The LAN port ransmission The network cab LAN port is mobile netw card first TV sets ra al u...

Страница 5: ...ernet Protocol in the Windows 7 operating system for your Wi Fi connection 1 Right click Network and select Properties 2 Select Chang adapter settings 3 Right click Wireless Network Connection and select Properties 4 Select Internet Protocol Version 4 TCP IPv4 and click Properties ...

Страница 6: ...6 5 Select Obtain an IP address automatically and Obtain DNS server address automatically and click OK ...

Страница 7: ...the Configuration Page 1 Launch the Internet browser and enter http 192 168 1 1 in the address bar The login page appears 2 Input the password and then click Login The default password is vivo SMS Manage the SMS send and receive text messages You can also set the SMS limit settings This function allows you to send or receive short messages 1 From the Web UI click the SMS tab to manage messages in ...

Страница 8: ...contact your service provider f Delivery Report Receive or reject a prompt informing you that the message is delivered to the recipient 3 Click Apply to save your settings Phonebook Manage the contacts information The phonebook information can be saved in the device or SIM card and you can choose the saved position From the Web UI click the Phonebook tab to view add and delete new contacts ...

Страница 9: ...ted ectly to the web G ettings Ne Manual and me and then c le Time can b ters of your econnection ngs Netwo can use the ngs APN cted by your k before chan ce successfu de The defa d to the Inter GUI configur etwork Setti then click A click Connec be defined b device log i Mode and C ork Setting default Acce r service pro nging the set ully you ca fault mode i Operations rnet automati ration page i...

Страница 10: ...w APN selecting the Manual mode then click Add New Wi Fi Settings z Basic settings From the Web UI click Settings Wi Fi Settings Basic Settings the wireless network basic parameters are shown in the following figure ...

Страница 11: ... clients will not be able to communicate with each other When Disable is selected each of your wireless clients will be able to communicate with each other f Security Mode The security modes are described below 1 OPEN You can authenticate successfully with a SSID whether it is valid or empty 2 WPA PSK WPA2 PSK Apply both the WPA PSK and WPA2 PSK scheme 3 WPA2 AES PSK It is the securer version of W...

Страница 12: ...lick Settings Wi Fi Settings WPS select WPS mode the two modes are described below f PIN Set the client s PIN code in Client PIN field f PBC Press the WPS button of the router or select PBC and then click Apply Press the WPS button on the client wireless adapter within two minutes and the negotiation process will be established ...

Страница 13: ... the tim Set limit p To upgrad PIN code en PUK code m o protect you t Filtering P gs Router s for LAN in mask for the ccount passw e your PIN he settings to e will restart t the device me of the rou phone numb de the softwa ntries will blo may be offere ur network Port Forward r settings th nterface e IP address word o their factor t automatical uter er or phone n are version o ock the U S ed toge...

Страница 14: ...a DDNS as fol ion ll through U et one number ress key on atically onnected ndication the king it Call rings pick u he call by pr e or disable D ate begin and Define how nfiguration ain Name llows SIM card n the telepho e radio signa up the handse ressing the H DHCP Serve d end IP add long the lea e Server one to send al is unavaila et to answer Hands free b r function dress for IP p sed IP addre r...

Страница 15: ...ed Setup authentication process 4 Enable the WPS function on your client to respond to this authentication process 5 Follow the system prompts on your client to finish the connection Wireless Connection Optional If you want to use Wi Fi to connect your router please refer to the following steps 1 Make sure that the Wi Fi works normal Please check the Wi Fi Setting on the Configuration Page or chec...

Страница 16: ...e passw ain an IP add an IP address Fi SSID and D of your dev fault SSID on word and the dress automa s for exampl Wi Fi Key p vice and then n the label of en click OK atically For t le 192 168 1 printed on th n click Conn f your device the detailed p 1 101 he label benea nect e procedure re ath the devic efer to Confi ce figuring Your r ...

Страница 17: ... PUK code wh Remove a to the phon The cable Put the phone connected to t please disconn When you hav or wait 4 8 sec ossible Problem Please che Please wa Check you The speed is d signal strength can view the ms Solutions ait for 1 2 minu ED light is blink Change the loca ur U SIM card ber has been ent incorrectly then hen prompted any electrical ap ne or your devic e or phone set m on the hook an ...

Страница 18: ...t can obtain an IP address automatically in the Internet protocol TCP IP properties Type the correct network key Wi Fi password when you connect to the device Others Symptoms Possible Problems Solutions The 3G 4G signal indicator is always blinking or does not light This indicates poor reception Try moving the router to another location near the window About the password For the Wi Fi connection p...

Страница 19: ...ditions Do not touch the inner antenna area unless it is necessary Otherwise the performance of the device may be affected Keep the device out of the reach of little children The device may cause an injury if used as a toy When the device is operating do not touch the metallic parts Failing to do so may cause burns Using Your Device Use original accessories or accessories that are authorized Using...

Страница 20: ... Modifications or repairs not provided by ZTE or a ZTE certified individual v Power failures surges fire flood accidents and actions of third parties or other events outside ZTE s reasonable control vi Usage of third party products or usage in conjunction with third party products if such defects are due to the combined usage vii Any other cause beyond the range of normal usage intended for the pr...

Страница 21: ...terruption of business cost of capital cost of substitute facilities or product or any downtime cost You can get help by Sending an E mail to mobile zte com cn Visiting www ztedevice com Calling the service hotline 86 755 26779999 ...

Страница 22: ...y turning the equipment off and on the user is encouraged to try to correct the interference by one or more of the following measures Reorient or relocate the receiving antenna Increase the separation between the equipment and receiver Connect the equipment into an outlet on a circuit different from that to which the receiver is connected Consult the dealer or an experienced radio TV technician fo...

Отзывы: