


46
AMD RS880 motherboard
SATA RAID User Manual
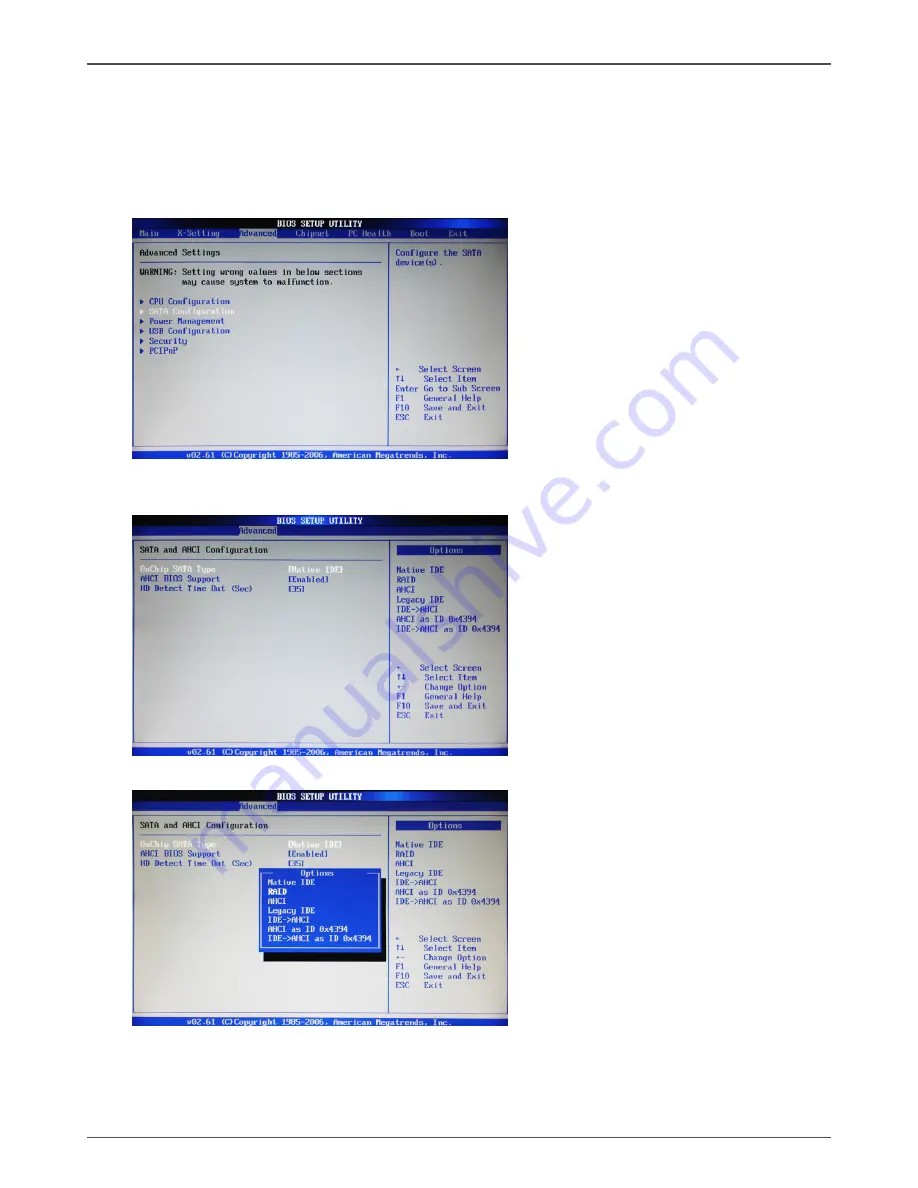
Setting up the BIOS
1. Setting your computer, then press <Delete> to enter BIOS SETUP UTILITY.
2. Use the arrow key to select Advanced menu. When enter the Advanced menu,
select the Item “
SATA Configuration
”.
3. Press <Enter> to display
SATA and AHCI Configuration
, then select the item
“
OnChip SATA Type
”.
4. Press <Enter> and enable the option “
RAID
”.
5. Enable the disks that you want to use as RAID disks.
6. Press F10 to save the configuration and exit. The PC reboo
ts.
7. Enter the RAID BIOS Setup by pressing F10 when prompted, and proceed to set
up the RAID BIOS as described in the next Section.
Содержание 880G-ITX wifi
Страница 1: ......
Страница 30: ...29 Installing Drivers and Software...
Страница 35: ...34 AMD RS880 motherboard...
Страница 52: ...51 SATA RAID User Manual...
Страница 53: ...52 AMD RS880 motherboard 291 MA154 00...
Страница 54: ......


